Countertop Seam Options: What Works Best for Your Kitchen?
A countertop seam is not automatically a flaw. It is often the practical result of fitting a large, heavy slab through a home, around a kitchen layout, and onto properly prepared cabinets. The best countertop seam options balance appearance, slab layout, material behaviour, and safe installation, rather than simply having the fewest seams possible.
For many Ontario kitchens, a seam is needed because an L-shaped run, a long wall, or an island exceeds the usable dimensions of one slab. A good fabrication plan makes the seam as discreet and structurally sensible as the material and layout allow. The right time to discuss it is before fabrication, ideally while reviewing the full slab and final template.
Quick Answer: The best countertop seam option depends on your kitchen layout and material. Straight seams are common on long runs, inside-corner seams often work well in L-shaped kitchens, and mitered joints are used for built-up edges and waterfall installations. A properly planned seam should be tight, level, supported, and positioned to work with the slab pattern. No seam can be guaranteed completely invisible.
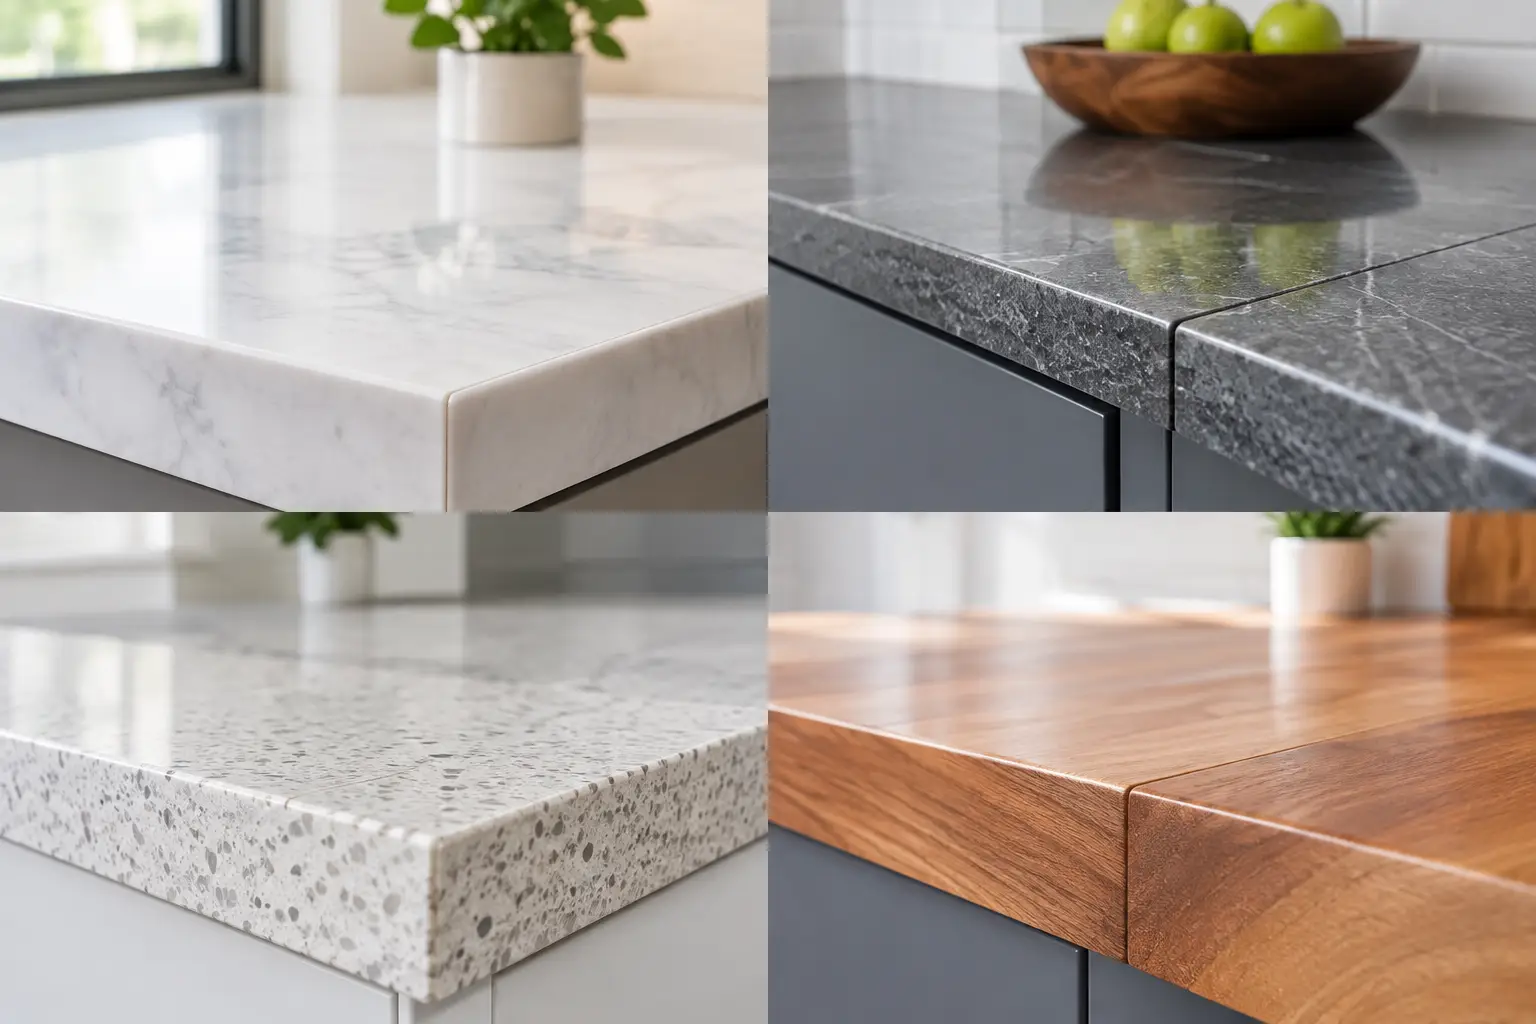
Why Countertop Seams Are Sometimes Necessary
Natural stone, quartz, porcelain, and sintered stone are supplied in slabs or sheets with set dimensions. Even when a countertop run appears short enough on paper, the fabricator must allow for trimming, edge finishing, cutouts, and the direction of the pattern. Moving an oversized piece through doorways, hallways, stairs, and tight turns can also limit what can be installed as one section.
Cabinet layouts matter just as much. An L-shaped kitchen may be difficult or impractical to fabricate from one rectangular piece without creating a vulnerable narrow section or wasting a large amount of material. Long peninsulas, U-shaped kitchens, and islands with waterfall legs also commonly require separate components.
A seam should never be treated as an afterthought. Its location affects the visual result, the way veins travel across the counter, the amount of material required, and the support needed below.
During templating, the finished cabinet dimensions, wall conditions, appliance openings, and access route all help determine the workable plan. Understanding the stone fabrication process can help homeowners see why these decisions need to be made before cutting begins.
Countertop Seam Options by Layout
1. Straight Seams on Long Runs
A straight seam joins two countertop sections along a clean, straight line. This is the most common approach for a long run that cannot be made from one piece.
Fabricators generally try to position the joint away from sink cutouts, cooktop openings, and other areas where material has been removed. If a seam must be near an opening, the design needs to account for the manufacturer’s fabrication requirements and adequate support.
The ideal position depends on the room. In a simple galley kitchen, a seam may be placed in a less prominent section of counter. In a long wall with upper cabinets and a full-height backsplash, the countertop and backsplash layout should be considered together so joints do not look accidental or interrupt the visual flow unnecessarily.
2. Seams at an Inside Corner
L-shaped counters often have a seam near the inside corner where two runs meet. This can be a practical location because it follows the change in direction and allows each piece to be handled more safely.
The exact placement may be adjusted to avoid placing a seam too close to a sink, cooktop, or narrow cabinet section.
An inside-corner seam is common, but it still deserves careful planning. With a quiet, small-scale quartz pattern, it may blend into the surface. With bold marble-look quartz, quartzite, or heavily veined natural stone, the line needs to be coordinated with the slab pattern rather than simply hidden at the corner.
Depending on the material and layout, the fabricator may use a straight joint or another approved corner configuration. The final design should account for the stone’s strength, pattern direction, and support.
3. Mitered Seams for Thicker Edges and Waterfall Legs
A mitered seam joins two pieces at an angle, usually to create the appearance of a thicker countertop edge or a continuous waterfall leg. For example, a 3 cm surface can be fabricated with a built-up mitered edge to create a thicker visual profile without using a solid, thicker slab.
Mitered countertop edges can look crisp and substantial, but they require precise fabrication and properly aligned cabinetry.
They are particularly noticeable on patterned materials because the face and top must be planned together. A waterfall leg also needs careful vein direction and support planning.
The vertical panel is not just decorative. Its size, material, floor condition, and connection to the countertop all affect the finished installation.
For homeowners considering this detail, our guide to the best stones for waterfall islands explains how material selection influences the finished appearance.
4. Seams Between Countertop and Backsplash Pieces
Full-height backsplashes are usually separate pieces from the countertop, even when they come from the same slab. A horizontal joint where the counter meets the backsplash is normal.
On a tall backsplash, additional vertical seams may be necessary depending on slab dimensions, outlet locations, and the wall layout.
This is where slab selection becomes especially valuable. Viewing the full slab helps determine whether a feature vein can be centred behind a range, carried across adjacent pieces, or intentionally broken at a less noticeable point.
Exact vein matching is possible in some layouts, but it depends on the slab pattern, the amount of material available, and the cuts required.
For more detail, read our guide on how to match countertop veining before approving a patterned slab layout.
Which Countertop Seam Option Works Best?
There is no single seam style that works for every kitchen. The following comparison provides a practical starting point when reviewing your layout with a fabricator.
| Seam Option | Common Application | Main Consideration |
|---|---|---|
| Straight seam | Long countertop runs and large islands | Position, pattern alignment, and support |
| Inside-corner seam | L-shaped and U-shaped kitchens | Corner geometry and vein direction |
| Mitered joint | Built-up edges and waterfall legs | Precision, alignment, and edge continuity |
| Backsplash joint | Full-height slab backsplashes | Wall layout, pattern flow, and joint placement |
For most kitchens, the best option is the one that allows safe handling, appropriate support, and a clean visual transition. Reducing the number of seams can be worthwhile, but it should not compromise fabrication or installation requirements.
How Material Affects Seam Visibility
No countertop seam disappears completely. Fabricators colour-match the adhesive as closely as practical, align the surfaces, and finish the joint so it is neat. At close range or in certain lighting, however, a seam remains visible.
The material has a major effect on how noticeable it will be.
Quartz Countertops
Quartz countertops with a consistent colour or fine, evenly distributed pattern often make a seam less obvious than surfaces with dramatic movement.
That does not mean every quartz design will hide a joint. Large-scale veining, especially veins that run diagonally across the slab, needs a deliberate layout.
Printed or highly directional quartz patterns may require additional attention to how adjacent pieces are positioned.
Granite, Marble, and Quartzite
Granite, marble, and quartzite vary from slab to slab. Natural movement can make a seam easier to disguise in one area and harder to disguise in another.
A strong vein may be aligned across a seam where the slab layout permits, but a perfect continuation should not be assumed.
Fissures, mineral deposits, and colour variation are natural characteristics that also affect how a joint appears.
Porcelain and Sintered Stone
Porcelain countertops and sintered stone can offer striking large-format designs, but fabrication and installation details differ from thicker stone slabs.
Their thinner profiles, pattern direction, edge construction, and cutout requirements should be reviewed for the specific product.
A seam plan that works for 3 cm quartz is not automatically the right approach for every porcelain or sintered stone installation.
Our porcelain slab countertops review explains additional fabrication and installation considerations for these large-format surfaces.
What Makes a Countertop Seam Look Better?
The most successful seams are planned before the slab is cut. Several details influence the final appearance.
Review the Full Slab Before Fabrication
If the material has veining or obvious movement, ask to review the slab layout. This is the stage to discuss which section receives the most attractive area of the slab, how the veins should run, and where any necessary seam will fall.
A small sample cannot show how a large vein will cross an island or continue into a backsplash. Full-slab viewing is especially important for quartzite, marble, and dramatic quartz designs.
Consider Lighting and Viewing Angles
A seam that is barely noticeable under general ceiling lighting may stand out more in strong daylight or under directional under-cabinet lighting.
That does not necessarily mean the installation is incorrect. A joint has physical edges and adhesive, and surface reflection changes with the viewing angle.
Choose the Edge Profile Carefully
Edge profiles can influence what the eye notices. A simple eased edge keeps attention on the countertop surface, while a thicker built-up edge or detailed profile creates more lines and transitions to coordinate.
Neither choice is inherently better. The key is making sure the edge detail suits the selected material and the overall kitchen design.
Make Sure Cabinets Are Properly Prepared
Cabinets must be level, secure, and adequately supported before installation.
Stone and engineered surfaces need appropriate support, particularly around dishwasher openings, large sink cutouts, overhangs, and unsupported spans. The required support depends on the material, thickness, span, and manufacturer’s instructions.
A seam cannot compensate for cabinets that are out of level or poorly prepared. Unsupported movement beneath a joint can contribute to problems over time.
Questions to Ask Before Approving a Seam Plan
Before fabrication begins, homeowners should understand the plan in practical terms. These questions are worth discussing with the fabricator:
- Where will the seams be located? Ask to see the proposed positions on the template or slab layout.
- Why is each seam necessary? Understand whether the reason is slab size, access, material limitations, or the kitchen layout.
- Will the seams be supported? Confirm how the cabinetry and any required reinforcement will support the adjoining pieces.
- Can the veins be aligned? Ask whether the design allows vein matching, bookmatching, or another suitable orientation.
- Would another slab or layout reduce the seams? A different slab size or modest dimension change may create additional options.
- What will the finished seam look like? Discuss adhesive colour, joint alignment, and realistic visibility expectations.
For projects with waterfall legs, tall backsplashes, or large islands, ask to see how the pieces relate to one another.
Confirm the edge profile, countertop thickness, overhang support, sink type, and backsplash joint locations at the same time, since these decisions work together.
Can You Avoid Countertop Seams Completely?
Sometimes. A smaller countertop section that fits within the usable slab dimensions may be fabricated and installed without a seam across its main surface.
However, slab size is only one factor. The shape of the countertop, access through the home, weight, cutouts, material thickness, and safe handling all influence whether a single-piece installation is practical.
A large island may be possible in one piece if the selected slab has sufficient usable dimensions and the access route allows safe handling. Another island of similar size may require a seam because of a different material, layout, or installation condition.
Before changing a design solely to eliminate a seam, consider the trade-offs. A single oversized piece may increase material waste, complicate transport, or create handling risks.
The better question is whether a seam-free installation is practical and beneficial for the specific project, rather than whether it is technically possible in every situation.
Setting Realistic Expectations
A well-made countertop seam should be tight, clean, level, and thoughtfully located. It should not have an unnecessarily wide gap, an objectionable height difference, or inadequate support.
Still, it is a joint between separate pieces, and it will not look exactly like uninterrupted material when inspected closely.
If you already have countertops installed and want to understand why a particular joint stands out, read our separate guide on what causes countertop seam visibility.
The goal is not to promise an invisible line. It is to make informed choices about slab selection, layout, seam placement, and fabrication details before the material is cut.
Frequently Asked Questions About Countertop Seams
What is the best place for a countertop seam?
The best location depends on the kitchen layout, slab dimensions, material, and available support. A less prominent section of a straight run or a properly planned inside corner may work well. Seams should be positioned with consideration for cutouts, cabinetry, and the manufacturer’s fabrication requirements.
Are countertop seams more noticeable in quartz or granite?
Neither material automatically produces a more visible seam. Consistent quartz patterns may make joints less noticeable, while some granite patterns naturally disguise them. Bold veining, colour differences, lighting, and seam placement often have a greater effect than the material category alone.
Can a countertop seam be completely invisible?
No seam can be guaranteed completely invisible. Skilled fabrication, suitable adhesive colour, careful alignment, and thoughtful slab layout can reduce visibility, but a joint between two pieces can still be seen under certain lighting or viewing conditions.
Can a kitchen island be installed without a seam?
Yes, if the island fits within the usable slab dimensions and the material can be transported, handled, and installed safely as one piece. Large islands, unusual shapes, or restricted access routes may require a seam even when the slab initially appears large enough.
Should countertop seams be discussed before templating?
Ideally, seam expectations should be discussed during material selection and confirmed after the final template is completed. This allows the fabricator to consider slab dimensions, cabinet measurements, access conditions, pattern direction, and support before fabrication begins.
Plan Your Countertop Layout With Stone Valley
Choosing a countertop involves more than selecting a colour or finish. Seam placement, slab orientation, edge details, and installation access all influence the finished result.
At Stone Valley Countertops, we help homeowners review these details during material selection, templating, and fabrication planning. Discussing the actual slab and final measurements makes it easier to understand what is practical for your kitchen.
Planning new kitchen countertops in Ontario?
Visit Stone Valley Countertops in Mississauga, Bowmanville, Welland, or Orillia to explore material options and discuss your project layout.
Contact Stone Valley Countertops to request a quote or discuss your countertop project.