
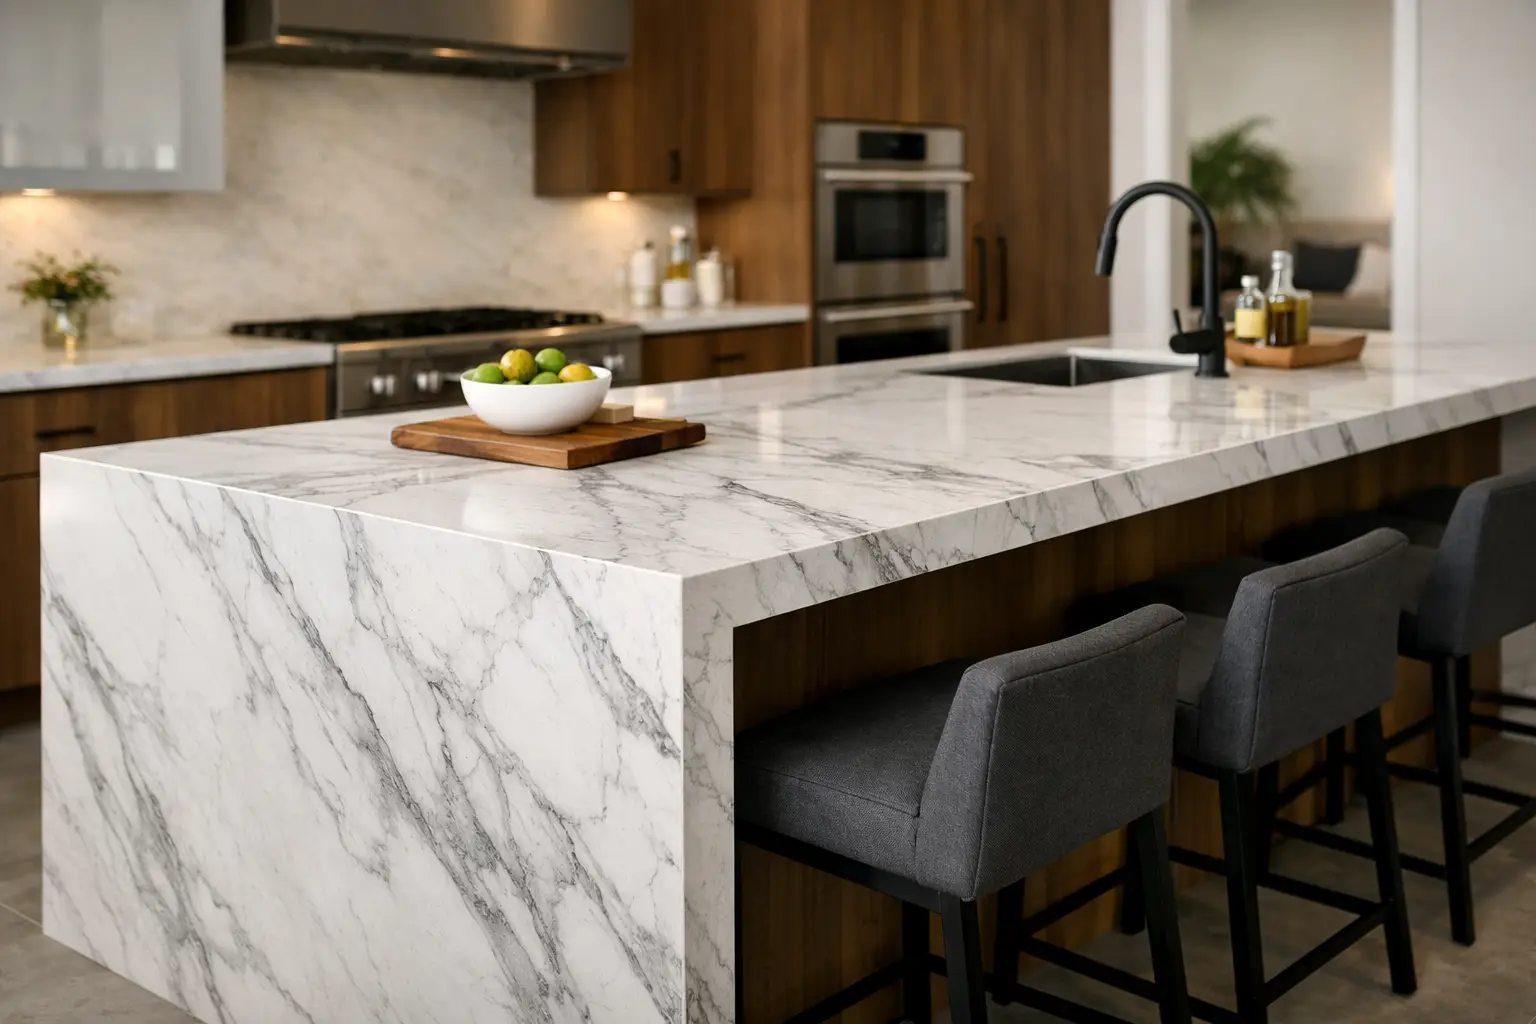
A waterfall island can look clean and intentional, or it can become the feature that makes a kitchen feel crowded, awkward to use, or difficult to repair. Knowing how to plan a waterfall island before choosing a slab helps avoid the most common problems: poorly placed seams, mismatched veining, unsupported overhangs, and dimensions that do not suit the way your household uses the kitchen.
A waterfall edge is not simply a countertop with a side panel added on. The horizontal surface and vertical stone panel need to be measured, fabricated, transported, and installed as one coordinated design. The details matter because they are visible from across the room.
Quick answer: A well-planned waterfall island starts with the cabinet layout, seating requirements, island dimensions, slab size, vein direction, seam locations, overhang support, and finished floor height. These decisions should be made before templating and fabrication. For highly veined materials, reviewing the full slab layout before cutting is especially important because the countertop and vertical panels need to work together visually.
Before selecting a material or edge profile, decide what the island needs to do. A prep-focused island may need a large uninterrupted work area and an undermount sink. A social island may need seating on one or two sides. Some kitchens need storage at both ends, while others benefit from an open end to keep circulation comfortable.
This determines where a waterfall panel makes sense. A stone panel at both ends creates a strong, furniture-like look, but it also closes off two useful areas for cabinets, seating, or legroom. One waterfall end is often the more practical choice when the other side needs a seating overhang.
Leave enough space around the island for doors, drawers, appliances, and people to move comfortably. This is particularly important in Ontario kitchens where renovations often involve fitting a larger island into an existing floor plan. The clearance should be reviewed during the design stage rather than after the cabinets are installed.
A beautiful island that restricts traffic or prevents an appliance door from opening properly will become frustrating quickly.
The island’s length, depth, countertop thickness, and cabinet layout all affect the finished waterfall. Standard counter-height islands are commonly around 36 inches high, but the stone thickness and support details need to be considered within that final height.
A thicker-looking edge can be created with a mitered build-up, while a standard slab thickness provides a slimmer, more contemporary profile. If you are unsure how the edge treatment will affect the finished appearance, review our countertop edge profile guide before fabrication.
A waterfall panel usually runs from the finished countertop surface to the floor. That means the fabricator must account for flooring thickness, level variations, cabinet height, and any trim or toe-kick details. Even a small discrepancy at the floor can be noticeable along a tall, straight stone edge.
Decide early whether the panel will sit flush with the cabinet end, extend slightly beyond it, or align with adjacent features. There is no single correct choice. A flush panel is crisp and compact, while a small stone reveal can add visual weight. What matters is that the reveal is consistent and planned rather than accidental.
Seating is where many waterfall island plans need a closer look. A seating overhang needs enough depth for comfortable stools and knee room, but longer projections may require hidden steel supports or other reinforcement.
Stone should not be expected to carry a large unsupported overhang by itself. Support requirements depend on the material, stone thickness, projection, cabinet structure, and the location of nearby cutouts.
The waterfall end can also affect where stools fit. If the vertical panel reaches the outer corner of the island, it may reduce access to the end seat. In some designs, limiting the waterfall to one end improves seating without losing the overall effect.
Share the intended stool count and seating arrangement before templating. This lets the countertop fabricator coordinate the stone layout with the cabinetmaker or designer and identify support requirements before fabrication begins.
Waterfall islands can be fabricated from quartz, granite, marble, quartzite, porcelain, sintered stone, and other engineered surfaces. The best option depends on more than appearance. Consider how often the island will be used for food preparation, whether it will contain a sink or cooktop, and how much maintenance your household is comfortable with.
Quartz is a practical countertop option for many busy kitchens because it has a consistent appearance, does not require routine sealing, and is easy to clean with mild soap and water. Controlled patterns can also make vein matching more predictable.
Quartz is not immune to damage. Very hot cookware should still be kept off the surface, and exposed waterfall corners should be protected from heavy impacts.
Natural stones bring more variation. Granite is generally durable and well suited to active kitchens, while quartzite can offer dramatic movement with strong day-to-day performance when properly selected and maintained.
Marble has a distinctive appearance and develops character with use, but it can etch or stain more easily than harder materials. It may be right for homeowners who accept that natural patina, but it is not ideal for everyone.
Porcelain and sintered stone can create a slim, modern waterfall profile and offer strong resistance to heat, staining, and UV exposure. Their fabrication requires specialized handling because the material is relatively thin and rigid. For a waterfall island, fabrication experience matters as much as the material itself.
A waterfall island is often chosen to showcase a veined slab. To achieve that effect, the slab layout needs to be planned before cutting begins. The goal may be to make the vein appear to continue from the horizontal countertop down the vertical panel.
This look is possible in many cases, but it depends on slab size, pattern direction, island dimensions, and the number of waterfall ends. A large island with two full-height panels may require multiple slabs. Natural stone variation and engineered patterns can also limit how closely the movement aligns.
For highly veined quartzite, marble, granite, or engineered stone, it is worth reviewing the actual slabs rather than making the decision from a small sample. Our guide on how to compare stone slabs before you buy explains what to look for before fabrication begins.
A good countertop fabrication team will review the slab layout and explain where seams may be necessary. Seams are not automatically a problem. They are often unavoidable on longer islands, depending on the slab dimensions and island layout.
A well-placed and colour-matched seam can be discreet. The goal is to avoid placing a seam where it unnecessarily interrupts a strong vein, sits too close to a sink or cooktop cutout, or creates a vulnerable section of stone.
For more detail on why seams are needed and where they are typically located, see our kitchen countertop seams guide.
The corner where the horizontal countertop meets the vertical panel deserves careful attention. A mitered corner creates the appearance of one continuous piece of stone wrapping down the island.
This can produce a very clean result, particularly with strongly veined materials, but it requires accurate cutting, assembly, handling, and installation.
A square edge or more visible joint can also work depending on the material, budget, slab thickness, and overall design. The corner detail should be decided before fabrication rather than left as an installation-day decision.
Waterfall panels are heavy, especially when natural stone or large-format pieces are involved. The cabinet base, substructure, and floor need to support the material properly. The vertical panel should be installed against a flat, stable surface rather than forced into position to correct uneven cabinetry or flooring.
If the island contains a cooktop, sink, or large seating overhang, the support plan becomes even more important. Cutouts remove material from the countertop, while an overhang creates leverage beyond the cabinet structure.
Depending on the design, reinforcement may be needed around openings, beneath seating areas, or within the island cabinetry.
This is one reason accurate countertop templating takes place after cabinets are installed, secured, and properly levelled. Measurements are taken from the actual site conditions rather than relying only on drawings. Floor level, cabinet alignment, finished dimensions, appliance locations, and overhangs can all influence the final stone pieces.
The waterfall does not need to be repeated everywhere. In many kitchens, a restrained approach works better. If the island uses a strongly veined material, a quieter backsplash or perimeter countertop can prevent the room from becoming visually busy.
If the perimeter countertops use the same material, consider whether the island should receive the most dramatic section of the slab. Slab layout planning gives you an opportunity to decide where the strongest movement will be seen.
Edge style also changes the finished result. A squared or subtly softened edge is commonly used for waterfall designs because it keeps the lines clean. Highly decorative profiles can compete with the straight vertical drop of the stone.
Pay attention to adjacent finishes as well. Cabinet colour, hardware, flooring, lighting, and stool placement will all frame the island. Viewing a small sample under your kitchen lighting is helpful, but seeing the entire slab is much more useful when the material has large-scale veining or significant natural variation.
Waterfall islands should be finalized before fabrication begins, not adjusted during installation. Once the material is selected and cabinets are ready, the usual sequence is templating, slab layout approval when applicable, fabrication, delivery, and installation.
Complex miters, multiple waterfall panels, special supports, and detailed vein matching can require additional fabrication compared with a simple straight countertop.
Avoid scheduling the countertop template before cabinets are permanently installed or before the island base is complete. Rushing this stage can lead to rework, delays, or compromises in fit.
A precise template gives the fabrication team the information needed to produce clean joints, consistent overhangs, properly fitted waterfall panels, and accurate cutouts.
Two waterfall ends create a strong symmetrical appearance and can make an island feel like a single piece of stone furniture. However, two panels also use more material and may restrict seating, cabinetry, electrical locations, or access to the ends of the island.
A single waterfall end can provide the same visual feature while leaving the opposite side available for seating, cabinetry, or a more open transition into the rest of the kitchen.
The better choice depends on the room rather than a design rule. Before committing to two waterfall ends, look at how people will actually approach, sit at, clean, and move around the island.
It depends on the island dimensions, slab size, material pattern, and whether the design has one or two waterfall panels. A smaller island may fit within one slab, while a large island with two full-height panels or directional veining may require two or more slabs. Slab layout should be reviewed before fabrication to confirm material requirements.
No. A mitered corner is commonly used because it can create the appearance of the countertop continuing directly down the side of the island. Other joint and edge details can also work depending on the material, thickness, design, and fabrication requirements.
Yes. Waterfall islands can have seating, but stool placement, knee space, overhang depth, and support requirements should be planned before templating. In some layouts, using one waterfall panel instead of two gives the seating area more room.
The waterfall panel itself needs a stable and properly prepared cabinet and floor structure. Seating overhangs may also require reinforcement depending on their projection, material, thickness, and nearby cutouts. Support requirements should be reviewed before fabrication.
Not necessarily. Two ends create a stronger symmetrical statement, while one end usually offers more flexibility for seating, cabinetry, and circulation. The best arrangement depends on the kitchen layout and how the island will be used.
The best waterfall island plans balance appearance with everyday use. Choose a material that suits your household, leave enough room for seating and circulation, and treat seams, supports, vein direction, and slab layout as design decisions rather than technical details to solve later.
When those decisions are made before fabrication, the countertop, vertical panels, and surrounding cabinetry can be planned as one complete installation.
Planning a waterfall island in Ontario? Stone Valley Countertops supplies, fabricates, and installs quartz, granite, marble, quartzite, porcelain, Dekton, and other countertop surfaces across the GTA, Durham Region, Niagara Region, Hamilton, Burlington, Oakville, and surrounding communities.
Contact Stone Valley Countertops to discuss your island dimensions, material selection, slab layout, waterfall panels, and fabrication requirements before the stone is cut.