
A backsplash that stops too low can leave a kitchen feeling unfinished. One that rises higher without a clear plan can complicate outlets, cabinet clearances, slab layout, and material costs. This countertop backsplash height guide explains the most common backsplash heights, where each option works best, and what homeowners should decide before stone is fabricated.
The right height is not based on appearance alone. Cabinet spacing, cooking areas, windows, outlets, countertop material, slab size, and how the kitchen is used can all affect the final decision.
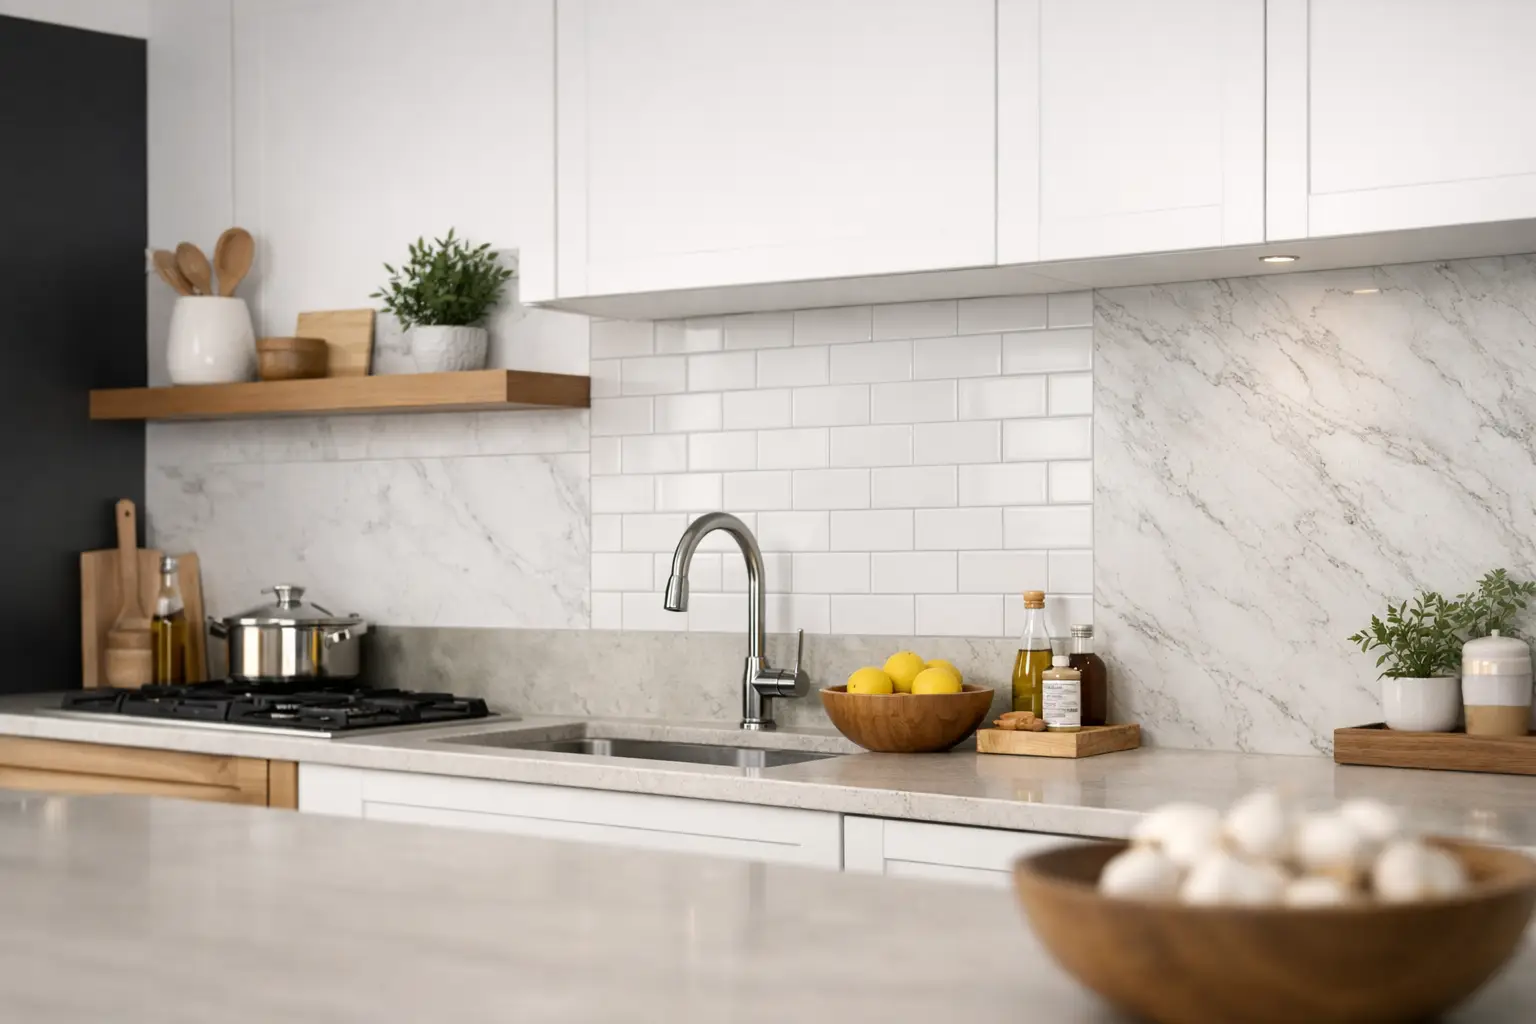
Quick answer: The most common countertop backsplash heights are 4 inches, approximately 6 to 12 inches for a mid-height backsplash, or full height from the countertop to the underside of the upper cabinets. In many kitchens, upper cabinets are roughly 18 inches above the countertop, so a full-height backsplash often fills that entire space. The exact measurement should always be confirmed during templating.
There is no single standard backsplash height that works for every kitchen. Most projects fall into three common categories: a short 4-inch backsplash, a mid-height backsplash, or a full-height backsplash.
A 4-inch backsplash is the traditional countertop return. It runs along the back edge of the countertop and protects the lower portion of the wall from water, spills, and everyday cleaning.
It is practical, relatively simple to fabricate, and usually made from the same material as the countertop. It can work particularly well when tile, paint, or another wall finish will be installed above it.
Four-inch backsplashes are also common in bathrooms, laundry rooms, mudrooms, basement kitchens, bars, and utility spaces where full-height stone may not be necessary.
A mid-height backsplash usually rises about 6 to 12 inches above the countertop. It provides more wall protection than a traditional 4-inch return without covering the entire wall.
This height can work well behind sinks, coffee stations, wet bars, bathroom vanities, or counters with open wall space above them.
The exact height should feel intentional. A backsplash that stops at an arbitrary point on a large wall can sometimes look unfinished, so nearby outlets, shelves, windows, and cabinetry should help determine where the material ends.
A full-height backsplash extends from the countertop to the underside of the upper cabinets. Where upper cabinets are not present, the material may continue to a range hood, floating shelf, window, or another architectural stopping point.
In many kitchens, the distance between the countertop and upper cabinets is around 18 inches, but that number should never be assumed during fabrication. Cabinet heights, floor conditions, countertop thickness, and installation tolerances can all affect the actual opening.
Full-height backsplashes are especially effective when homeowners want the countertop material to become part of the wall design. Quartz, granite, marble, quartzite, porcelain, and sintered stone can all be used depending on the project and material specifications.
The practical starting point is the wall itself. Look at the distance between the countertop and the cabinets, along with windows, range hoods, shelves, outlets, and other fixed elements.
A 4-inch backsplash may make sense when you want to keep more painted wall visible, plan to install tile above the countertop, or want to reduce the amount of slab material required.
A mid-height backsplash provides additional protection while still leaving part of the wall exposed.
Full-height stone works well when you want a continuous surface, easier wall cleanup, or a stronger connection between the countertop and backsplash.
If you are considering using the same quartz material on both surfaces, our guide to the pros and cons of quartz backsplashes explains some of the practical benefits and limitations.
It does not have to, but extending the backsplash to the cabinets usually creates a more continuous appearance and removes the narrow painted wall section between the countertop and cabinetry.
A full-height backsplash can also simplify everyday cleaning because cooking residue and water splashes land on the finished surface rather than drywall.
The trade-off is additional material and fabrication. Full-height backsplash pieces may require outlet cutouts, seams, polished exposed edges, detailed slab layout, and more precise installation.
For heavily veined quartz, marble, granite, or quartzite, the appearance of the backsplash should also be considered during slab layout. A beautiful countertop layout does not automatically create a good backsplash layout if the remaining slab sections are not planned in advance.
The wall behind a cooktop or range usually deserves additional consideration because it is exposed to cooking residue, steam, and splashes more frequently than other backsplash areas.
Some kitchens use full-height material behind the range while keeping a shorter backsplash elsewhere. Others continue the full-height slab across the entire kitchen for a more consistent look.
Material selection matters in this area. Natural stones such as marble can develop etching or staining when exposed to certain foods and cleaners. Granite and quartzite are generally durable natural-stone choices, while porcelain and sintered stone are also commonly considered for wall applications.
Quartz is widely used for kitchen backsplashes as well, but installations around cooking appliances should always follow the countertop manufacturer’s requirements and the appliance manufacturer’s required clearances. Those requirements should be confirmed before fabrication.
If you are comparing natural stone options, our quartzite vs granite durability guide explains how the two materials perform in everyday kitchen use.
A full-height backsplash is not simply a larger version of a 4-inch backsplash. It is a fabricated wall panel with pattern direction, cutouts, seams, edges, and installation access to consider.
With veined quartz, marble, granite, or quartzite, slab layout becomes particularly important. The fabricator may try to carry movement from the countertop into the backsplash, centre an attractive section behind the range, or choose a quieter portion of the slab so the countertop remains the main feature.
These decisions can affect slab yield. In some projects, the countertop and backsplash fit comfortably within the planned material. In others, achieving a specific vein pattern or bookmatched effect can require additional slab area.
A seam may be necessary when the backsplash wall is longer than the available slab section, when access into the home limits piece size, or when cutouts and material characteristics make one large panel impractical.
Good seam placement makes a noticeable difference. Where possible, seams are usually planned away from prominent focal areas and positioned where the surrounding pattern makes them less noticeable.
Just like countertop seams, backsplash seam locations depend on slab dimensions, material movement, fabrication limits, wall conditions, and access to the installation area. Our kitchen countertop seams guide explains how fabricators approach seam planning in more detail.
Backsplash pieces that stop at an open wall, cabinet side, doorway, or window may need a finished exposed edge. Depending on the material, that edge may be polished, mitred, factory-finished, or handled using another appropriate fabrication method.
Window areas deserve particular attention. In some kitchens, the countertop material continues into the sill or around the opening. These details should be established during templating so the finished pieces meet cleanly.
Electrical outlets and switches are one of the biggest reasons backsplash planning should happen before fabrication.
Stone, quartz, porcelain, and sintered materials can be fabricated with accurate outlet openings, but the final outlet locations need to be established before the backsplash pieces are cut.
Moving an electrical box after a full-height stone backsplash has been fabricated can create delays or require additional work.
Outlet placement also affects slab appearance. On strongly veined material, several cutouts through a prominent vein can interrupt the pattern. Where practical, layout planning can help reduce the visual impact.
For Ontario kitchen projects, outlet placement and electrical changes should be coordinated with the appropriate electrician or contractor before final backsplash fabrication. The stone fabricator’s role is to accurately measure and cut around the confirmed locations.
Backsplash templating should also account for range hoods, pot fillers, windows, shelves, faucet clearances, cabinet panels, under-cabinet lighting, appliance clearances, and other fixtures that meet or pass through the backsplash.
It is much easier to plan these details before fabrication than to modify a finished backsplash panel on site.
They can be, but they do not need to match.
Using the same material for both surfaces creates continuity and can make the countertop feel more integrated into the architecture of the kitchen.
A quartz countertop paired with tile can introduce texture and contrast. Granite can be combined with porcelain or ceramic tile. A highly patterned natural-stone backsplash may also work better with a quieter countertop rather than repeating the same movement everywhere.
Matching materials often works particularly well with low-variation quartz or subtle natural stone. With heavily veined marble or quartzite, the slab should be viewed as a complete layout before deciding how much material should continue onto the walls.
In a smaller kitchen, too much high-contrast movement can make the room feel visually busy. In a larger kitchen with long walls and a substantial island, the same pattern may feel balanced.
A 4-inch backsplash is usually the most economical stone backsplash option because it uses less material and involves relatively simple fabrication.
A full-height backsplash requires considerably more surface area. Additional fabrication may also be needed for outlet cutouts, exposed edges, seams, windows, shelves, range areas, and vein matching.
The slab itself can make a significant difference as well. A simple quartz pattern may allow efficient material use, while premium marble or quartzite with a specific desired layout may require additional slab area.
That is why backsplash pricing should be considered as part of the complete countertop layout rather than simply calculated by backsplash height. Our guide to budgeting for countertop replacement explains several other factors that affect overall project cost.
Walls and cabinets may look perfectly straight, but small variations are common once accurate measurements are taken.
Cabinet bottoms can vary slightly in height. Walls can bow inward or outward. Corners may not be perfectly square. Countertops themselves may also need minor adjustments during installation.
These variations are particularly important with full-height slab backsplashes because the pieces often need to fit closely between the installed countertop and cabinetry.
Depending on the project, the backsplash may be templated along with the countertop or verified after the countertops are installed. Measuring after countertop installation can help account for the final counter position and small wall variations before the backsplash pieces are fabricated.
For most homeowners, the decision can be simplified into three options.
Before deciding, stand at the countertop and look at the entire wall rather than focusing only on the backsplash itself. Consider where the cabinets stop, where splashes are most likely, how outlets interrupt the wall, and whether the countertop pattern should continue vertically.
The best backsplash height is the one that works with the actual kitchen layout and can be fabricated cleanly without creating unnecessary complications.
A traditional countertop backsplash is commonly about 4 inches high. Full-height backsplashes usually extend from the countertop to the underside of the upper cabinets, which is often around 18 inches in many kitchens. The exact opening should be measured before fabrication.
No. A 4-inch backsplash is still a practical option, especially in bathrooms, laundry rooms, rental properties, utility spaces, and kitchens where tile or another wall finish will be installed above the countertop.
It does not have to, but continuing the backsplash to the upper cabinets creates a continuous wall surface and eliminates the narrow section of painted wall between the countertop and cabinetry. It also provides more protection from splashes and cooking residue.
Many homeowners extend backsplash material higher behind a range or cooktop because that wall receives more cooking splatter. The final height depends on the range hood, cabinetry, selected material, appliance clearances, and manufacturer requirements.
Yes. Quartz, granite, marble, quartzite, porcelain, and sintered stone can all be considered for full-height backsplash applications. Fabrication requirements vary by material, particularly for large panels, outlet cutouts, seams, exposed edges, and installation access.
It depends on the project. Some backsplash pieces can be templated with the countertops, while other full-height installations benefit from final measurements after the countertops are installed. This allows the fabricator to account for the finished counter position, cabinet spacing, and wall variations.
If you are choosing between a 4-inch backsplash, a full-height slab backsplash, or something in between, it helps to make the decision before final fabrication begins. Material layout, outlets, seams, cabinet clearances, and wall conditions can all affect what will work best.
Stone Valley Countertops supplies, fabricates, and installs countertop and slab backsplash materials for homeowners across Toronto, Mississauga, Durham Region, Niagara, Hamilton, Burlington, Oakville, and surrounding Ontario communities.
If you already have a material or kitchen layout in mind, contact Stone Valley Countertops to discuss the countertop and backsplash details before templating.