Uncategorized

How to Plan a Waterfall Island That Works

How to Plan a Waterfall Island That Works

Waterfall kitchen island with veined stone countertop and matching waterfall panels

A waterfall island can look clean and intentional, or it can become the feature that makes a kitchen feel crowded, awkward to use, or difficult to repair. Knowing how to plan a waterfall island before choosing a slab helps avoid the most common problems: poorly placed seams, mismatched veining, unsupported overhangs, and dimensions that do not suit the way your household uses the kitchen.

A waterfall edge is not simply a countertop with a side panel added on. The horizontal surface and vertical stone panel need to be measured, fabricated, transported, and installed as one coordinated design. The details matter because they are visible from across the room.

Quick answer: A well-planned waterfall island starts with the cabinet layout, seating requirements, island dimensions, slab size, vein direction, seam locations, overhang support, and finished floor height. These decisions should be made before templating and fabrication. For highly veined materials, reviewing the full slab layout before cutting is especially important because the countertop and vertical panels need to work together visually.

Start With How the Island Will Be Used

Before selecting a material or edge profile, decide what the island needs to do. A prep-focused island may need a large uninterrupted work area and an undermount sink. A social island may need seating on one or two sides. Some kitchens need storage at both ends, while others benefit from an open end to keep circulation comfortable.

This determines where a waterfall panel makes sense. A stone panel at both ends creates a strong, furniture-like look, but it also closes off two useful areas for cabinets, seating, or legroom. One waterfall end is often the more practical choice when the other side needs a seating overhang.

Leave enough space around the island for doors, drawers, appliances, and people to move comfortably. This is particularly important in Ontario kitchens where renovations often involve fitting a larger island into an existing floor plan. The clearance should be reviewed during the design stage rather than after the cabinets are installed.

A beautiful island that restricts traffic or prevents an appliance door from opening properly will become frustrating quickly.

How to Plan a Waterfall Island Around Real Dimensions

The island’s length, depth, countertop thickness, and cabinet layout all affect the finished waterfall. Standard counter-height islands are commonly around 36 inches high, but the stone thickness and support details need to be considered within that final height.

A thicker-looking edge can be created with a mitered build-up, while a standard slab thickness provides a slimmer, more contemporary profile. If you are unsure how the edge treatment will affect the finished appearance, review our countertop edge profile guide before fabrication.

A waterfall panel usually runs from the finished countertop surface to the floor. That means the fabricator must account for flooring thickness, level variations, cabinet height, and any trim or toe-kick details. Even a small discrepancy at the floor can be noticeable along a tall, straight stone edge.

Decide early whether the panel will sit flush with the cabinet end, extend slightly beyond it, or align with adjacent features. There is no single correct choice. A flush panel is crisp and compact, while a small stone reveal can add visual weight. What matters is that the reveal is consistent and planned rather than accidental.

Plan Seating and Overhangs Carefully

Seating is where many waterfall island plans need a closer look. A seating overhang needs enough depth for comfortable stools and knee room, but longer projections may require hidden steel supports or other reinforcement.

Stone should not be expected to carry a large unsupported overhang by itself. Support requirements depend on the material, stone thickness, projection, cabinet structure, and the location of nearby cutouts.

The waterfall end can also affect where stools fit. If the vertical panel reaches the outer corner of the island, it may reduce access to the end seat. In some designs, limiting the waterfall to one end improves seating without losing the overall effect.

Share the intended stool count and seating arrangement before templating. This lets the countertop fabricator coordinate the stone layout with the cabinetmaker or designer and identify support requirements before fabrication begins.

Choose a Material That Suits the Design and Your Routine

Waterfall islands can be fabricated from quartz, granite, marble, quartzite, porcelain, sintered stone, and other engineered surfaces. The best option depends on more than appearance. Consider how often the island will be used for food preparation, whether it will contain a sink or cooktop, and how much maintenance your household is comfortable with.

Quartz is a practical countertop option for many busy kitchens because it has a consistent appearance, does not require routine sealing, and is easy to clean with mild soap and water. Controlled patterns can also make vein matching more predictable.

Quartz is not immune to damage. Very hot cookware should still be kept off the surface, and exposed waterfall corners should be protected from heavy impacts.

Natural stones bring more variation. Granite is generally durable and well suited to active kitchens, while quartzite can offer dramatic movement with strong day-to-day performance when properly selected and maintained.

Marble has a distinctive appearance and develops character with use, but it can etch or stain more easily than harder materials. It may be right for homeowners who accept that natural patina, but it is not ideal for everyone.

Porcelain and sintered stone can create a slim, modern waterfall profile and offer strong resistance to heat, staining, and UV exposure. Their fabrication requires specialized handling because the material is relatively thin and rigid. For a waterfall island, fabrication experience matters as much as the material itself.

Think About Veins, Seams, and Corner Details

A waterfall island is often chosen to showcase a veined slab. To achieve that effect, the slab layout needs to be planned before cutting begins. The goal may be to make the vein appear to continue from the horizontal countertop down the vertical panel.

This look is possible in many cases, but it depends on slab size, pattern direction, island dimensions, and the number of waterfall ends. A large island with two full-height panels may require multiple slabs. Natural stone variation and engineered patterns can also limit how closely the movement aligns.

For highly veined quartzite, marble, granite, or engineered stone, it is worth reviewing the actual slabs rather than making the decision from a small sample. Our guide on how to compare stone slabs before you buy explains what to look for before fabrication begins.

Plan Seam Locations Before Cutting

A good countertop fabrication team will review the slab layout and explain where seams may be necessary. Seams are not automatically a problem. They are often unavoidable on longer islands, depending on the slab dimensions and island layout.

A well-placed and colour-matched seam can be discreet. The goal is to avoid placing a seam where it unnecessarily interrupts a strong vein, sits too close to a sink or cooktop cutout, or creates a vulnerable section of stone.

For more detail on why seams are needed and where they are typically located, see our kitchen countertop seams guide.

Decide How the Waterfall Corner Will Be Finished

The corner where the horizontal countertop meets the vertical panel deserves careful attention. A mitered corner creates the appearance of one continuous piece of stone wrapping down the island.

This can produce a very clean result, particularly with strongly veined materials, but it requires accurate cutting, assembly, handling, and installation.

A square edge or more visible joint can also work depending on the material, budget, slab thickness, and overall design. The corner detail should be decided before fabrication rather than left as an installation-day decision.

Do Not Treat Support as an Afterthought

Waterfall panels are heavy, especially when natural stone or large-format pieces are involved. The cabinet base, substructure, and floor need to support the material properly. The vertical panel should be installed against a flat, stable surface rather than forced into position to correct uneven cabinetry or flooring.

If the island contains a cooktop, sink, or large seating overhang, the support plan becomes even more important. Cutouts remove material from the countertop, while an overhang creates leverage beyond the cabinet structure.

Depending on the design, reinforcement may be needed around openings, beneath seating areas, or within the island cabinetry.

This is one reason accurate countertop templating takes place after cabinets are installed, secured, and properly levelled. Measurements are taken from the actual site conditions rather than relying only on drawings. Floor level, cabinet alignment, finished dimensions, appliance locations, and overhangs can all influence the final stone pieces.

Match the Waterfall Detail to the Rest of the Kitchen

The waterfall does not need to be repeated everywhere. In many kitchens, a restrained approach works better. If the island uses a strongly veined material, a quieter backsplash or perimeter countertop can prevent the room from becoming visually busy.

If the perimeter countertops use the same material, consider whether the island should receive the most dramatic section of the slab. Slab layout planning gives you an opportunity to decide where the strongest movement will be seen.

Edge style also changes the finished result. A squared or subtly softened edge is commonly used for waterfall designs because it keeps the lines clean. Highly decorative profiles can compete with the straight vertical drop of the stone.

Pay attention to adjacent finishes as well. Cabinet colour, hardware, flooring, lighting, and stool placement will all frame the island. Viewing a small sample under your kitchen lighting is helpful, but seeing the entire slab is much more useful when the material has large-scale veining or significant natural variation.

Build Enough Time Into the Fabrication Schedule

Waterfall islands should be finalized before fabrication begins, not adjusted during installation. Once the material is selected and cabinets are ready, the usual sequence is templating, slab layout approval when applicable, fabrication, delivery, and installation.

Complex miters, multiple waterfall panels, special supports, and detailed vein matching can require additional fabrication compared with a simple straight countertop.

Avoid scheduling the countertop template before cabinets are permanently installed or before the island base is complete. Rushing this stage can lead to rework, delays, or compromises in fit.

A precise template gives the fabrication team the information needed to produce clean joints, consistent overhangs, properly fitted waterfall panels, and accurate cutouts.

One Waterfall End or Two?

Two waterfall ends create a strong symmetrical appearance and can make an island feel like a single piece of stone furniture. However, two panels also use more material and may restrict seating, cabinetry, electrical locations, or access to the ends of the island.

A single waterfall end can provide the same visual feature while leaving the opposite side available for seating, cabinetry, or a more open transition into the rest of the kitchen.

The better choice depends on the room rather than a design rule. Before committing to two waterfall ends, look at how people will actually approach, sit at, clean, and move around the island.

Frequently Asked Questions About Waterfall Islands

How many slabs do you need for a waterfall island?

It depends on the island dimensions, slab size, material pattern, and whether the design has one or two waterfall panels. A smaller island may fit within one slab, while a large island with two full-height panels or directional veining may require two or more slabs. Slab layout should be reviewed before fabrication to confirm material requirements.

Does a waterfall island need a mitered edge?

No. A mitered corner is commonly used because it can create the appearance of the countertop continuing directly down the side of the island. Other joint and edge details can also work depending on the material, thickness, design, and fabrication requirements.

Can a waterfall island have seating?

Yes. Waterfall islands can have seating, but stool placement, knee space, overhang depth, and support requirements should be planned before templating. In some layouts, using one waterfall panel instead of two gives the seating area more room.

Does a waterfall countertop need extra support?

The waterfall panel itself needs a stable and properly prepared cabinet and floor structure. Seating overhangs may also require reinforcement depending on their projection, material, thickness, and nearby cutouts. Support requirements should be reviewed before fabrication.

Is one waterfall end better than two?

Not necessarily. Two ends create a stronger symmetrical statement, while one end usually offers more flexibility for seating, cabinetry, and circulation. The best arrangement depends on the kitchen layout and how the island will be used.

Plan the Details Before the Slab Is Cut

The best waterfall island plans balance appearance with everyday use. Choose a material that suits your household, leave enough room for seating and circulation, and treat seams, supports, vein direction, and slab layout as design decisions rather than technical details to solve later.

When those decisions are made before fabrication, the countertop, vertical panels, and surrounding cabinetry can be planned as one complete installation.

Planning a waterfall island in Ontario? Stone Valley Countertops supplies, fabricates, and installs quartz, granite, marble, quartzite, porcelain, Dekton, and other countertop surfaces across the GTA, Durham Region, Niagara Region, Hamilton, Burlington, Oakville, and surrounding communities.

Contact Stone Valley Countertops to discuss your island dimensions, material selection, slab layout, waterfall panels, and fabrication requirements before the stone is cut.

How to Compare Stone Slabs Before You Buy

How to Compare Stone Slabs Before You Buy

A small sample can tell you the material name and basic colour. It cannot tell you how a full kitchen island will look, where a seam may fall, or whether the veining will suit your cabinet layout. Knowing how to compare stone slabs means looking beyond the showroom sample and considering the full slab, the fabrication plan, and how the surface will work in your daily routine.

For most homeowners, the right choice is not simply the prettiest slab. It is the slab that fits the room, holds up to how the space is used, and can be fabricated with clean, thoughtful details.

Comparing stone slabs and countertop material samples before buying

Quick Answer: When comparing stone slabs, look at the full slab rather than relying on a small sample. Compare the material, overall colour, pattern direction, slab dimensions, thickness, natural characteristics, maintenance requirements, seam possibilities, fabrication layout, and total installed cost.

If your project requires more than one natural stone slab, also ask whether the slabs are from the same bundle or are sequential. This can make a major difference when matching colour and vein movement across a large kitchen or island.

Start With the Material, Then Compare Individual Slabs

Before comparing colours and patterns, narrow down the type of stone or surface that fits your priorities. Every material has trade-offs, especially around maintenance, heat resistance, movement in the pattern, and cost. If you are still deciding between materials, our guide to choosing kitchen countertops can help narrow the options first.

Quartz is consistent, nonporous, and straightforward to clean. It works well for busy kitchens, bathroom vanities, laundry rooms, and bars. However, it should not be treated like a hot landing pad for cookware. Use trivets, particularly near a cooktop or on an island where pans are regularly set down.

Granite offers natural variation, strong heat resistance, and a surface that feels distinctly natural. It needs periodic sealing, although the frequency depends on the specific stone and finish.

Quartzite is often chosen for its dramatic movement and durability, but it is a natural stone, so it also benefits from sealing and a realistic conversation about maintenance. If you are deciding between these two natural stones, see our comparison of quartzite vs granite durability.

Marble has a softer look and a softer surface. It can etch from acidic foods and drinks, which shows as a dull mark rather than a stain. That character can be appealing in a lower-use bathroom, fireplace surround, or a kitchen where the homeowner accepts a lived-in finish. It is less practical for someone who wants a perfectly uniform surface after years of heavy cooking.

Porcelain and sintered stone are thin, dense surfaces with strong resistance to heat, staining, and UV exposure. They can be excellent for shower walls, fireplace surrounds, outdoor BBQ counters, and contemporary kitchens. Their fabrication requires care because the material is thinner and exposed edges require precise cutting and finishing.

Once you know which materials suit the project, compare actual slabs from the same material category. Natural slabs can vary significantly. Even engineered materials can have some variation between production batches.

How to Compare Stone Slabs in Person

Always view the whole slab when possible. A sample may show one attractive section, while the full slab may have more movement, darker areas, fissures, crystals, or colour shifts. None of these are automatically defects. In natural stone, they are part of what makes each slab individual. The question is whether you want those features in your room.

Stand back several feet, then move closer. From a distance, look at the overall colour balance and pattern direction. Up close, check for areas that may affect your expectations, such as natural pits, filled fissures, mineral deposits, or changes in polish.

Ask whether a visible line is a natural fissure, a vein, or a repaired area. An experienced fabricator should be able to explain what you are seeing and how it may appear once the countertop is installed.

Bring cabinet doors, paint swatches, backsplash samples, and flooring samples if you have them. A warm white cabinet can make a cool grey slab look blue, while a bright white backsplash can make an ivory countertop appear more yellow than expected.

Compare materials under natural daylight and interior lighting. Kitchen lighting, especially warm under-cabinet lights, can change how a white, grey, or beige surface reads.

Look for Pattern Scale and Direction

A bold vein may look balanced on a large island but overwhelming on a short bathroom vanity. Fine, repeated movement is usually easier to carry across several countertop runs. Large, directional veins require more planning and may need additional material to keep the pattern flowing in the preferred direction.

If your design includes a waterfall island, ask to see how the vein could meet at the corner. A mitered waterfall can create a continuous visual effect when the slab layout allows it. That detail takes more material, precise cutting, and careful fabrication, so it should be included in the planning stage rather than decided after a slab has been selected.

Check the Bundle When Using Multiple Natural Stone Slabs

If your kitchen needs two or more slabs of granite, marble, or quartzite, ask whether they are from the same bundle. Ideally, strongly patterned materials should be selected from sequential slabs when available.

Sequential slabs are cut next to one another from the same stone block. Their colour, movement, and veining are generally more closely related, which gives the fabricator more flexibility when planning an island, perimeter, waterfall panels, or full-height backsplash.

This does not mean every vein will connect perfectly. Natural stone is unpredictable by nature. However, choosing related slabs gives the project a better starting point for pattern and colour continuity.

Compare Slab Size Against Your Layout

Slab size affects seams, waste, cost, and design options. A typical kitchen may have a perimeter, an island, a backsplash, and perhaps a window ledge or bar top. Even when the total square footage seems to fit within one slab, the shape and direction of each piece may require more material.

A large island is often the deciding factor. If an island is wider or longer than the usable slab dimensions, a seam may be necessary. Some materials and patterns make seams less noticeable than others. A quiet, light quartz often hides a seam better than a dark glossy surface or a slab with dramatic veins that must align.

Ask where seams are likely to go before making a final selection. The goal is not always to eliminate every seam. That is not possible with every layout. Instead, seams should be placed thoughtfully.

A seam should avoid high-visibility areas when practical and should not interrupt a strong feature in the pattern unnecessarily. For a deeper explanation of what affects seam location and appearance, see our kitchen countertop seams guide.

Also consider sink and cooktop cutouts. A large farmhouse sink, an undermount sink, or a wide cooktop changes how the countertop pieces can be nested on the slab. These openings are planned during templating, but discussing them early helps avoid surprises.

Compare Thickness, Edges, and Finished Details

The slab thickness alone does not tell the full story. A 2 cm or 3 cm material can be fabricated in different ways depending on the desired look, edge profile, and application. Many homeowners prefer 3 cm countertops for a substantial appearance without a built-up edge.

A thicker-looking profile can also be created with a mitered edge, especially for islands, waterfall panels, and modern designs.

Edge selection affects both style and maintenance. A simple eased edge is clean, practical, and easy to wipe. A beveled or ogee edge creates more detail but can collect crumbs along its profile. For a busy family kitchen, a straightforward edge is often the easiest choice. For a formal bar or vanity, a more decorative edge may be worth the additional fabrication work.

Do not overlook overhangs. A standard seating overhang may be possible without additional support in some applications, while deeper or longer overhangs can require brackets or another support method. The material, thickness, cabinet construction, and layout all matter.

This should be reviewed before fabrication so supports can be planned without interfering with seating or the finished appearance.

Compare Price by the Complete Project, Not Just the Slab

Two slabs with similar colours can have very different project costs. Material availability, slab size, thickness, pattern complexity, finish, and the number of slabs needed all affect pricing.

Fabrication details matter too. A simple straight run with one sink cutout is very different from a kitchen with a large island, waterfall ends, full-height backsplash, multiple seams, and several cutouts.

When reviewing an estimate, make sure it accounts for the details that matter to your design:

  • Selected material and slab quantity
  • Material thickness
  • Edge profile
  • Sink cutout and installation
  • Cooktop or appliance cutouts
  • Backsplash pieces
  • Waterfall panels or mitered edges
  • Seam placement
  • Required countertop supports
  • Templating, fabrication, delivery, and installation
  • Natural stone sealing, when applicable

The least expensive material is not always the lowest-cost decision over time. If you strongly dislike ongoing sealing or worry about etching, choosing a surface that matches your maintenance comfort level can prevent regret later.

On the other hand, a homeowner who values natural variation may find that the character of granite, marble, or quartzite is worth the extra care.

Ask How the Slab Will Be Fabricated

A beautiful slab can lose its impact if the layout is not planned well. Fabrication is where the material becomes a countertop tailored to your room. Before work begins, ask how the template, slab layout, seams, and vein direction will be reviewed.

For patterned slabs, a layout review is particularly valuable. It helps identify where the most attractive area of the stone will sit, how the veins will travel across an island, and which portions will be used for smaller pieces.

It also allows the fabricator to avoid placing a prominent natural feature directly beside a sink cutout or in another visually sensitive location when the slab layout permits.

Precision matters at exposed edges, mitres, sink openings, and seam joints. It also matters where the countertop meets walls that are not perfectly straight, which is common in existing homes.

Accurate templating and careful fabrication help create a closer fit while still allowing for the small clearances needed for proper installation. You can learn more about the process in our guide to countertop fabrication in Ontario.

Stone Slab Comparison Checklist

Before approving a slab, use this checklist to make sure you are comparing more than colour:

  • Material: Does it suit your maintenance and performance expectations?
  • Full slab appearance: Have you viewed the entire slab rather than only a sample?
  • Colour: Does it work with your cabinets, flooring, backsplash, and lighting?
  • Pattern: Is the movement subtle, busy, or strongly directional?
  • Slab dimensions: Is the slab large enough for the island and major countertop pieces?
  • Thickness: Is the material available in the thickness needed for the design?
  • Natural characteristics: Have you reviewed fissures, pits, mineral deposits, and colour changes?
  • Multiple slabs: Are they from the same bundle or sequential slabs when possible?
  • Seams: Do you understand where seams are likely to be located?
  • Vein direction: Has the direction been considered for islands, waterfalls, and backsplash pieces?
  • Cutouts: Have sinks, cooktops, faucets, and other openings been considered?
  • Maintenance: Are you comfortable with sealing, etching, heat precautions, or other material-specific care?
  • Fabrication: Do you understand the edge, seam, miter, and layout plan?
  • Total price: Are you comparing the complete fabricated and installed project rather than only the slab price?

Make the Final Choice With Your Daily Use in Mind

The best slab for a polished showroom display may not be the best slab for a busy Ontario kitchen. Think about who uses the space, how often you cook, whether children use the island for homework, and how much maintenance feels reasonable to you.

A quiet quartz may bring calm to a busy room. A strongly veined quartzite may become the visual centre of an island. A honed marble vanity may be exactly right where its patina can be appreciated rather than fought.

If you are choosing between two slabs, do not rush the decision based on a small colour difference. Compare the full slabs, confirm how each will be laid out, and review the practical details that affect the finished result.

A careful selection process gives your fabricator the information needed to create countertops that look intentional from every angle.

Frequently Asked Questions About Comparing Stone Slabs

What should I look for when comparing stone slabs?

Compare the entire slab rather than only a small sample. Look at overall colour, pattern direction, slab dimensions, thickness, natural characteristics, maintenance requirements, possible seam locations, edge options, fabrication requirements, and total installed cost.

Should multiple stone slabs come from the same bundle?

For natural stone, using slabs from the same bundle is usually preferable when a project requires multiple slabs. Sequential slabs can provide more similar colour and vein movement, which gives the fabricator more options when planning adjoining countertops, islands, waterfalls, and backsplashes.

Is it better to choose a countertop from a full slab or a sample?

Whenever possible, view the full slab before making a final decision. A small sample is useful for checking colour and finish, but it cannot show the complete pattern, large veins, natural characteristics, or how the material will look across a large island.

How can I tell if a line in natural stone is a crack or a fissure?

Natural stone can contain veins, fissures, mineral lines, and repaired areas that may look similar at first glance. Ask the slab supplier or fabricator to explain any feature you are concerned about. The important point is understanding whether it is a normal characteristic of the stone and how it will be handled during fabrication.

Does slab size affect countertop seams?

Yes. Slab dimensions and usable slab area directly affect how large countertop pieces can be fabricated. Large islands, long countertop runs, directional patterns, sink cutouts, and cooktops can all influence whether a seam is required and where it can be placed.

Should I approve the slab layout before fabrication?

For strongly patterned granite, marble, quartzite, and other materials with significant movement, reviewing the slab layout before cutting can be very helpful. It allows you and the fabricator to discuss vein direction, focal areas, seams, waterfall pieces, and how prominent features will appear in the finished countertop.

Need Help Comparing Countertop Slabs?

If you are comparing quartz, granite, marble, quartzite, porcelain, or sintered stone for an Ontario countertop project, Stone Valley Countertops can help you review the material from both a design and fabrication perspective.

We can look at slab dimensions, pattern direction, seam possibilities, edge details, cutouts, and the overall layout before fabrication begins. Contact Stone Valley Countertops to discuss your project or arrange the next step.

Countertop Edge Profile Guide for Your Kitchen

Countertop Edge Profile Guide for Your Kitchen

A countertop can have the right stone, colour, and layout yet still feel slightly off if the edge is not suited to the room. A crisp eased edge reads clean and contemporary, while a rounded profile feels softer in a busy kitchen. This countertop edge profile guide explains what those choices actually mean once the slab is fabricated and installed.

An edge profile is the shaped finish along the exposed perimeter of a countertop, island, vanity, or bar. It affects the way light catches the stone, how easy the surface is to wipe down, the apparent thickness of the countertop, and how well the edge suits everyday use. The best option is not always the most decorative one. It is the one that works with your material, design, budget, and household.

Countertop edge profile guide showing stone edge samples for kitchen countertops

Countertop Edge Profiles: Quick Answer

For most kitchens, an eased or pencil-round edge is the most practical choice. These profiles are easy to clean, work with many countertop materials, and suit both modern and transitional kitchens. Bullnose and bevelled edges add more visual detail, while ogee profiles create a traditional look. Mitered edges are used when you want the countertop to appear substantially thicker or need a continuous edge detail on an island or waterfall feature.

The right profile also depends on the countertop material. Quartz, granite, marble, and quartzite can accommodate several edge styles, while porcelain and other thin-format surfaces generally require more careful edge planning and fabrication.

Why the Countertop Edge Profile Matters

The edge is one of the most visible fabrication details in a kitchen. It frames the countertop from across the room and is especially noticeable on an island, raised bar, peninsula, or vanity with open sides. A profile can make a standard-thickness quartz counter look crisp and minimal, or give a natural-stone island a heavier, more substantial appearance.

Function matters just as much. Profiles with a small radius have fewer sharp corners to bump into and are generally simpler to clean. More detailed edges have grooves and transitions that can collect crumbs, dust, or residue near the front of a working counter.

That does not make decorative profiles a poor choice. It simply means they should be selected with the way the kitchen is actually used in mind. Homes with children, frequent cooking, or busy islands may benefit from simpler profiles that are comfortable and easy to wipe clean.

Edge selection also has a cost component. A simple eased edge generally requires less fabrication than a detailed ogee or built-up mitered edge. The final cost depends on the material, linear footage, number of exposed sides, slab thickness, edge complexity, and amount of hand finishing required.

If you are deciding primarily based on appearance, our guide to the best countertop edge styles provides another useful comparison.

Countertop Edge Profile Guide: Common Options

Edge names can vary slightly between fabricators, so a physical sample is more useful than a name alone. Two profiles described as bevelled, for example, may use different angles or widths. Looking at an actual edge sample beside your cabinet finish and slab selection helps prevent surprises.

Eased Edge

An eased edge is one of the most common choices for quartz, granite, marble, and quartzite. Despite the name, it is not completely square. The upper corner is lightly softened to remove the sharpness while maintaining a straight, modern appearance.

This profile works well in contemporary kitchens, bathrooms, laundry rooms, and commercial spaces because it is clean, practical, and easy to wipe. It also allows the countertop material to take centre stage, which is useful when quartzite, granite, or marble has pronounced movement.

For many homeowners, an eased edge is the sensible starting point rather than a compromise.

Pencil-Round Edge

A pencil-round edge has a more noticeable smooth radius than an eased profile. It still looks streamlined, but feels softer to the touch and is forgiving in high-traffic areas. It is a practical option for family kitchens, vanities, and islands where people frequently sit or walk nearby.

Because the profile remains simple, it pairs easily with both shaker-style and flat-panel cabinetry. It provides softness without making the countertop look overly traditional.

Half Bullnose and Full Bullnose

A half bullnose rounds the upper portion of the front edge while leaving more definition toward the underside. It gives the countertop a softer, finished appearance and is commonly considered for bathrooms, bars, and kitchens with transitional styling.

A full bullnose curves across both the upper and lower portions, creating a fully rounded front. This provides a comfortable edge with no pronounced corner.

One practical consideration is liquid behaviour. Because the underside is rounded, spills reaching the front edge may follow the curve underneath rather than dropping cleanly away from the cabinet. The softer shape can also make the countertop appear visually different from a crisp eased profile.

Bevelled Edge

A bevelled edge has a flat angled section cut into the upper portion of the countertop edge. It creates a defined line that catches light and adds more detail than an eased or rounded profile. The bevel can be narrow and subtle or wider and more noticeable.

Bevelled profiles work well when homeowners want an architectural detail without the curves of a bullnose or ogee. They require accurate fabrication so the angle and width remain consistent across countertop sections.

With strongly veined materials, the edge should also be considered alongside the backsplash and cabinetry so the additional lines do not make the finished design feel unnecessarily busy.

Ogee Edge

An ogee is a decorative profile that combines curved sections to create a more traditional edge. It can work particularly well with detailed cabinetry, warm-toned granite, marble, quartzite, and classic bathroom designs.

On a large island, the profile itself can become a noticeable design feature.

An ogee takes more effort to clean because its curved recesses require additional wiping. It also generally involves more machining and hand finishing than a basic edge, which can increase fabrication cost.

This profile tends to work best when it is part of a broader traditional design rather than the only decorative element in an otherwise minimal kitchen.

Mitered Edge

A mitered edge is fabricated by joining pieces of material at an angled seam to create the appearance of a thicker countertop. Instead of using a much thicker solid slab, the front edge is built down to create additional visual depth.

For example, a 2 cm slab can be fabricated to create the appearance of a much thicker edge depending on the design and material. Mitered fabrication is commonly used for large islands, thick contemporary countertops, and waterfall countertops.

The detail must be measured, cut, assembled, and installed precisely. On veined material, the fabrication plan should also consider how the pattern transitions through the miter so the finished edge looks intentional.

A mitered edge is therefore not simply a thicker countertop. It involves additional fabrication, material, finishing, and planning.

Match the Edge to the Countertop Material

The material itself should influence which profiles make sense. A profile that works easily on 3 cm granite may require a completely different fabrication approach on thin porcelain.

Quartz

Most quartz slabs accommodate eased, pencil-round, bullnose, bevelled, and certain mitered profiles well. Because engineered quartz is relatively consistent, it gives fabricators flexibility when creating clean, repeatable edges.

The exact profile should still follow the slab manufacturer’s fabrication requirements, particularly around corners, sink cutouts, and thinner materials.

Granite, Marble, and Quartzite

Granite, marble, and quartzite can accommodate a wide range of profiles, including more decorative options. Natural stone, however, contains veins, mineral variation, fissures, and occasional softer areas that need to be considered during fabrication.

A fabricator should inspect the slab before cutting and determine how exposed edges, seams, sink openings, and other finished areas interact with the natural pattern.

Porcelain and Sintered Stone

Porcelain and sintered stone countertops are generally thinner than traditional stone slabs and require specialized fabrication techniques. Their hardness is an advantage in everyday use, but exposed edges and corners need careful cutting and finishing.

Simple edge details and properly fabricated mitered builds are commonly used. The appropriate solution depends on the product thickness, pattern, intended use, and manufacturer’s fabrication requirements.

How Edge Profiles Affect Countertop Cost

Countertop edge pricing is generally based on the amount of fabrication required rather than appearance alone. A standard eased profile is relatively straightforward to machine and polish, while decorative or built-up edges require additional shop time.

Several factors can affect the cost, including the number of exposed linear feet, countertop material, slab thickness, edge complexity, hand polishing requirements, corners, and mitered sections.

A large island with four exposed sides, for example, has considerably more finished edge than a countertop installed between two walls. That difference matters when comparing edge upgrades.

It is worth confirming which edge profile is included in your countertop quote and which options are considered upgrades before fabrication begins.

Thickness, Overhangs, and Sink Areas Need Special Attention

An edge profile does not exist separately from the rest of the countertop design. A 2 cm or 3 cm slab with an eased edge creates a different visual weight than a built-up or mitered edge designed to look substantially thicker.

On a large island, added visual thickness can help balance the countertop against tall cabinetry, waterfall panels, or a substantial seating area.

Overhangs should also be reviewed before the edge is finalized. Seating overhangs may require concealed support depending on the material, slab thickness, depth, layout, and manufacturer’s requirements. A rounded or decorative edge does not replace proper structural support.

The same consideration applies around sink cutouts, where enough material must remain around the opening to maintain strength and allow proper finishing.

For undermount sinks, a simple polished sink cutout and appropriate reveal usually create an easy-to-clean transition. The front countertop edge and sink cutout are separate fabrication details, but they should be discussed together before the slab is cut.

A Practical Way to Choose Your Countertop Edge

Start with the room’s overall lines. Flat-panel cabinets, slim hardware, and large-format backsplashes often suit eased, pencil-round, or restrained mitered edges. Traditional cabinet doors, detailed fixtures, and warmer natural stone may support a half bullnose, bevelled, or ogee profile.

Then think about how the space will be used. A busy family kitchen often benefits from an edge that can be wiped clean quickly and does not have deep decorative grooves.

Next, view your chosen slab with a physical edge sample whenever possible. This is particularly useful with white quartz, dark granite, and heavily veined quartzite because shadows and pattern movement can make the same profile appear quite different from one material to another.

Before approving fabrication, confirm which countertop sides will be exposed, where seams are expected, which edge profile is being used, whether an island requires support, and whether a waterfall or thickened edge is part of the design.

These details are much easier to resolve before cutting begins than after the countertop reaches the installation stage.

Frequently Asked Questions About Countertop Edge Profiles

What is the most popular countertop edge profile?

An eased edge is one of the most commonly selected profiles because it provides a clean appearance, works with many countertop materials, and is easy to maintain. Pencil-round edges are another practical option when a slightly softer corner is preferred.

Which countertop edge is easiest to clean?

Eased and pencil-round profiles are among the easiest to clean because they have very little decorative detailing. Profiles such as ogee have additional curves and recesses that require more attention when wiping the countertop.

What countertop edge is best for a kitchen island?

There is no single best island edge. Eased and pencil-round profiles work well for practical everyday islands, while mitered edges can create the appearance of a thicker, more substantial island. The right choice depends on the slab material, island size, cabinetry, seating, and surrounding design.

Are mitered countertop edges more expensive?

Usually, yes. A mitered edge requires additional cutting, material, assembly, finishing, and installation precision compared with a standard eased profile. Vein and pattern matching can also add fabrication complexity.

Can every countertop material use the same edge profile?

No. Quartz, granite, marble, and quartzite can accommodate many common profiles, but porcelain, sintered stone, and certain thin materials may have more specific fabrication requirements. The slab thickness and manufacturer’s specifications should always be considered before choosing an edge.

Should I choose the countertop edge before templating?

Ideally, yes. The edge profile, exposed sides, waterfall panels, overhangs, sink details, and other fabrication requirements should be confirmed before the countertop enters production. This gives the fabricator the information needed to plan the finished pieces accurately.

Choosing an Edge Before Fabrication

The best countertop edge is usually the one you stop noticing because it works naturally with the kitchen. It should feel comfortable at the island, complement the slab rather than compete with it, and suit the way the space is used every day.

If you are selecting quartz, granite, marble, quartzite, porcelain, or another countertop surface for an Ontario project, Stone Valley Countertops can review edge options alongside the slab, layout, overhangs, sink details, and fabrication requirements before production begins.

Contact Stone Valley Countertops to discuss your countertop project or compare edge profiles for your selected material.

How to Choose Quartz Color for Your Kitchen

How to Choose Quartz Color for Your Kitchen

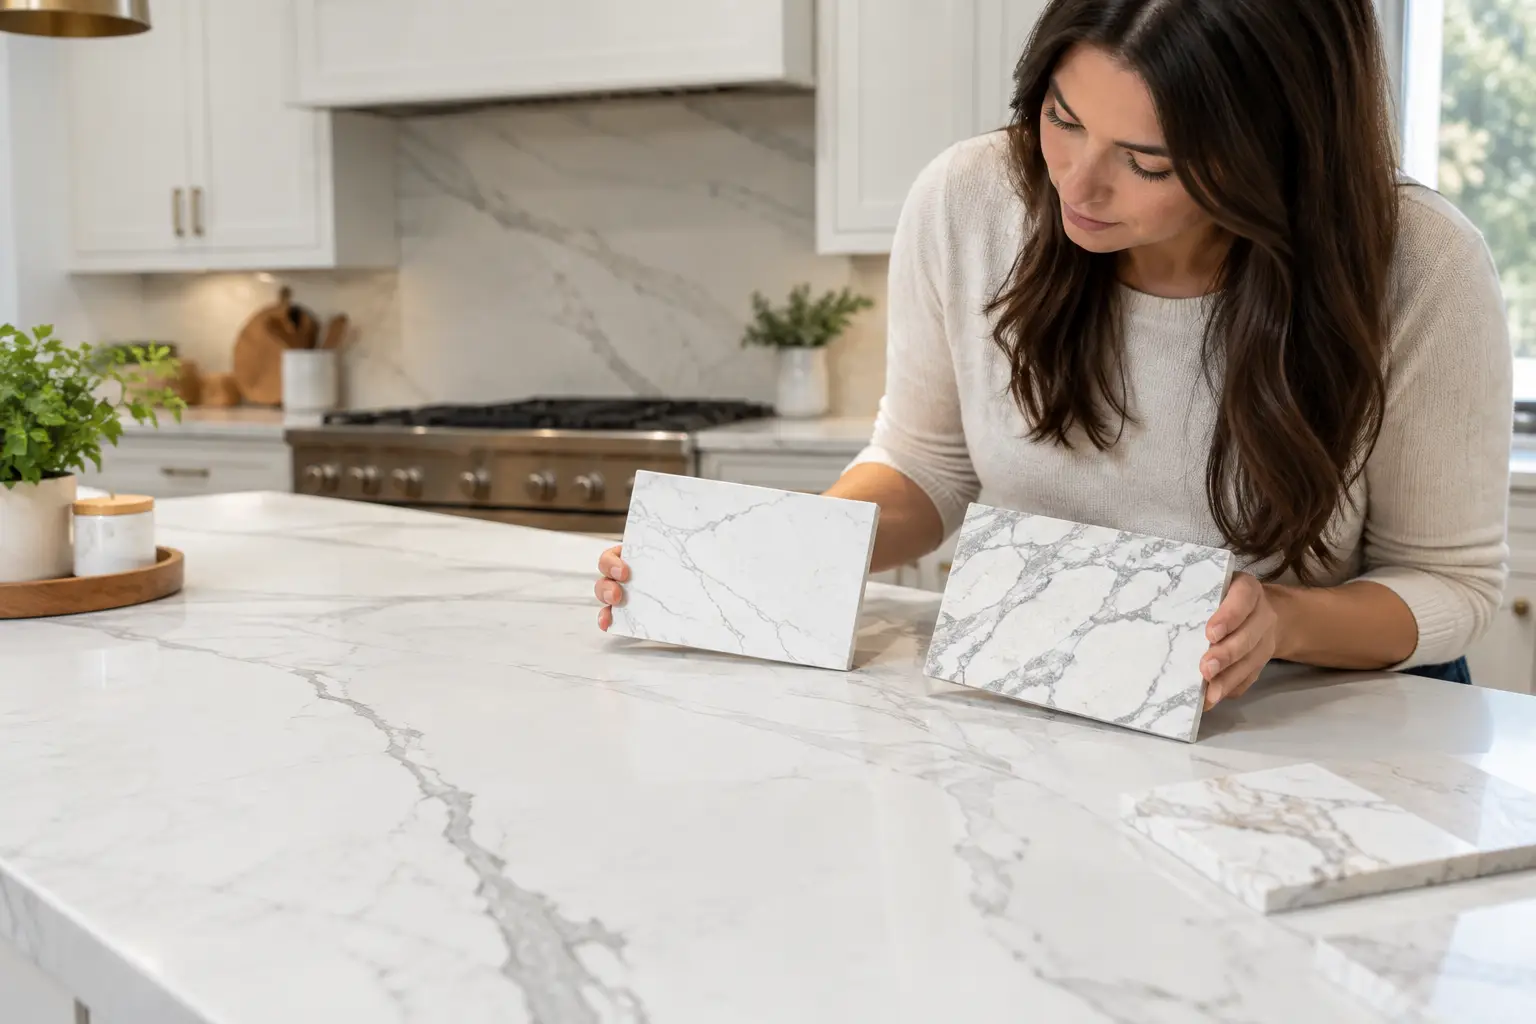
Homeowner comparing quartz countertop colour samples for a kitchen

A quartz sample can look soft white in a showroom, then read grey, beige, or unexpectedly bright once it is installed beside your cabinets. That is why learning how to choose quartz colour is less about finding a popular slab and more about seeing how the material behaves in your actual kitchen.

Quartz is consistent, low-maintenance, and available in a wide range of solid colours and natural-looking patterns. Still, a good choice has to work with your lighting, cabinet finish, backsplash plans, and the way your household uses the kitchen. A colour that photographs beautifully may be less practical if it constantly shows crumbs, water marks, or fingerprints.

Quick answer: To choose a quartz colour, start with your cabinets, flooring, and natural light. Compare warm and cool undertones, view larger samples inside the kitchen, and consider how much pattern the room can handle. For many busy kitchens, soft whites, warm neutrals, subtle greys, and lightly patterned quartz are easier to coordinate and more forgiving in everyday use.

How to Choose Quartz Colour Without Guesswork

Start with the elements that are hardest or most expensive to change. For most kitchen projects, that means cabinetry, flooring, and the overall amount of natural light. Paint can be adjusted later. Countertops usually cannot, so quartz should be chosen with the larger fixed finishes in mind.

Bring cabinet door samples, flooring pieces, backsplash samples, and paint swatches when viewing quartz. Looking at materials one at a time is where many colour decisions go wrong. Even a small cabinet sample beside a quartz sample can reveal a clash between warm and cool tones that was not obvious before.

It also helps to decide what role you want the countertop to play. Quartz can be a quiet background that lets cabinetry take the lead, or it can become the main visual feature of the room. Both approaches work, but trying to make every surface a statement often makes the kitchen feel busy.

Check the Undertones, Not Just the Main Colour

White quartz is not simply white. Some whites lean creamy or ivory, while others have cool grey, blue, or crisp bright-white undertones. The same is true of grey, beige, and black surfaces.

A warm white quartz can make cool white cabinets look stark or slightly blue. A cool grey slab beside warm oak may feel disconnected unless another finish ties them together.

Look at the sample in daylight and then under the kitchen’s planned lighting. Hold it next to cabinet doors rather than against a white showroom wall. If you cannot identify the undertone right away, compare it with a pure white sheet of paper. Warmth, greyness, or cream tones become easier to see.

For homeowners choosing between two close options, the better choice is usually the sample that makes the cabinets look more intentional, not the one that appears whitest on its own.

Let Kitchen Lighting Guide the Quartz Colour

Lighting changes quartz more than many homeowners expect. North-facing rooms often receive cooler, softer natural light, which can make grey veining or cooler tones appear more noticeable. Kitchens with stronger southern or western sunlight can bring out warmth in creamy whites, taupes, and beige veining.

Artificial lighting matters too. Warm bulbs can add a yellow cast to a bright white countertop, while cooler LEDs may emphasize grey veining.

Before finalizing a colour, view a larger sample in the room at different times of day. If the kitchen is still under construction, examine samples near a window and under lighting similar to what will eventually be installed.

This step is especially useful in all-white kitchens. When cabinets, backsplash, and quartz are all light, small differences in undertone become much more noticeable. A slight contrast between the cabinet white and countertop white often looks cleaner than attempting to match both surfaces exactly.

Choose Quartz Pattern Based on the Size of the Kitchen

Quartz patterns range from nearly solid colours to broad marble-inspired veining. The right scale depends on the room, slab layout, and other finishes nearby.

A quiet, fine-grain quartz works well when the kitchen already includes movement in wood grain, backsplash tile, or flooring. It can also be practical for smaller countertops, where large veins may be divided into short sections and lose their intended flow.

Large-format veining can make a strong focal point on a wide island, particularly when the island includes a waterfall edge. Dramatic patterns, however, require careful slab planning. Veins may appear differently across perimeter countertops, islands, backsplashes, and waterfall panels.

A fabricator can review where seams, sink cutouts, cooktops, and other openings will fall before fabrication so the finished pattern feels deliberate. You can also read our kitchen countertop seams guide to understand how slab size and layout can affect seam placement.

Do not choose a heavily veined quartz solely from a small sample. Ask to view the full slab or a large slab image where available. A sample can show the colour family, but it cannot show the true width, direction, and concentration of the veining.

Think Honestly About Daily Kitchen Use

Quartz is nonporous and does not require routine sealing, which makes it a practical countertop surface for busy kitchens. Colour can still affect how much day-to-day evidence of cooking is visible.

Very dark solid quartz can show pale crumbs, dust, dried water spots, and fingerprints, particularly in areas with hard water. Very bright white quartz can make coffee drips, sauce, and darker crumbs easy to notice until the surface is wiped.

Neither option is necessarily harder to clean. For everyday care, mild soap, water, and a soft cloth are usually enough. The difference is how visible normal kitchen residue appears between cleanings.

For an active family kitchen, many homeowners find that soft whites with gentle grey or taupe detail, mid-tone greys, and subtle patterns are forgiving choices. They can disguise everyday crumbs better than perfectly solid dark or bright white surfaces without making the kitchen feel overly patterned.

Avoid choosing quartz only because it hides mess. The countertop should still suit the kitchen. The goal is to choose a finish you will be comfortable maintaining while still enjoying how it looks.

Coordinate Quartz With Cabinets and Backsplash

With white or painted cabinets, quartz gives you considerable flexibility. A warmer quartz can soften a kitchen with beige, greige, or natural wood accents. Cooler white or grey-veined quartz often works well with cleaner, more contemporary cabinet colours.

If the cabinets are a strong colour, such as navy, green, or charcoal, a quieter countertop usually helps keep the room balanced.

Choosing Quartz for Wood Cabinets

Wood cabinetry deserves extra attention because wood carries a noticeable undertone. Oak may appear golden, red-toned, or neutral depending on the species and finish. Walnut often introduces richer brown and reddish tones.

Pairing warm wood cabinets with a cool quartz can work, but another element such as hardware, backsplash tile, flooring, or wall colour should connect the two surfaces. Otherwise, the countertop and cabinetry may look as though they were selected independently.

Choosing a Backsplash After Quartz

Backsplash decisions are usually easier after the countertop has been selected, particularly with veined quartz. A busy countertop paired with a busy backsplash can create too much visual competition.

Many kitchens benefit from a simple backsplash that picks up one colour from the countertop rather than trying to repeat every vein or pattern.

If you are considering using the same quartz vertically, our guide to the pros and cons of a quartz backsplash explains the design, maintenance, fabrication, and cost considerations.

Using the same quartz as a full-height backsplash can create strong visual continuity, but slab size and pattern placement should be considered before fabrication. Depending on the kitchen, the backsplash may also affect how many slabs are required.

Consider Thickness, Edge Profiles, and Waterfalls Early

Colour is the first thing people notice, but fabrication details have a major effect on the finished countertop.

A 2 cm or 3 cm countertop thickness can make the same quartz colour feel different. A thicker appearance gives an island more visual weight, while a slimmer profile can suit a cleaner, understated kitchen design.

Choose an Edge That Suits the Quartz Pattern

A simple eased edge keeps attention on the quartz colour and pattern and is easy to maintain. More detailed profiles can suit traditional cabinetry, although they may compete visually with heavily veined surfaces.

Our guide to the best countertop edge styles explains how different profiles affect appearance, maintenance, and fabrication.

If you are considering a mitered countertop edge to create a thicker appearance, review the colour and vein direction around the edge return. Precision fabrication makes a noticeable difference in how continuous the pattern appears.

Plan Waterfall Islands Before Fabrication

Waterfall islands deserve the same planning. Some homeowners prefer the veining to continue from the horizontal countertop down the side panel, while others are comfortable with the waterfall reading as a separate visual plane.

Neither approach is automatically better. The right decision depends on the quartz pattern, available slab yield, fabrication requirements, budget, and how important vein continuity is to the design.

View a Larger Quartz Sample Before You Commit

The final decision should not be made from a small chip under showroom lighting. Take home a larger sample whenever possible and place it horizontally, the same way the countertop will sit.

Stand back from the sample, then look at it closely beside cabinets, flooring, and backsplash materials. Check it in morning daylight, afternoon light, and under the kitchen’s artificial lighting.

Pay attention to finish as well as colour. Most quartz is polished, but matte, honed, or suede-style finishes may be available in certain collections. Matte finishes can soften bold colours and reduce glare, although fingerprints and oils may appear differently than they do on polished surfaces.

If you are comparing finishes, our guide to matte versus polished countertops explains how each option behaves in everyday kitchens.

What to Review Before Ordering Quartz

Once you have narrowed the selection to one or two colours, review the complete project rather than looking at colour alone. Before ordering or templating, consider:

  • How the quartz undertone works with the cabinet finish
  • How the slab looks in natural and artificial light
  • Whether the pattern scale suits the countertop size
  • Where seams and cutouts may interrupt large veins
  • Whether the backsplash will compete with the countertop
  • How visible crumbs, fingerprints, and water marks may be
  • The countertop thickness and edge profile
  • Whether an island or waterfall requires vein matching
  • Whether the full project can be fabricated efficiently from the selected slabs

At Stone Valley Countertops, material selection and fabrication planning are considered together. Reviewing the slab and project layout helps identify practical details such as sink placement, seam locations, overhangs, edge profiles, and how the quartz pattern will appear after fabrication.

A good quartz colour should still feel right after the cabinet hardware changes, the stools move in, and the kitchen is being used on a busy weekday. Give yourself time to see the material in real light, beside the finishes that will remain, and choose the option that feels settled rather than simply striking for a few minutes in a showroom.

Frequently Asked Questions About Choosing Quartz Colour

What quartz colour is easiest to keep looking clean?

Quartz with subtle movement, soft veining, or a light speckled pattern tends to disguise crumbs, fingerprints, and minor water marks better than completely solid black or bright white surfaces. Maintenance is still straightforward, but the pattern makes everyday residue less noticeable.

Should quartz countertops match the cabinets exactly?

No. An exact match is usually unnecessary and can be difficult because cabinet paint, quartz, and lighting all affect colour differently. A slight contrast often looks more intentional. The important part is making sure the undertones work together.

Should I choose the countertop or backsplash first?

In most kitchens, choose the countertop first. Quartz has fewer practical substitutes once fabrication begins, while backsplash tile is available in many colours, shapes, and finishes. Selecting the countertop first usually makes backsplash coordination easier.

Is white quartz still practical for a busy kitchen?

Yes. White quartz is nonporous and easy to maintain when cleaned properly. Very bright or solid white surfaces can make crumbs and spills more visible, so a soft white with subtle veining can be more forgiving for households that use the kitchen heavily.

Can quartz colour look different after installation?

Yes. The slab itself has not changed, but lighting, surrounding cabinetry, flooring, wall colour, and the size of the installed surface can make quartz appear warmer, cooler, lighter, or more patterned than it did in a showroom sample.

Do I need to see the full quartz slab before ordering?

It is especially useful for quartz with large veins, dramatic movement, or significant pattern variation. A small sample is usually enough to evaluate the base colour and undertone, but a full slab or large slab image gives you a much better idea of how the pattern will look across an island or long countertop run.

Compare Quartz Colours With Your Kitchen in Mind

If you are narrowing down quartz options, bring cabinet, flooring, or backsplash samples when you visit Stone Valley Countertops. Seeing the materials together makes it easier to compare undertones, patterns, thicknesses, edge profiles, and slab layouts before fabrication begins.

Contact Stone Valley Countertops to discuss your kitchen project or visit one of our Ontario showrooms to compare quartz options in person.

Countertop Backsplash Height Guide for Kitchens

Countertop Backsplash Height Guide for Kitchens

A backsplash that stops too low can leave a kitchen feeling unfinished. One that rises higher without a clear plan can complicate outlets, cabinet clearances, slab layout, and material costs. This countertop backsplash height guide explains the most common backsplash heights, where each option works best, and what homeowners should decide before stone is fabricated.

The right height is not based on appearance alone. Cabinet spacing, cooking areas, windows, outlets, countertop material, slab size, and how the kitchen is used can all affect the final decision.

Countertop backsplash height guide showing a kitchen with countertop and backsplash

Quick answer: The most common countertop backsplash heights are 4 inches, approximately 6 to 12 inches for a mid-height backsplash, or full height from the countertop to the underside of the upper cabinets. In many kitchens, upper cabinets are roughly 18 inches above the countertop, so a full-height backsplash often fills that entire space. The exact measurement should always be confirmed during templating.

What Is the Standard Countertop Backsplash Height?

There is no single standard backsplash height that works for every kitchen. Most projects fall into three common categories: a short 4-inch backsplash, a mid-height backsplash, or a full-height backsplash.

4-Inch Countertop Backsplash

A 4-inch backsplash is the traditional countertop return. It runs along the back edge of the countertop and protects the lower portion of the wall from water, spills, and everyday cleaning.

It is practical, relatively simple to fabricate, and usually made from the same material as the countertop. It can work particularly well when tile, paint, or another wall finish will be installed above it.

Four-inch backsplashes are also common in bathrooms, laundry rooms, mudrooms, basement kitchens, bars, and utility spaces where full-height stone may not be necessary.

6 to 12-Inch Mid-Height Backsplash

A mid-height backsplash usually rises about 6 to 12 inches above the countertop. It provides more wall protection than a traditional 4-inch return without covering the entire wall.

This height can work well behind sinks, coffee stations, wet bars, bathroom vanities, or counters with open wall space above them.

The exact height should feel intentional. A backsplash that stops at an arbitrary point on a large wall can sometimes look unfinished, so nearby outlets, shelves, windows, and cabinetry should help determine where the material ends.

Full-Height Countertop Backsplash

A full-height backsplash extends from the countertop to the underside of the upper cabinets. Where upper cabinets are not present, the material may continue to a range hood, floating shelf, window, or another architectural stopping point.

In many kitchens, the distance between the countertop and upper cabinets is around 18 inches, but that number should never be assumed during fabrication. Cabinet heights, floor conditions, countertop thickness, and installation tolerances can all affect the actual opening.

Full-height backsplashes are especially effective when homeowners want the countertop material to become part of the wall design. Quartz, granite, marble, quartzite, porcelain, and sintered stone can all be used depending on the project and material specifications.

How to Choose the Right Backsplash Height

The practical starting point is the wall itself. Look at the distance between the countertop and the cabinets, along with windows, range hoods, shelves, outlets, and other fixed elements.

A 4-inch backsplash may make sense when you want to keep more painted wall visible, plan to install tile above the countertop, or want to reduce the amount of slab material required.

A mid-height backsplash provides additional protection while still leaving part of the wall exposed.

Full-height stone works well when you want a continuous surface, easier wall cleanup, or a stronger connection between the countertop and backsplash.

If you are considering using the same quartz material on both surfaces, our guide to the pros and cons of quartz backsplashes explains some of the practical benefits and limitations.

Should a Backsplash Go All the Way to the Upper Cabinets?

It does not have to, but extending the backsplash to the cabinets usually creates a more continuous appearance and removes the narrow painted wall section between the countertop and cabinetry.

A full-height backsplash can also simplify everyday cleaning because cooking residue and water splashes land on the finished surface rather than drywall.

The trade-off is additional material and fabrication. Full-height backsplash pieces may require outlet cutouts, seams, polished exposed edges, detailed slab layout, and more precise installation.

For heavily veined quartz, marble, granite, or quartzite, the appearance of the backsplash should also be considered during slab layout. A beautiful countertop layout does not automatically create a good backsplash layout if the remaining slab sections are not planned in advance.

Consider the Area Behind the Range

The wall behind a cooktop or range usually deserves additional consideration because it is exposed to cooking residue, steam, and splashes more frequently than other backsplash areas.

Some kitchens use full-height material behind the range while keeping a shorter backsplash elsewhere. Others continue the full-height slab across the entire kitchen for a more consistent look.

Material selection matters in this area. Natural stones such as marble can develop etching or staining when exposed to certain foods and cleaners. Granite and quartzite are generally durable natural-stone choices, while porcelain and sintered stone are also commonly considered for wall applications.

Quartz is widely used for kitchen backsplashes as well, but installations around cooking appliances should always follow the countertop manufacturer’s requirements and the appliance manufacturer’s required clearances. Those requirements should be confirmed before fabrication.

If you are comparing natural stone options, our quartzite vs granite durability guide explains how the two materials perform in everyday kitchen use.

Full-Height Backsplashes Need a Slab Layout Plan

A full-height backsplash is not simply a larger version of a 4-inch backsplash. It is a fabricated wall panel with pattern direction, cutouts, seams, edges, and installation access to consider.

With veined quartz, marble, granite, or quartzite, slab layout becomes particularly important. The fabricator may try to carry movement from the countertop into the backsplash, centre an attractive section behind the range, or choose a quieter portion of the slab so the countertop remains the main feature.

These decisions can affect slab yield. In some projects, the countertop and backsplash fit comfortably within the planned material. In others, achieving a specific vein pattern or bookmatched effect can require additional slab area.

Backsplash Seams

A seam may be necessary when the backsplash wall is longer than the available slab section, when access into the home limits piece size, or when cutouts and material characteristics make one large panel impractical.

Good seam placement makes a noticeable difference. Where possible, seams are usually planned away from prominent focal areas and positioned where the surrounding pattern makes them less noticeable.

Just like countertop seams, backsplash seam locations depend on slab dimensions, material movement, fabrication limits, wall conditions, and access to the installation area. Our kitchen countertop seams guide explains how fabricators approach seam planning in more detail.

Exposed Backsplash Edges

Backsplash pieces that stop at an open wall, cabinet side, doorway, or window may need a finished exposed edge. Depending on the material, that edge may be polished, mitred, factory-finished, or handled using another appropriate fabrication method.

Window areas deserve particular attention. In some kitchens, the countertop material continues into the sill or around the opening. These details should be established during templating so the finished pieces meet cleanly.

Outlets, Switches, and Backsplash Height

Electrical outlets and switches are one of the biggest reasons backsplash planning should happen before fabrication.

Stone, quartz, porcelain, and sintered materials can be fabricated with accurate outlet openings, but the final outlet locations need to be established before the backsplash pieces are cut.

Moving an electrical box after a full-height stone backsplash has been fabricated can create delays or require additional work.

Outlet placement also affects slab appearance. On strongly veined material, several cutouts through a prominent vein can interrupt the pattern. Where practical, layout planning can help reduce the visual impact.

For Ontario kitchen projects, outlet placement and electrical changes should be coordinated with the appropriate electrician or contractor before final backsplash fabrication. The stone fabricator’s role is to accurately measure and cut around the confirmed locations.

Other Details That Need to Be Confirmed

Backsplash templating should also account for range hoods, pot fillers, windows, shelves, faucet clearances, cabinet panels, under-cabinet lighting, appliance clearances, and other fixtures that meet or pass through the backsplash.

It is much easier to plan these details before fabrication than to modify a finished backsplash panel on site.

Should the Countertop and Backsplash Be the Same Material?

They can be, but they do not need to match.

Using the same material for both surfaces creates continuity and can make the countertop feel more integrated into the architecture of the kitchen.

A quartz countertop paired with tile can introduce texture and contrast. Granite can be combined with porcelain or ceramic tile. A highly patterned natural-stone backsplash may also work better with a quieter countertop rather than repeating the same movement everywhere.

Matching materials often works particularly well with low-variation quartz or subtle natural stone. With heavily veined marble or quartzite, the slab should be viewed as a complete layout before deciding how much material should continue onto the walls.

In a smaller kitchen, too much high-contrast movement can make the room feel visually busy. In a larger kitchen with long walls and a substantial island, the same pattern may feel balanced.

How Backsplash Height Affects Countertop Cost

A 4-inch backsplash is usually the most economical stone backsplash option because it uses less material and involves relatively simple fabrication.

A full-height backsplash requires considerably more surface area. Additional fabrication may also be needed for outlet cutouts, exposed edges, seams, windows, shelves, range areas, and vein matching.

The slab itself can make a significant difference as well. A simple quartz pattern may allow efficient material use, while premium marble or quartzite with a specific desired layout may require additional slab area.

That is why backsplash pricing should be considered as part of the complete countertop layout rather than simply calculated by backsplash height. Our guide to budgeting for countertop replacement explains several other factors that affect overall project cost.

Why Backsplash Measurements Are Taken Carefully

Walls and cabinets may look perfectly straight, but small variations are common once accurate measurements are taken.

Cabinet bottoms can vary slightly in height. Walls can bow inward or outward. Corners may not be perfectly square. Countertops themselves may also need minor adjustments during installation.

These variations are particularly important with full-height slab backsplashes because the pieces often need to fit closely between the installed countertop and cabinetry.

Depending on the project, the backsplash may be templated along with the countertop or verified after the countertops are installed. Measuring after countertop installation can help account for the final counter position and small wall variations before the backsplash pieces are fabricated.

Countertop Backsplash Height Guide: A Practical Rule

For most homeowners, the decision can be simplified into three options.

  • Choose a 4-inch backsplash when you want basic wall protection, lower material use, or plan to use tile or another finish above it.
  • Choose a 6 to 12-inch backsplash when you want more protection in a specific area without covering the full wall.
  • Choose a full-height backsplash when you want a continuous surface from the countertop to the cabinets and are prepared to plan outlets, seams, slab layout, and other wall details before fabrication.

Before deciding, stand at the countertop and look at the entire wall rather than focusing only on the backsplash itself. Consider where the cabinets stop, where splashes are most likely, how outlets interrupt the wall, and whether the countertop pattern should continue vertically.

The best backsplash height is the one that works with the actual kitchen layout and can be fabricated cleanly without creating unnecessary complications.

Frequently Asked Questions About Countertop Backsplash Height

What is the standard height for a countertop backsplash?

A traditional countertop backsplash is commonly about 4 inches high. Full-height backsplashes usually extend from the countertop to the underside of the upper cabinets, which is often around 18 inches in many kitchens. The exact opening should be measured before fabrication.

Is a 4-inch backsplash outdated?

No. A 4-inch backsplash is still a practical option, especially in bathrooms, laundry rooms, rental properties, utility spaces, and kitchens where tile or another wall finish will be installed above the countertop.

Should backsplash go all the way to the cabinets?

It does not have to, but continuing the backsplash to the upper cabinets creates a continuous wall surface and eliminates the narrow section of painted wall between the countertop and cabinetry. It also provides more protection from splashes and cooking residue.

How high should a backsplash be behind a stove?

Many homeowners extend backsplash material higher behind a range or cooktop because that wall receives more cooking splatter. The final height depends on the range hood, cabinetry, selected material, appliance clearances, and manufacturer requirements.

Can countertop material be used as a full-height backsplash?

Yes. Quartz, granite, marble, quartzite, porcelain, and sintered stone can all be considered for full-height backsplash applications. Fabrication requirements vary by material, particularly for large panels, outlet cutouts, seams, exposed edges, and installation access.

Should backsplash be measured before or after countertops are installed?

It depends on the project. Some backsplash pieces can be templated with the countertops, while other full-height installations benefit from final measurements after the countertops are installed. This allows the fabricator to account for the finished counter position, cabinet spacing, and wall variations.

Planning a Stone Backsplash in Ontario?

If you are choosing between a 4-inch backsplash, a full-height slab backsplash, or something in between, it helps to make the decision before final fabrication begins. Material layout, outlets, seams, cabinet clearances, and wall conditions can all affect what will work best.

Stone Valley Countertops supplies, fabricates, and installs countertop and slab backsplash materials for homeowners across Toronto, Mississauga, Durham Region, Niagara, Hamilton, Burlington, Oakville, and surrounding Ontario communities.

If you already have a material or kitchen layout in mind, contact Stone Valley Countertops to discuss the countertop and backsplash details before templating.