Uncategorized

How to Measure Countertop Overhang Accurately

How to Measure Countertop Overhang Accurately

A countertop can look perfectly proportioned on a drawing and still feel awkward once stools are pulled up to the island. That is why learning how to measure countertop overhang starts with more than choosing a number. You need to measure from the finished cabinet face, account for the edge profile, and consider how the material will be supported.

Overhang affects legroom, seating comfort, cabinet access, and the structural demands placed on the stone. A small vanity overhang may need little more than a clean, finished edge. A deep island overhang in quartz, granite, marble, quartzite, porcelain, or sintered stone can require carefully planned support before fabrication begins.

Quick Answer: To measure countertop overhang, measure horizontally from the finished face of the cabinet or support panel to the outermost finished edge of the countertop. Standard front overhangs are commonly around 1 to 1Β½ inches, while seating overhangs are often planned around 12 to 15 inches for knee room. These are design dimensions, not universal unsupported-span allowances. Always confirm support requirements for the specific material, thickness, and installation.
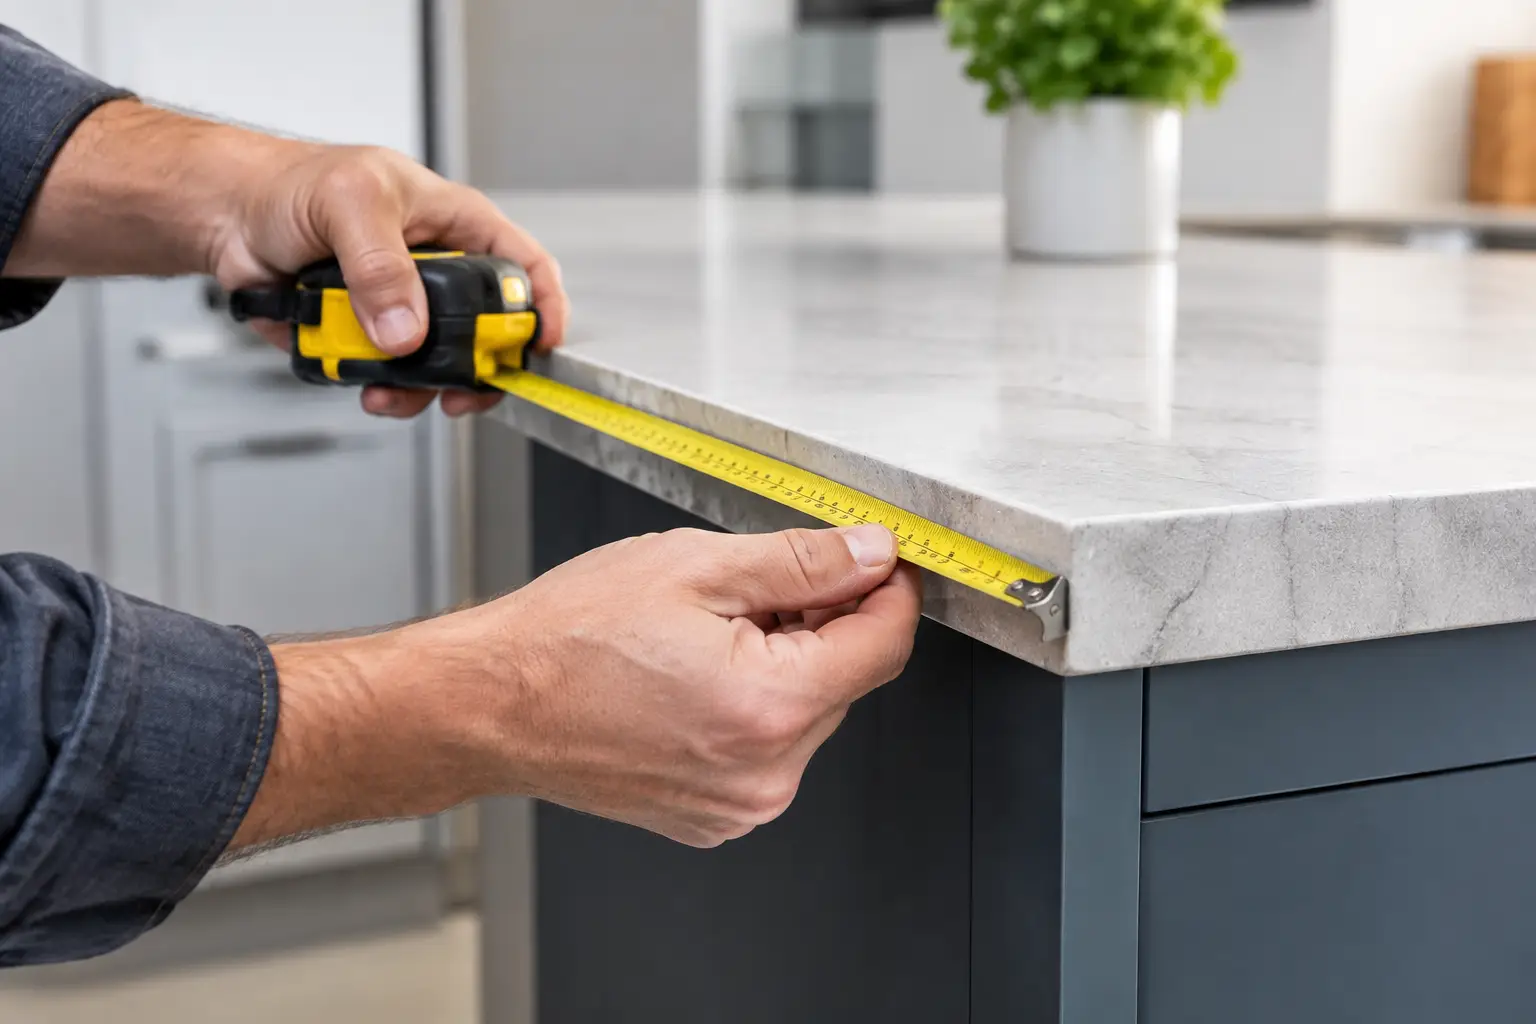
Measuring countertop overhang from the finished cabinet face to the stone countertop edge
Measure countertop overhang from the finished cabinet face to the outside edge of the countertop.

What Is Countertop Overhang?

Countertop overhang is the portion of the countertop that extends beyond the face of the base cabinet, panel, or other support below it.

It is not measured from the cabinet box behind the doors or from the toe kick. Measure horizontally from the finished vertical face that will sit directly below the countertop to the outermost finished edge of the stone.

For a typical cabinet run, the overhang at the front is often modest. It gives the doors and drawers visual clearance and creates a finished edge without taking up unnecessary floor space.

At an island or peninsula designed for seating, the overhang is deeper because it must provide knee and leg room.

The right amount depends on the intended use, countertop material and thickness, edge detail, cabinet construction, and whether additional support will be used.

How to Measure Countertop Overhang Step by Step

Accurate measurements begin with the finished cabinetry. If you are still planning your kitchen, use the final approved cabinet dimensions, including any decorative panels or finished gables.

Step 1: Identify the Finished Cabinet Face

Locate the finished vertical surface directly beneath the countertop. This may be the cabinet door face, a finished end panel, or another designated reference surface.

Make sure you are measuring from the correct point. Measuring from an unfinished cabinet box can produce a different result once doors or decorative panels are installed.

Step 2: Measure to the Outside Countertop Edge

Hold your tape measure perpendicular to the finished cabinet face and extend it to the outermost finished edge of the countertop.

The horizontal distance between those two points is the countertop overhang.

For an existing countertop, a straightedge held against the cabinet face can help establish the reference line. Measure from that line to the countertop edge without angling the tape.

Step 3: Calculate the Overhang

For a simple countertop with a known overall depth, you can calculate the overhang using this formula:

Countertop overhang = Total countertop depth βˆ’ Distance from the rear countertop edge to the finished cabinet face

For example, suppose a countertop measures 25Β½ inches deep and the distance from its rear edge to the finished cabinet face is 24 inches.

25Β½ inches βˆ’ 24 inches = 1Β½ inches of overhang.

This calculation assumes both measurements use the same rear reference point. If the countertop has a rear projection, wall gap, or backsplash detail, account for those dimensions separately.

Step 4: Check Multiple Locations

Measure near both ends and at the centre of a long countertop run or island.

Cabinets and walls are not always perfectly straight or square, especially in older Ontario homes. Small variations can affect the appearance of the finished overhang.

A professional template records these conditions before fabrication, allowing the fabricator to plan the finished edge consistently.

How Much Countertop Overhang Do You Need?

Overhang dimensions vary depending on whether the countertop is being used for a standard cabinet run, a kitchen island, or seating.

Countertop Application Typical Planning Dimension Considerations
Standard kitchen cabinet front 1 to 1Β½ inches Allow for cabinet doors, drawers, and edge appearance.
Bathroom vanity Approximately 1 inch Coordinate with cabinet design and nearby clearances.
Kitchen island seating 12 to 15 inches Consider knee room, stool height, and structural support.
Bar-height seating Approximately 12 inches Check stool dimensions and usable legroom.
Decorative end overhang Varies by design Confirm appearance, walkway clearance, and support.

These dimensions are general design references. They do not establish how far a particular stone slab can safely extend without support.

For a deeper projection, the fabricator should evaluate the countertop material, thickness, cabinet structure, and proposed reinforcement.

How to Measure Kitchen Island Seating Overhang

Kitchen islands require additional planning because the overhang must provide comfortable seating while preserving enough circulation space around the island.

Begin by identifying the finished seating-side cabinet face. Measure outward to the planned countertop edge, including the final edge detail.

For example, if you want a 12-inch seating overhang, the countertop must extend 12 inches beyond the chosen finished cabinet reference surface.

That does not necessarily mean the entire 12 inches is unobstructed knee space. Brackets, decorative panels, structural legs, and other supports may reduce the usable area.

Consider Stool Height and Knee Room

Counter-height and bar-height stools have different seating positions and legroom requirements.

Before finalizing the projection, consider the stool seat depth, footrest location, and how far occupants need to move their chairs to sit comfortably.

A shallow overhang can preserve aisle space in a compact kitchen, but it may feel uncomfortable during longer meals. A deeper overhang can improve seating comfort but may require reinforcement and reduce nearby walkway clearance.

Account for Waterfall Legs and End Panels

A waterfall countertop extends vertically down the side of an island, creating a continuous surface.

Although waterfall legs can provide an attractive finished appearance, they may affect the available seating width and legroom near the ends.

Measure the clear space between finished vertical elements rather than relying only on the overall island dimensions.

Does Countertop Thickness Affect Overhang?

Yes. Countertop thickness is one of several factors that influence how a projection must be supported.

A 2 cm slab and a 3 cm slab do not necessarily have the same structural requirements. Material composition, natural fissures, cutouts, seams, and manufacturer specifications also matter.

For example, a thick granite countertop may behave differently from a thin porcelain slab, while different quartz manufacturers may specify different reinforcement requirements.

Our guide to 2 cm vs. 3 cm countertops explains how slab thickness affects appearance, fabrication, and installation.

When Does Countertop Overhang Need Support?

Stone countertops can be strong and durable, but unsupported projections introduce bending stresses that must be considered during design.

Support requirements depend on the specific material, slab thickness, projection depth, nearby cutouts, seams, and the construction beneath the countertop.

Depending on the project, reinforcement may involve concealed steel plates, structural brackets, corbels, legs, or other approved support systems.

Support should be planned before fabrication so it can be integrated without interfering with drawers, cabinet doors, or seating comfort.

For a detailed explanation of structural requirements, read our countertop overhang support guide.

Pay Attention to Seams and Cutouts

Sink openings, cooktop cutouts, seams, and narrow sections of stone can affect how a countertop carries loads.

A seam near an unsupported seating edge may require a different layout or reinforcement approach than one positioned over a fully supported cabinet.

These decisions should be resolved during slab layout and fabrication planning, rather than after the countertop has been installed.

How Edge Profiles Affect Overhang Measurements

The finished edge is an important part of the measurement because it determines where the countertop physically ends.

A simple eased edge and a thick mitered edge can have different visual proportions, even when the horizontal projection is identical.

For a built-up edge, measure to the outermost finished face of the assembly rather than assuming the visible edge matches the slab beneath it.

If you are comparing profiles, see our guide to countertop edge styles.

Common Countertop Overhang Measuring Mistakes

Even a small measuring error can create an uneven appearance or affect how a countertop fits against finished cabinetry.

  • Measuring from unfinished cabinets: Added doors, panels, or gables can change the final reference point.
  • Measuring at an angle: Keep the tape perpendicular to the cabinet face.
  • Ignoring edge details: Include the outermost finished edge in the measurement.
  • Measuring only once: Check several locations to identify cabinet alignment differences.
  • Forgetting seating clearance: Consider stools, legs, brackets, and nearby walkways.
  • Assuming support is unnecessary: Confirm the allowable projection with the fabricator before finalizing the design.

What to Prepare Before Countertop Templating

Before professional templating, cabinets and finished support panels should be permanently installed, secured, and ready for measurement.

Confirm the intended countertop overhang, edge profile, seating locations, stool dimensions, waterfall legs, and any decorative panels that affect the finished layout.

If you are choosing natural stone, review the full slab when possible. Veining, colour variation, fissures, and usable slab dimensions can influence the final layout.

For engineered materials, confirm the specific product’s fabrication and support requirements. Recommendations are not universal across brands and thicknesses.

To understand what happens after measurements are finalized, see our stone fabrication process guide.

Frequently Asked Questions About Countertop Overhang

How do you measure countertop overhang correctly?

Measure horizontally from the finished cabinet face or designated support surface to the outermost finished edge of the countertop. Keep the tape perpendicular to the cabinet face and check the dimension in several locations.

Is a 1Β½-inch countertop overhang normal?

Yes. A front overhang of approximately 1 to 1Β½ inches is common on standard kitchen cabinet runs. The appropriate dimension depends on cabinet construction, door clearance, and the intended appearance.

Is a 12-inch overhang enough for kitchen island seating?

A 12-inch overhang is a common planning dimension for counter-height seating and can work well for many kitchens. Comfort depends on stool dimensions, occupant height, and available knee room. Structural support must be evaluated separately.

Can quartz countertops have a 15-inch overhang?

A quartz countertop can be designed with a 15-inch seating projection, but that does not mean it can safely extend 15 inches without reinforcement. The fabricator must confirm the manufacturer’s requirements and design an appropriate support system.

Should countertop overhang be measured before or after cabinet installation?

Preliminary measurements can be taken from approved cabinet plans, but final countertop measurements should be confirmed after the cabinets and finished panels are installed. Professional templating verifies the actual site conditions before fabrication.

Final Thoughts on Measuring Countertop Overhang

A countertop overhang should feel intentional from every angle: comfortable at a stool, proportional to the cabinetry, clear of nearby walkways, and properly supported for the selected material.

Accurate measurements begin with the finished cabinet face, but the final decision also depends on slab thickness, edge profile, seating requirements, and fabrication details.

Taking the time to confirm these factors before templating can prevent awkward seating arrangements, inconsistent edges, and costly design changes.

Planning a New Countertop?

Stone Valley Countertops supplies, fabricates, and installs quartz, granite, marble, quartzite, porcelain, and sintered stone countertops throughout Ontario.

With showrooms in Mississauga, Bowmanville, Welland, and Orillia, our team can help review your countertop measurements, edge details, and installation requirements before fabrication begins.

Contact Stone Valley Countertops to discuss your project or arrange a consultation.

Countertop Fabricators Oakville: What to Ask

What to Ask Countertop Fabricators in Oakville

A countertop can look straightforward on a sample board and become much more complicated once it has to fit real cabinets, walls, sinks, appliances, and a particular slab. That is why choosing countertop fabricators Oakville homeowners can communicate with matters as much as choosing quartz, granite, marble, or porcelain. The finished result depends on decisions made well before installation day.

For a kitchen island with dramatic veining, a full-height backsplash, or a vanity with an undermount sink, details such as slab layout, seam placement, overhang support, and cutout requirements affect both appearance and long-term performance. Here is what to discuss before committing to a material or fabrication plan.

Quick Answer: Before hiring a countertop fabricator in Oakville, ask about actual slab selection, seam locations, sink support, edge profiles, overhang reinforcement, templating requirements, installation access, and exactly what the estimate includes. These details can affect the finished countertop as much as the material itself.

Homeowner discussing countertop slab layout and installation details with a fabricator
Reviewing the fabrication details early helps prevent surprises during installation.

Start With the Full Scope of the Project

A fabricator should understand more than the total square footage of countertop. Cabinet layout, appliance specifications, wall conditions, sink selection, backsplash plans, and island dimensions all influence how the material is measured, fabricated, and installed.

Bring cabinet drawings if you have them, along with the model information for sinks, cooktops, and faucets. A farmhouse sink, for example, needs different planning than a standard undermount sink. A cooktop cutout must be made to the appliance manufacturer’s requirements, while the amount of stone behind it may affect whether a full-height backsplash can be fabricated in one piece or needs a seam.

It also helps to decide early whether the countertop will continue into a waterfall leg, bar top, laundry counter, fireplace surround, or outdoor BBQ area. These are not simply add-ons. They can change the number of slabs required, the direction of a veined pattern, the edge treatment, and the installation sequence.

Compare Materials for the Way You Use the Space

There is no single best countertop material for every Oakville home. The practical choice depends on the room, your maintenance preferences, the look you want, and how the surface will be used.

Quartz countertops are popular for kitchens, bathrooms, and laundry areas because they offer consistent patterns and do not generally require the periodic sealing associated with many natural stones. However, quartz is not a universal solution. Heat exposure, direct outdoor use, and product-specific fabrication guidance should all be considered. Ask about the particular brand and colour rather than relying on broad assumptions about every quartz product.

Granite, marble, and quartzite are natural slabs, so each piece has its own movement, mineral variation, and colour range. Granite can be a practical choice for many kitchens, while marble is valued for its distinctive character but may show etching or wear more readily in active cooking spaces. Quartzite can offer dramatic natural movement and strong performance characteristics, but the name alone does not determine how a specific slab will behave. Natural materials should be viewed in person when possible.

Porcelain and sintered stone can be useful for countertops, full-height backsplashes, shower walls, and certain outdoor applications, depending on the product and installation conditions. Their large-format appearance and thin profiles can be appealing, but they require careful handling during fabrication and installation. Edge details, cutouts, and substrate conditions deserve a specific conversation.

Ask to See the Actual Slab

A small sample is useful for narrowing down colour families, but it cannot show the full personality of a natural slab or a large-pattern engineered surface. Veins may become stronger, lighter, wider, or change direction across a full slab. This matters especially when a kitchen includes a large island, a waterfall edge, or full-height backsplash panels.

Viewing the slab gives you a chance to discuss layout. A fabricator can explain where the most prominent movement may land, how the pattern may flow across an island and waterfall leg, and whether bookmatching is feasible for a particular material and design. Bookmatching can create a mirrored vein effect across adjoining pieces, but it may require more material and is not appropriate for every slab or layout. For more preparation tips, read our guide to choosing a countertop slab.

If you are selecting a quieter quartz colour, slab viewing may be less critical, though it can still help confirm tone and pattern variation. Lighting also changes perception. A colour that reads warm in a showroom can look different beside cool cabinetry or under daylight from a large kitchen window.

Discuss Seams Before Fabrication Begins

Many countertop projects have seams. Even a modest kitchen may require one because of slab dimensions, access into the home, an L-shaped layout, or the need to protect a fragile area during handling. A seam is not necessarily a flaw, but it should be planned rather than treated as a surprise.

Ask where seams are likely to be located and why. Fabricators generally try to place them where they are less noticeable, while also accounting for material strength, cabinet layout, transportation, and access. In a veined material, the fabricator may also consider how movement can be aligned across the seam. Exact visual continuity is not always possible, particularly with natural stone or heavily patterned designs.

Very narrow pieces around a sink or cooktop can be vulnerable during fabrication and transport. In some layouts, a seam or a small design adjustment may be the more sensible option. A good discussion explains the trade-off instead of promising an invisible result in every situation.

Confirm Thickness, Edges, and Overhang Support

Countertops are commonly fabricated in different thicknesses, and the selected material may influence the available options. Thickness affects the visual weight of an island, the profile of a waterfall leg, and how the countertop meets a backsplash or window sill. A built-up edge can create a thicker appearance, but it is a fabrication detail that should be reviewed for joint visibility and design intent.

Edge profiles deserve attention because they affect both appearance and daily use. A simple eased edge has a clean, contemporary look and works with many materials. More detailed profiles can suit traditional cabinetry, but they may create areas where crumbs collect or where a veined pattern is interrupted. The right choice is usually the one that fits the cabinet style and is comfortable in the space, not the most elaborate option on a display rack.

Overhangs need particular care. A short seating overhang may be achievable without additional support, while a deeper or longer overhang may require brackets, legs, or other structural support. The material type, thickness, cabinet construction, and shape of the overhang all matter. Confirm support requirements before cabinets are finalized, especially for large islands and cantilevered bar areas.

Know What Happens at Templating and Installation

Templating is when final field measurements are taken after cabinets are installed, secured, and level. Walls are rarely perfectly straight, and floors can vary. Templates capture those real conditions so the countertop can be fabricated to fit the space rather than only the original drawing.

Before templating, cabinets should be complete and stable. Sinks, faucets, cooktops, and other relevant specifications should be available. If a wall tile backsplash, decorative panel, or appliance is being coordinated with the countertop, clarify the order of work with the trades involved. Countertop installation often depends on work completed by others, and changes after templating can require revisions.

Installation day also has practical limits. Fabricators need a clear path into the home, adequate access around the work area, and cabinets capable of supporting the material. Large islands, oversized slabs, and full-height panels may require additional handling considerations. Your fabricator should identify access concerns early instead of discovering them when a finished piece arrives. Our stone fabrication process guide explains the steps from measurement through installation.

Questions for Countertop Fabricators in Oakville

When comparing countertop fabricators serving Oakville, focus on the answers behind the estimate. Ask how the material will be laid out, where seams are anticipated, and whether you can approve the slab or pattern placement before fabrication. Ask how the selected sink will be supported, what edge profile is included, and whether your island overhang needs brackets or another support method.

Also ask what is included for cutouts, backsplash pieces, removal of existing material if needed, and installation conditions. Estimates can differ because project scopes differ. A lower number may not reflect the same slab allocation, edge treatment, sink work, or installation complexity.

For natural stone, ask about recommended care for that particular material. For quartz, porcelain, and sintered stone, ask for the manufacturer’s guidance where heat, outdoor exposure, or specialty applications are involved. Honest material advice should include limitations, not just advantages.

Frequently Asked Questions

What should I ask a countertop fabricator before accepting a quote?

Confirm the exact material and thickness, slab allocation, edge profile, sink and cooktop cutouts, seam locations, templating, delivery, installation, and any exclusions. Ask whether removal, plumbing reconnection, and extra support are included or handled separately.

Can I choose the exact slab for my countertop?

Many fabricators can arrange slab viewing or selection, especially for natural stone and strongly veined materials. Ask whether the actual slab and proposed layout can be reviewed before cutting, and whether approval is part of the process.

Will my new countertop have a visible seam?

That depends on the slab size, kitchen layout, material, and access to the home. Some projects can be fabricated without a seam, while others require one. Seam placement and pattern alignment should be discussed before fabrication.

When should countertops be measured for fabrication?

Final templating generally takes place once cabinets are installed, secured, and level, with sink and appliance specifications confirmed. Changes to cabinets or walls after templating may affect fit and require new measurements.

How long does countertop fabrication and installation take in Oakville?

Timing depends on slab availability, project complexity, final measurements, and scheduling. Ask the fabricator for a project-specific timeline after templating rather than assuming every material or installation follows the same schedule.

Plan Your Oakville Countertop Project

A well-planned countertop project is less about picking a colour quickly and more about making the visible and structural details work together. Stone Valley Countertops serves Oakville homeowners with countertop supply, fabrication, and installation. To discuss material options, slab layout, seams, and installation requirements, contact Stone Valley Countertops with your measurements, drawings, or project photos.

Countertop Options for Dark Cabinets That Work

Countertop Options for Dark Cabinets That Work

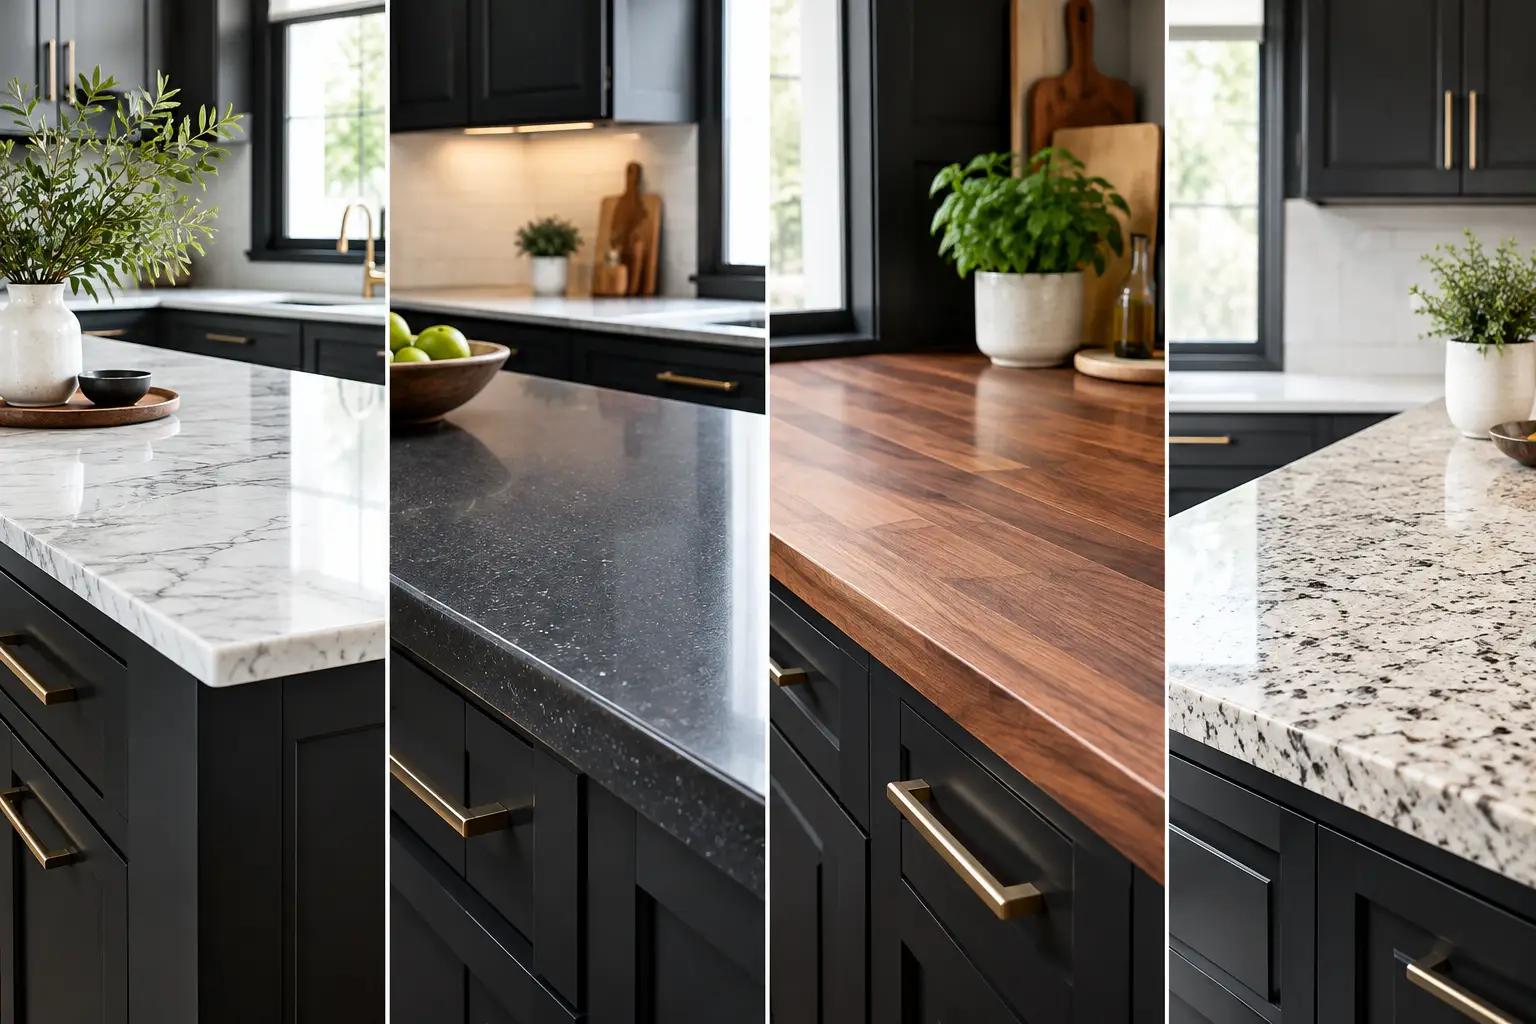
Quick answer: The best countertop options for dark cabinets are often white or warm off-white quartz, light granite, softly veined quartzite, and marble-look porcelain. For a moodier kitchen, charcoal, black, or bronze-toned stone can also work. Match the countertop undertone to the cabinetry and check both samples under your kitchen lighting.
Light stone countertops paired with dark kitchen cabinets and a contrasting island
Compare countertop colour, veining and finish against your actual cabinet sample.

Dark cabinets can make a kitchen feel tailored and substantial, but they leave less room for a countertop that is merely β€œclose enough.” The best countertop options for dark cabinets depend on the cabinet undertone, the amount of natural light, and how much visual movement the room can handle. A bright white surface can look crisp against black or espresso cabinetry, while a warm stone may be the better fit for deep brown, green, or charcoal finishes.

The countertop is also where the design becomes physical. Slab layout, seam placement, sink cutouts, edge profiles, and backsplash height all affect the finished result. Choosing a colour sample before seeing the full material can be useful, but it should not be the final decision for a veined natural stone or a highly patterned quartz.

Start with the undertone of the dark cabinet

β€œDark” is a broad description. A cabinet that reads as black may have blue, brown, green, or grey undertones. Espresso cabinets often carry noticeable warmth, while dark blue cabinets can look nearly black under some lighting. Put the cabinet sample beside the countertop sample in the actual room if possible, then look at it in daylight and under the kitchen lighting.

A surface with the wrong undertone can make a well-built kitchen feel disconnected. Cool white quartz with a sharp grey vein may suit charcoal or blue-black cabinets, but it can appear stark beside warm walnut-toned cabinetry. Conversely, cream or beige stone can soften warm dark cabinets beautifully but may look yellow against a very cool black finish.

Lighting changes this decision more than many homeowners expect. Dark cabinetry absorbs light, so kitchens with limited windows often benefit from a lighter countertop, reflective finish, or full-height backsplash that carries the surface upward. A dark-on-dark combination can work, but it needs enough lighting and contrast in other elements, such as wall colour, hardware, or flooring, to avoid looking flat.

Light countertops for dark cabinets

Light surfaces are the most common direction because they clearly separate the work surface from the cabinetry. That contrast can make a smaller kitchen feel more open and makes dark cabinet details easier to see.

White and off-white quartz

White quartz is a practical choice for homeowners who want a clean contrast with dark cabinets and a relatively consistent appearance across the kitchen. Designs range from plain soft whites to marble-look patterns with grey, taupe, or warm brown veining. The right option depends on whether the cabinets need a crisp contrast or a warmer transition.

Quartz is nonporous, which generally makes everyday cleanup straightforward. Still, β€œwhite” does not mean identical from one design to another. Some options have a bright, cool base; others are creamy or carry noticeable speckling. If the design has directional veining, review the slab layout before fabrication, particularly for a large island, waterfall leg, or full-height backsplash.

For dark cabinets, avoid choosing a heavily veined quartz simply because it looks dramatic on a small sample. Once it covers long perimeter runs and an island, the pattern can become the dominant feature. That may be exactly the intended look, but it should be deliberate.

Soft grey, greige, and light taupe

These colours provide contrast without the sharpness of a pure white counter. A pale grey works well with charcoal, black, or navy cabinets, especially when the room has stainless steel or brushed nickel details. Greige and light taupe often suit dark brown, black, or muted green cabinets because they bridge cool and warm elements.

A subtle pattern is often easier to live with than a completely solid pale surface. It can make crumbs, water marks, and everyday use less visually obvious without competing with the cabinetry. The specific finish matters too. Polished surfaces reflect more light, while honed or matte finishes create a quieter appearance but may show marks differently depending on the material.

Marble and marble-look surfaces

White marble with grey or warm veining is a classic pairing with dark cabinets. It offers natural variation that cannot be replicated exactly, and that variation is part of the appeal. It also requires an honest discussion about use. Marble can etch when exposed to acidic foods and drinks, and it can stain if spills are left untreated. Sealing helps with stain resistance but does not prevent etching.

For kitchens that need the look with less day-to-day concern, marble-look quartz, porcelain, or sintered stone may be worth considering. Their performance characteristics vary by product and manufacturer, so the exact slab or collection should be reviewed before selecting it for a particular application.

Dark and mid-tone countertop options for dark cabinets

A light countertop is not the only answer. Tonal kitchens can look intentional and refined when the materials have enough difference in texture, veining, or finish.

Black, charcoal, and deep grey stone

Black granite, dark quartz, soapstone-look materials, and charcoal porcelain can create a low-contrast kitchen with a strong architectural feel. This direction works particularly well in rooms with generous windows, light walls, or a large island that breaks up the dark perimeter cabinetry.

The practical trade-off is visibility. Dust, fingerprints, and water spots may stand out on a very dark polished surface. A leathered or honed finish can change the look and reduce glare, but it also changes how the material feels and cleans. Not every stone or manufactured slab is available in every finish, and some finishes may require more attention around oils or spills.

Dark natural stone should always be selected from the actual slab. Two slabs with the same name can have different veining, mineral deposits, fissures, or movement. Those are normal characteristics of many natural materials, not fabrication defects, but they should be understood before the slab is cut.

Warm brown, bronze, and earthy surfaces

Dark cabinets with brown undertones often pair naturally with quartzite, granite, or quartz that includes cream, gold, rust, bronze, or soft brown movement. These combinations can add warmth without making the room feel overly traditional. A warm countertop can also connect dark cabinetry to wood floors or brass hardware.

Quartzite is often selected for its natural movement and durability, but slabs vary significantly. Some have pronounced fissures, colour variation, or areas that need careful layout. Depending on the stone, sealing and appropriate care may be recommended. Review the slab in person and ask how its features will appear around sink cutouts, seams, and backsplash pieces.

Countertop details that affect the final look

Material selection is only part of the decision. With dark cabinets, small fabrication choices tend to stand out because contrast draws the eye to every transition.

Seams and vein flow

Most large kitchens require seams because slabs have finite dimensions. A fabricator plans seams around slab size, cabinet layout, sink locations, structural considerations, and the direction of the pattern. A seam can be minimised visually, but it will not disappear completely.

For veined material, decide where the movement should run before fabrication. Veins that flow along a long island can look very different from veins that run across it. If a waterfall leg or full-height backsplash is included, ask whether vein matching is desired and what slab quantity or layout that may require. A continuous visual flow often requires additional material and more planning.

Thickness, edges, and overhangs

A standard-looking edge can be achieved in more than one way. Some projects use a thicker slab, while others use a built-up or mitered edge to create a heavier profile. A mitered edge can give an island a substantial look, but the joint line and pattern alignment need careful fabrication, especially with veined designs.

Overhangs for seating need to be discussed early. The amount of unsupported stone that is appropriate depends on the material, thickness, overhang depth, cabinet construction, and the support method. Brackets or other support may be needed, and it is better to coordinate them before installation than to add them after the countertop is in place.

Sink cutouts and backsplash choices

An undermount sink keeps the counter surface easy to wipe down and works with many stone materials. The sink type, cutout shape, and reveal should be confirmed during templating. Heavy sinks may need cabinet support, particularly with certain installations.

A short backsplash lets the countertop remain the focal point, while a full-height backsplash can make a light stone feel more continuous against dark cabinets. If the backsplash uses a strongly veined slab, plan the layout as part of the countertop package rather than treating it as an afterthought.

Visit the slab before making the final call

Samples are useful for narrowing choices, but a full slab tells the real story. This is especially true for granite, marble, quartzite, and any design with broad or directional veining. Look at the slab from several feet away, not only at the most attractive section. Consider where the most active areas may land on the island, near the sink, or at a seam.

For quartz, porcelain, and sintered stone, the available slab size and pattern repeat still matter. Some products are designed with continuous movement, while others have a more uniform or repeating print. The fabricator can explain how the selected material may lay out on your kitchen and where practical compromises may be needed.

Stone Valley Countertops can help homeowners compare slab options and discuss the fabrication details before templating, including seams, edge treatments, cutouts, and backsplash planning. A well-matched surface is not necessarily the lightest or most dramatic one. It is the material whose colour, movement, and practical requirements still make sense after the cabinet doors are open, the lights are on, and the kitchen is being used every day.

Frequently asked questions

What colour countertop looks best with dark cabinets?

White, off-white, light grey and greige countertops provide clear contrast with dark cabinetry. Warm beige or bronze-toned stone can work especially well with espresso or walnut finishes. The best choice depends on cabinet undertones and lighting.

Should countertops be lighter or darker than cabinets?

They do not have to be lighter, but a light countertop often helps a darker kitchen feel brighter. Dark-on-dark combinations work best when lighting, walls, flooring or backsplash details provide enough contrast.

Is quartz a good option for black kitchen cabinets?

Yes. Quartz offers a wide selection of white, cream, grey and marble-look designs that contrast well with black cabinets. It is nonporous and does not require routine sealing, although hot cookware should still be placed on trivets.

What countertops work with dark brown cabinets?

Warm off-white quartz, greige surfaces, and granite or quartzite with cream, gold or bronze movement usually complement brown undertones. Compare physical samples to avoid an overly yellow or grey pairing.

Are dark countertops difficult to maintain?

Maintenance depends on the material and finish. Some black polished surfaces show dust, fingerprints and dried water spots more clearly. Honed and leathered finishes can change their visibility, but may have different cleaning requirements.

Do I need to see the full slab before ordering?

For natural stone and heavily veined designs, viewing the actual slab is strongly recommended. It helps you approve colour variation, vein direction, potential seams and the placement of prominent patterns before cutting begins.

Compare countertop options at Stone Valley

Stone Valley Countertops supplies, fabricates and installs stone surfaces for kitchens across Ontario. Bring a cabinet sample, photos and approximate dimensions to discuss materials, slab layouts, edges and backsplash details. You can visit our showrooms in Mississauga, Bowmanville, Welland or Orillia, or contact us about your project.

Kitchen Island Trends That Work in Real Homes

Kitchen Island Trends That Work in Real Homes

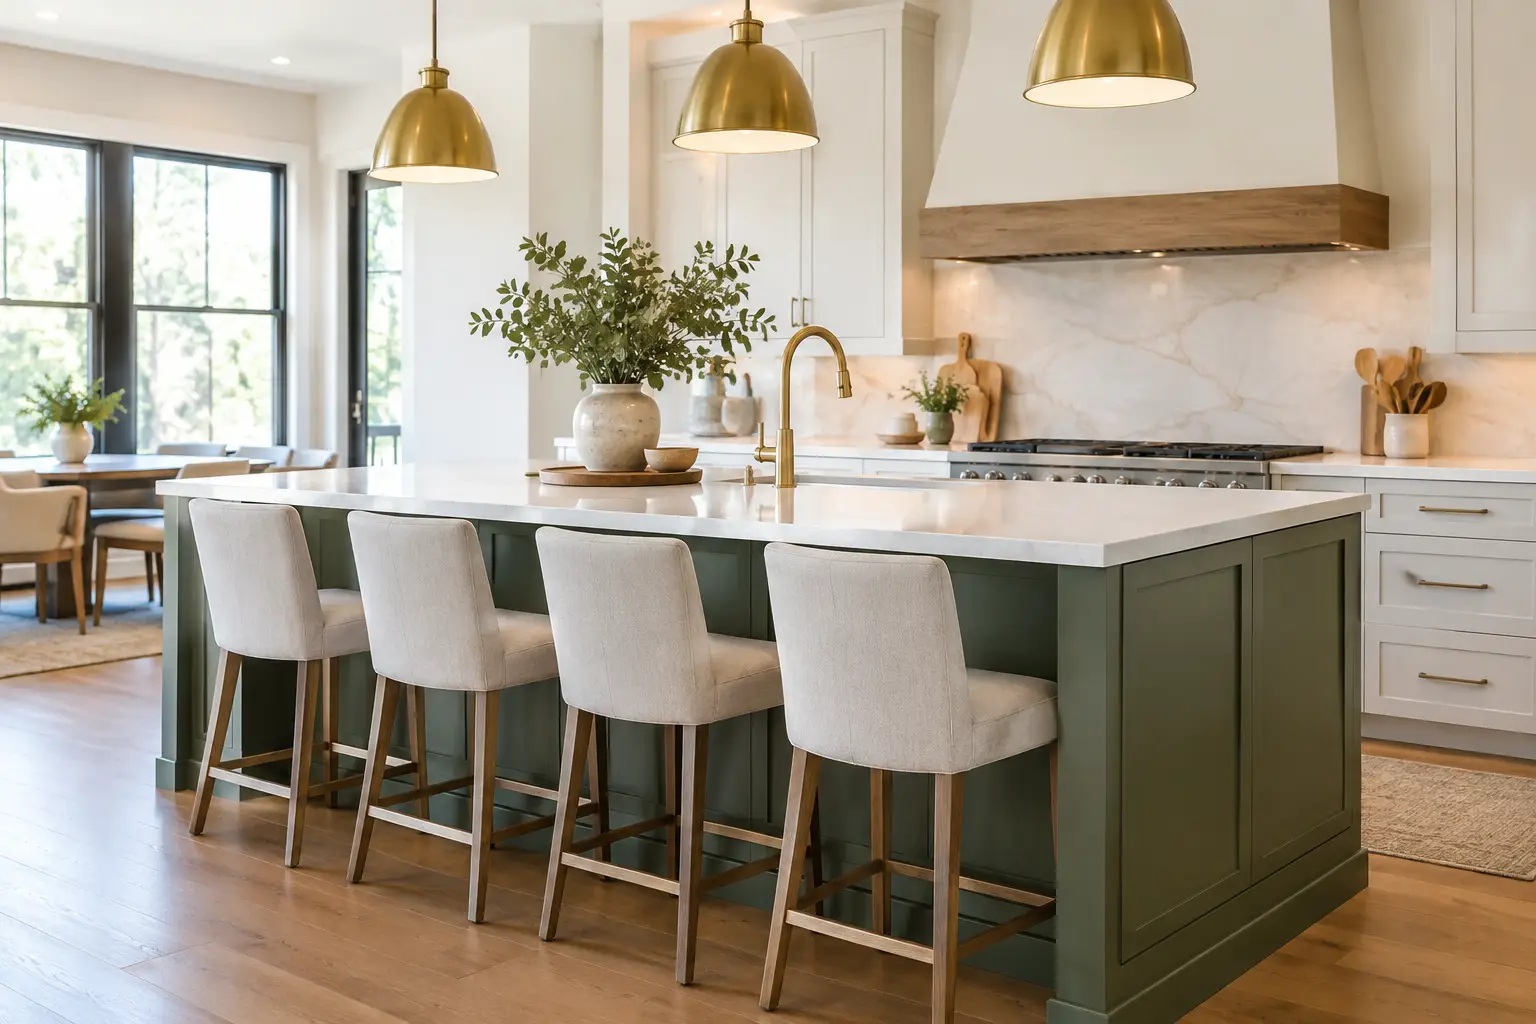
Kitchen island trends are moving away from showpiece-only designs and toward islands that earn their footprint every day. Homeowners still want a focal point, but they also need a surface that handles breakfast, homework, entertaining, meal prep, and the occasional spilled glass of red wine. The best result is not simply the most dramatic island. It is one that looks considered, fits the room, and is fabricated for how the household actually lives.

A kitchen island brings several countertop decisions together in one place: material, slab layout, thickness, edge profile, seating overhang, seams, sink or cooktop cutouts, and support. Looking at current ideas through that practical lens helps prevent a design choice from becoming a daily frustration.

Quick Answer

Current kitchen island trends favour waterfall ends, thicker-looking profiles, warm whites and natural stone-inspired movement, oversized work surfaces, and practical seating. The best island design also accounts for slab size, seams, overhang support, edge details, traffic flow, and how the surface will actually be used.

Kitchen Island Trends With Staying Power

The strongest kitchen island trends are less about chasing a single colour and more about using stone deliberately. Natural-looking movement, clean geometry, and functional details are taking priority over overly busy patterns and complicated shapes.

Waterfall Ends Remain Popular, With a Practical Caveat

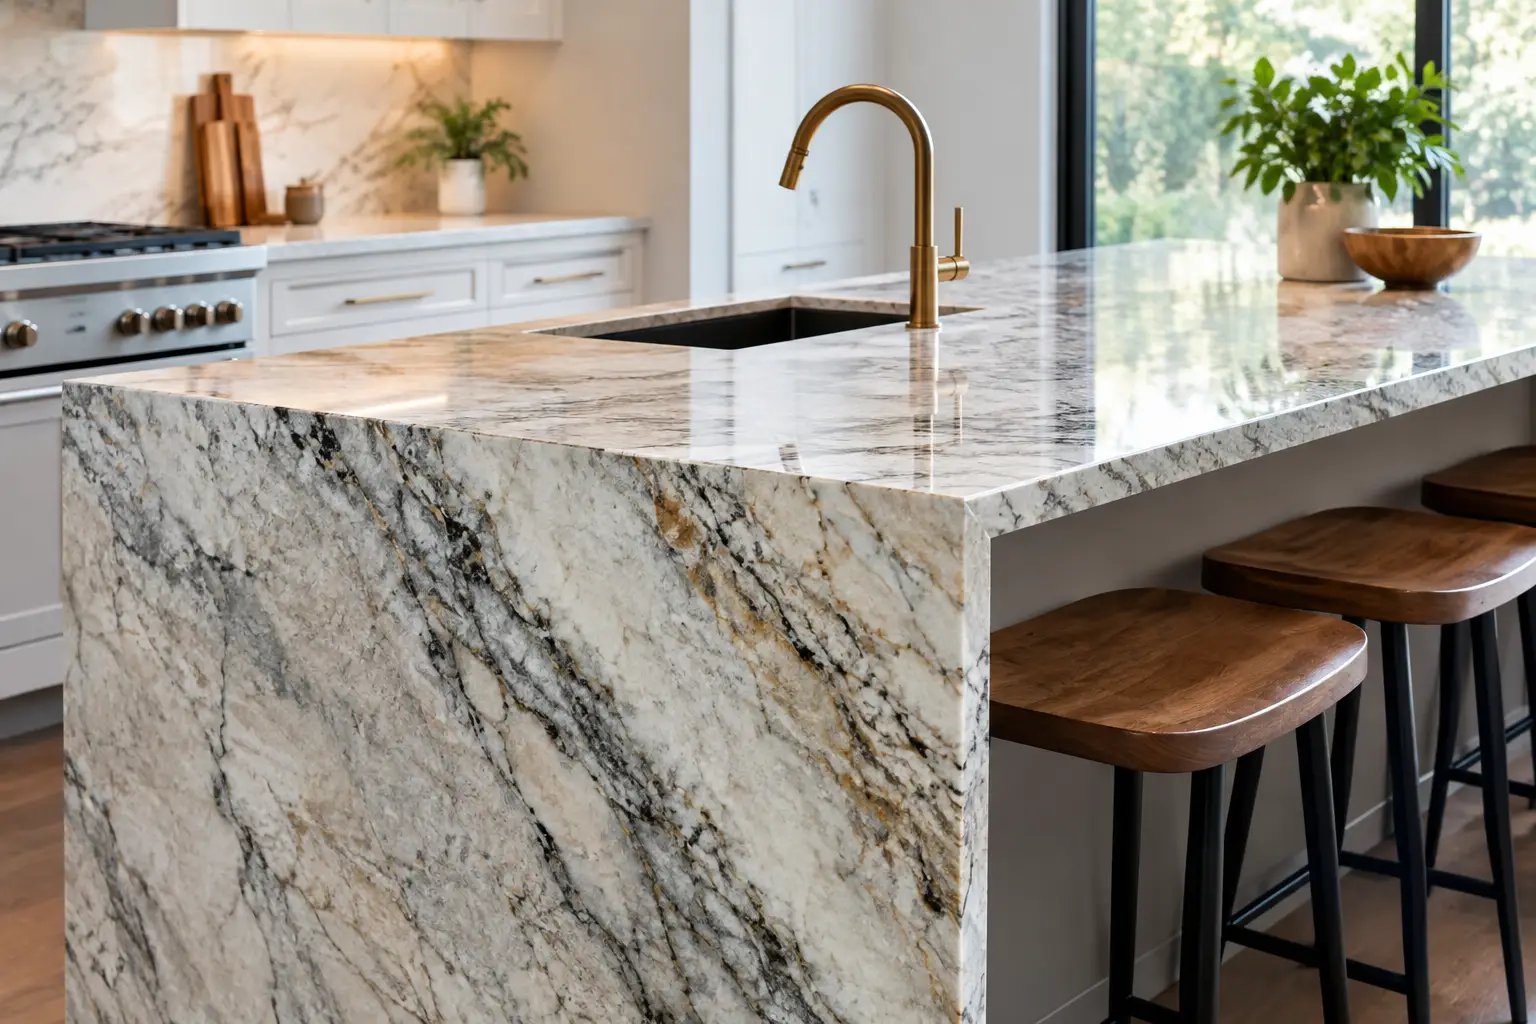
A waterfall island carries the countertop material down one or both sides of the cabinetry to the floor. It creates a clean, continuous frame and gives veined quartz, marble, quartzite, porcelain, and sintered stone a place to make an impact.

The detail looks best when the veins are planned before fabrication. A fabricator can book-match or vein-match the vertical return to the horizontal top where the material and slab layout allow it. This takes careful templating and cutting, especially with a strongly directional pattern. The goal is not always a perfectly uninterrupted vein, which may not be possible on every slab, but a layout that feels intentional.

Waterfalls do come with trade-offs. They use more material and fabrication time than a standard island, and the exposed edge can be vulnerable to hard impacts in high-traffic kitchens. They also need sound support and accurate cabinet installation. For homeowners who want the look without wrapping both ends, a single waterfall panel can provide balance while controlling cost.

Thicker-Looking Profiles Add Presence

A substantial island profile is another lasting direction. This may mean a thicker solid slab where the material permits, or a mitered edge that creates the appearance of a thicker top. Mitered profiles are especially common on waterfall islands and large statement pieces because they deliver a bold, tailored line without requiring an unusually thick slab.

This choice is about proportion. A slim profile can look crisp in a compact contemporary kitchen, while a larger island with tall ceilings often benefits from more visual weight. The edge should also suit the material. A simple eased edge works well for most kitchens and is easy to live with. More detailed profiles can suit traditional cabinetry, but they are harder to clean and may distract from a dramatic stone pattern.

Warm Whites, Soft Neutrals, and Natural Movement

Bright white countertops are still common, but many homeowners are choosing warmer whites, creamy backgrounds, soft grey-beige tones, and veining that feels more like natural stone. These surfaces bring character without making the island visually noisy.

Quartz countertops remain a practical choice for many busy homes because they are nonporous, easy to clean, and do not require sealing. They work particularly well for homeowners who like marble-inspired movement but want simpler everyday maintenance.

Granite offers natural variation and strong durability, while quartzite can provide bold veining and excellent hardness when the specific slab is suited to the application. Marble has a distinctive look, but it can etch and stain more easily, so it is best chosen with realistic expectations about patina.

Porcelain and sintered stone are gaining attention for their slim profiles, heat resistance, and contemporary appearance. They can be excellent for certain island designs, though fabrication and edge details differ from quartz or natural stone. The right choice depends on the desired look, the size of the island, cooking habits, and the specific material’s fabrication requirements.

Designing the Island Around Real Use

An island should not force the kitchen to work around it. Before choosing a slab, decide what the surface needs to do most often. A prep-focused island may need a large uninterrupted work zone. An entertaining island may need generous seating and space for serving. If the island includes a sink or cooktop, cutouts and clearances deserve early attention because they affect both function and the available stone surface.

Seating Needs More Planning Than It Appears To

Counter seating is often treated as an afterthought, yet it determines the island’s comfort and structural requirements. A typical seating overhang may be around 12 inches, but the appropriate dimension depends on stool style, knee room, cabinet depth, countertop material, and whether additional support is required.

Longer or deeper overhangs may need concealed steel, brackets, or another support system designed for the specific countertop and layout. This is not a detail to settle after fabrication. Support should be planned during design so it can be integrated cleanly and so the stone is not left carrying more load than it should. Our countertop overhang support guide explains the factors that affect when additional support may be needed.

Also consider where people will sit. Seating directly opposite a cooktop can put guests uncomfortably close to heat and splatter. Seating near a sink can work well, but only if there is still a dry area for someone to place a drink or laptop. A little forethought makes the island more welcoming without sacrificing prep space.

Larger Islands Need Thoughtful Slab Planning

Big, uninterrupted islands are popular, but slab size is finite. Depending on the material selected and the island dimensions, a seam may be necessary. A well-planned seam is narrow, colour-matched where appropriate, and positioned where it is least noticeable and least exposed to stress. It should be part of the conversation before the material is cut, not a surprise on installation day.

Natural stone also has variation from slab to slab, and even a single slab can have areas of stronger movement, fissures, or colour shifts. Viewing the actual slab and discussing layout helps homeowners decide where they want the most dramatic section of the pattern. This matters even more for waterfall panels, oversized islands, and surfaces with bold veining. Our guide to choosing a countertop slab covers what to inspect before fabrication begins.

Mixed Materials Can Make a Large Island Feel Lighter

A full stone island is not the only option. Some designs combine a stone prep surface with a wood table-height extension, or use stone on the main top with a different finish on the base. This can soften a large kitchen and define separate zones for cooking and gathering.

The transition needs to be planned precisely. Different materials have different thicknesses, movement characteristics, and support needs. A clean joint and aligned finished heights make the combination look deliberate rather than improvised.

Details That Affect the Finished Look

The small fabrication details are often what separate a polished island from one that feels slightly off. Overhangs should align with the cabinet layout and seating plan. Corners should be eased or rounded where traffic is tight, especially in homes with young children. Sink cutouts need proper support and clean finishing, while cooktop cutouts require the correct clearances from the appliance manufacturer.

A polished stone edge is common, but a honed finish can be a good fit for homeowners who prefer a softer, lower-sheen look. Honed natural stone may show fingerprints, oils, or marks differently than polished material, so it is worth seeing a sample in the intended finish before deciding. The same is true of light colours versus dark colours. Neither is automatically easier to maintain, but each shows daily use in different ways.

Thickness, edge profile, and backsplash selection should also feel connected. A thick mitered island with a very delicate perimeter countertop can work beautifully when it is intentional. Repeating the same material on a full-height backsplash can create continuity, while a simpler backsplash can let a dramatic island slab take the lead.

Choose a Trend You Will Still Like on a Tuesday Morning

The most successful island designs balance visual interest with the routines that happen around them. A striking quartzite waterfall may be right for one household, while a warm, durable quartz island with a simple eased edge may be the better fit for another. Neither choice is more current if it suits the room and the people using it.

Before finalizing a design, look at material samples under your kitchen lighting, confirm the slab layout, and discuss seams, supports, overhangs, edge details, and cutouts before templating. These decisions are much easier to solve before fabrication than after the countertop has been cut.

Kitchen Island FAQs

What kitchen island countertop styles are popular right now?

Waterfall ends, thicker-looking mitered edges, warm neutral colours, natural stone-inspired veining, and large uninterrupted work surfaces are common choices. Practical details such as seating, storage, and well-planned overhangs are also becoming more important than purely decorative features.

What is the best countertop material for a kitchen island?

There is no single best material for every island. Quartz is popular for easy maintenance, granite provides natural variation and durability, quartzite offers natural movement and hardness, and marble appeals to homeowners comfortable with etching and patina. Porcelain and sintered stone can also work well when their fabrication requirements suit the design.

Are waterfall kitchen islands still in style?

Waterfall islands continue to be used in contemporary kitchens, particularly when the slab has attractive veining or movement. The detail works best when the vertical panels, seams, mitres, and vein direction are planned before fabrication rather than treated as an add-on.

How much overhang should a kitchen island have for seating?

Around 12 inches is common for counter-height seating, but it is not a universal rule. Stool dimensions, knee room, cabinet depth, countertop material, overhang length, and structural support all need to be considered before the final dimension is set.

Can a large kitchen island be made without a seam?

Sometimes. It depends on the finished island dimensions and the usable size of the selected slab. Oversized islands may require a seam, particularly once edge allowances, defects, veining, cutouts, and waterfall panels are considered. Slab layout should be confirmed before fabrication.

Planning a kitchen island in Ontario?

If you are comparing quartz, granite, marble, quartzite, porcelain, or other slab materials, Stone Valley Countertops can help you review the practical details before fabrication, including slab layout, seams, edges, overhangs, supports, and waterfall panels. Contact Stone Valley Countertops to discuss your project or visit one of our Ontario showrooms.

Best Stones for Waterfall Islands in Your Kitchen

Best Stones for Waterfall Islands in Your Kitchen

A waterfall island is more than a countertop with stone on the sides. The material continues vertically from the island surface to the floor. As a result, every vein, edge, seam, and corner becomes more visible. Choosing the best stones for waterfall islands therefore starts with more than colour. You need a surface that suits how your kitchen works and allows for clean, well-planned transitions.

A waterfall design can make a simple island feel intentional and architectural. Poor material choices or rushed fabrication, however, become easier to notice on this type of installation. The right stone depends on the look you want, the island size, your maintenance preferences, and the importance of pattern continuity.

Waterfall kitchen island showing continuous stone veining from the countertop down the side panel

Quick Answer: What Are the Best Stones for Waterfall Islands?

Quartz, quartzite, granite, marble, porcelain, and sintered stone can all work well for waterfall islands. Quartz offers practical, low-maintenance performance. Quartzite combines natural movement with durability, while granite performs well in busy kitchens. Marble provides distinctive natural veining. Porcelain and sintered stone can create a thin, contemporary profile. Your best option depends on maintenance, slab size, pattern, edge construction, and the desired transition across the waterfall corners.

What Makes a Stone Work for a Waterfall Island?

Fabricators commonly join the horizontal countertop to the vertical side panels with a mitered edge. A well-executed miter makes the stone pattern and thickness appear continuous around the corner. Creating that effect requires accurate cutting, polishing, alignment, and support. Even a narrow mismatch can stand out at eye level.

Materials with a consistent background or controlled pattern are generally easier to plan. Dramatic natural veining can look exceptional, but it requires more attention. Before cutting, the fabricator must determine slab orientation and vein direction. The layout should also account for how the pattern will move from the top down each end.

Appearance is only part of the decision. Waterfall ends sit close to foot traffic, stools, pets, and vacuum cleaners. For busy households, resistance to stains, chips, and daily wear can matter as much as the pattern.

Quartz: A Practical Choice for Most Waterfall Islands

Quartz countertops are often one of the best choices for waterfall islands. Quartz combines a predictable appearance with straightforward maintenance. Its nonporous surface does not require sealing. Everyday spills such as coffee, cooking oil, or juice are also unlikely to leave a mark when you clean them promptly.

For a clean, modern island, consider solid white, warm beige, soft grey, or subtle concrete-look quartz. These designs create crisp waterfall panels without forcing the eye to follow a complicated pattern. Fine-veined quartz also suits homeowners who want a marble-inspired appearance with less maintenance.

Heat is the main trade-off. You should not treat quartz as a landing zone for hot cookware. Manufacturers also produce quartz in slabs with repeating or controlled patterns. These designs can appear less organic than natural stone.

That consistency can work in your favour on a waterfall island. It often simplifies the visual transition on long islands or designs with two exposed ends.

Quartzite: Natural Movement With Strong Everyday Performance

Quartzite countertops suit homeowners who want genuine natural stone with movement and crystalline detail. The material can provide more natural variation than engineered quartz while still offering strong everyday performance.

A quartzite waterfall island can range from quiet and sandy to bold and heavily veined. Dramatic slabs deserve careful layout planning. With the right slab, fabricators can align the movement from the countertop into the waterfall panel. This approach creates a deliberate transition instead of a random break at the corner.

Not every quartzite performs exactly the same way. Some varieties are denser and less absorbent than others, and sealing needs can vary. Your fabricator should assess the specific slab rather than relying only on the quartzite label.

Natural fissures and mineral variation are normal characteristics of many quartzites. Reviewing those features before fabrication helps set clear expectations for the finished countertop.

Granite: A Durable Natural-Stone Option

Granite countertops remain a sensible choice for waterfall islands. They suit households that want natural stone with strong heat resistance and reliable everyday performance. Granite also comes in a broad range of colours and patterns. Options range from relatively uniform dark surfaces to slabs with sweeping movement and visible mineral flecks.

A quieter granite can create a tailored island without competing with cabinets or a busy backsplash. More active granite can become the kitchen’s focal point. In that case, slab layout deserves extra attention.

The fabricator may need to adjust the template position to preserve an important feature in the stone. Careful planning can also help the pattern transition more naturally into the waterfall end.

Many granites benefit from periodic sealing, although requirements vary by stone and use. The maintenance is usually manageable. Homeowners who prefer a surface that does not require sealing may find quartz more suitable.

Marble: Beautiful, but Best for a Considered Kitchen

Marble countertops give a waterfall island natural depth and distinctive veining. Engineered surfaces can imitate this appearance, but natural marble has its own variation and character. It works especially well when the island serves as a visual centrepiece.

The practical trade-off is that marble can etch when it comes into contact with acidic ingredients. Lemon juice, vinegar, and wine are common examples. Etching changes the finish rather than necessarily staining the stone, and polished marble often shows it more clearly.

Marble also requires sealing and thoughtful daily care. Those requirements do not rule it out for a waterfall island. They simply make lifestyle and expectations more important.

Homeowners who appreciate a lived-in patina may enjoy marble for many years. If every mark will become frustrating, a marble-look quartz or soft-veined quartzite may be more appropriate.

Porcelain and Sintered Stone: Slim, Contemporary, and Heat-Friendly

Porcelain countertops and sintered stone are strong options for contemporary waterfall islands. They work particularly well when you want a thinner profile or a large-format surface with a controlled pattern. Both materials resist stains well and generally handle heat effectively.

Thin slabs can create a sharp, refined appearance, but fabrication requires specialized handling. Fabricators must cut corners, cutouts, and mitered edges precisely to reduce chipping. Accurate alignment also helps create a convincing wrapped edge.

Installation planning matters just as much. The waterfall panels need proper alignment and support throughout the installation.

Porcelain and sintered surfaces can reproduce marble, concrete, metal, and other stone looks with impressive consistency. This control can help when directional veining needs to travel across a long island and down both ends.

For a closer look at their differences, read our guide to sintered stone vs porcelain countertops.

Vein Matching Matters More Than Most Homeowners Expect

The defining detail of a waterfall island is the point where the countertop turns downward. Veined materials make this transition particularly noticeable. A basic miter can place the side-panel pattern beside the countertop pattern. More detailed layout planning can make the movement appear to continue around the corner.

Achieving a continuous look may require a larger slab, different slab orientation, or extra material. These requirements can increase the project cost. On a feature island facing the main living area, however, careful pattern planning can make a noticeable visual difference.

Subtle quartz, quieter granite, and solid colours may not need the same level of matching. Strongly veined materials usually benefit from more detailed planning.

Ask to review the slab layout before cutting if your chosen material has prominent veins or large mineral movement. The same advice applies to surfaces with a distinct directional pattern. Our guide on how to match countertop veining explains why slab orientation and cutting decisions matter before fabrication begins.

Thickness, Edges, and Seams

Many waterfall islands use 2 cm or 3 cm countertop material. Fabricators can use a mitered build-up with some 2 cm materials to create a thicker-looking profile. A 3 cm slab naturally creates more visual weight. Material type, cabinet design, fabrication method, and desired proportions should guide the choice.

Most waterfall designs use a simple eased edge or clean mitered corner rather than an elaborate decorative profile. Detailed edge profiles can distract from the vertical drop. Some profiles also do not transition naturally around a waterfall miter.

A lightly softened edge is often enough to make the surface comfortable while preserving the island’s clean lines.

Seam placement also deserves early planning. A large island may require more than one slab, and some patterns hide seams more successfully than others. When possible, the layout may keep seams away from prominent areas such as the main seating zone. Sink and cooktop locations can also affect seam planning.

The final seam position depends on slab dimensions, pattern layout, fabrication requirements, and safe installation.

Waterfall Islands Need Proper Support

The waterfall panels form only one part of the island’s structural plan. Seating overhangs, sink openings, cooktops, cabinet construction, and material weight can all affect support requirements.

A thick-looking mitered edge does not automatically mean the countertop can handle a large unsupported span. Visual thickness and structural support are separate considerations. Overhang depth, cabinet construction, stone type, and cutout locations should all receive attention before fabrication.

If your design includes seating, read our countertop overhang support guide. It explains the factors that determine when additional support may be appropriate.

Choose for Your Kitchen, Not Just the Showroom Sample

A small sample cannot show how a full slab will look when it wraps down one or both sides of an island. Whenever possible, view the actual slab before making the final decision. Discuss which faces of the finished island will remain exposed.

Look at the cabinets, flooring, backsplash, lighting, and stool placement as part of the same design. A bold pattern can look striking in a bright, open kitchen. It may feel busier when several surrounding finishes also demand attention.

Function matters too. If stools tuck beneath the island, waterfall panels affect where the seating overhang begins and where people can comfortably place their feet. The design needs to balance seating space with proper countertop support.

Confirm sink cutouts, cooktops, large overhangs, and waterfall dimensions during templating. Resolving these details before fabrication reduces the chance of surprises after cutting begins.

For homeowners in Ontario planning a custom island, Stone Valley Countertops can help compare the actual slab, edge approach, vein direction, and layout before fabrication. The best result is rarely about choosing the most expensive stone. It comes from selecting a material that suits daily use and planning the fabrication details carefully.

A well-chosen waterfall island should still feel right after the first busy dinner, first spill, and years of regular use. Start with a material you will be comfortable living with. Then let careful slab layout and precise fabrication create the visual impact.

Frequently Asked Questions About Waterfall Island Countertops

What is the best stone for a waterfall kitchen island?

There is no single best material for every waterfall island. Quartz offers easy maintenance, while quartzite provides natural movement and strong everyday performance. Granite offers durability and heat resistance. Marble provides distinctive natural character, while porcelain and sintered stone can create a slim contemporary appearance. Your kitchen, maintenance expectations, slab layout, and design preferences should guide the decision.

Is quartz good for a waterfall island?

Yes. Quartz works particularly well for waterfall islands because its relatively consistent pattern can simplify the transition between the countertop and vertical panels. The nonporous surface also does not require sealing. Highly veined quartz still needs careful slab planning when you want the pattern to flow across the corner.

Can you vein-match a waterfall countertop?

Yes, depending on the slab, pattern, dimensions, and available material. Fabricators can plan cuts so prominent veins appear to continue from the horizontal countertop into the waterfall panel. Complex matching may require extra material or a specific slab orientation.

Does a waterfall countertop need a mitered edge?

Fabricators commonly use a mitered joint to create a clean transition between the horizontal countertop and vertical waterfall panel. The exact construction depends on the material, thickness, design, and fabrication requirements.

Are waterfall islands more expensive than standard islands?

Waterfall islands generally require more countertop material because the design includes one or two vertical panels. Mitering, vein matching, slab layout, handling, and installation can add labour as well. The final cost depends on the material, island dimensions, number of waterfall ends, and fabrication complexity.

Should I choose the slab before planning the waterfall layout?

For natural stone and strongly veined engineered surfaces, reviewing the actual slab before finalizing the layout is useful. Slab dimensions, vein direction, natural features, and cutout locations can influence the final pattern. They can also determine whether the desired movement can continue from the top into the waterfall ends.

Planning a Waterfall Island in Ontario?

If you are comparing materials for a new waterfall island, bring your kitchen measurements, cabinet plans, or inspiration photos when reviewing slabs. Stone Valley Countertops can help evaluate slab dimensions, veining, seams, edge construction, and waterfall-panel placement before fabrication begins.

Visit one of our Ontario showrooms or contact Stone Valley Countertops to discuss your project.