Uncategorized

How to Remove Countertop Stains Without Damage

How to Remove Countertop Stains Without Damage

How to remove countertop stains without damaging the surface

A dark ring beside the sink, a faded spot near the coffee maker, or a rusty-looking mark under a soap dispenser can make an otherwise clean kitchen feel unfinished. Knowing how to remove countertop stains starts with one important distinction: not every mark is actually a stain. The wrong cleaner can turn a small surface issue into a permanent dull spot, especially on natural stone.

The safest approach is to identify the countertop material and the type of mark before reaching for a cleaner. Quartz, granite, marble, quartzite, porcelain, and sintered stone can look similar at a glance, but they do not react the same way to acidic products, abrasives, heat, or moisture.

How to Remove Countertop Stains: The Quick Answer

Start with warm water, mild dish soap, and a soft microfiber cloth. If the mark remains, identify both the countertop material and the likely cause before using a stronger product. Quartz generally needs a nonabrasive quartz-safe cleaner, while granite and quartzite may require a stone-safe cleaner or, for absorbed stains, an appropriate poultice. Marble requires extra care because a dull or light mark may be etching rather than a stain. Porcelain and sintered stone are highly stain resistant, but cleaners should still be appropriate for the manufacturer’s finish.

If you are unsure what caused the mark, avoid experimenting with acids, strong degreasers, abrasive pads, or increasingly aggressive cleaners. Identifying the problem first is safer than trying to scrub it away.

First, Determine Whether It Is Actually a Stain

A true stain has penetrated the material or its pores. It often looks darker than the surrounding surface and may remain after normal cleaning. Oil, cooking residue, wine, coffee, makeup, rust, and other pigmented liquids are common causes.

Etching is different. It is surface damage caused when an acidic substance reacts with acid-sensitive stone, most notably marble. Lemon juice, vinegar, wine, and some bathroom cleaners can leave a lighter, dull, or rough-feeling patch. An etched mark may look like a stain, but stain remover will not restore the polished finish because the surface itself has been altered.

Also watch for metal transfer, which is especially noticeable on light quartz. A grey or black streak from a pan, utensil, or appliance base may be sitting on the surface rather than absorbed into it. Hard-water buildup can create a cloudy white film around faucets, while residue trapped around a seam or sink edge can also resemble discoloration.

When in doubt, begin with the gentlest option. Wipe the area with warm water, a small amount of mild dish soap, and a soft microfiber cloth. Rinse with clean water and dry thoroughly. If the mark remains, move to a method suited to the material rather than trying increasingly aggressive household products.

Cleaning Stains on Quartz and Engineered Stone

Quartz countertops are nonporous, so most everyday spills remain at or near the surface. In kitchens, common marks include dried food residue, grease, marker, metal transfer, and stubborn pigment from spices or beverages. Mild dish soap and water are appropriate for routine cleaning.

For a tougher mark, use a nonabrasive cleaner specifically approved by the quartz manufacturer or intended for engineered stone, following the product directions. Allowing an approved cleaner a short amount of contact time can help loosen dried residue. Use a soft cloth or non-scratch sponge, then rinse and dry the area.

Avoid scouring powders, steel wool, abrasive pads, oven cleaner, paint remover, and cleaners outside the manufacturer’s recommended pH range. These products can affect the resin-rich surface of quartz and may leave a permanent dull or hazy area.

Quartz also does not require sealing. Applying an aftermarket sealer to solve a stain or surface mark can create additional residue or appearance issues.

If you see a stubborn grey streak, start with a manufacturer-approved nonabrasive cleaner. If the mark does not improve with reasonable cleaning, stop rather than scrubbing harder. A fabricator can help determine whether you are dealing with metal transfer, surface damage, or another issue.

Removing Stains From Granite and Quartzite

Granite and quartzite are natural stones, and their stain resistance varies by the particular slab, finish, porosity, and condition of the sealer. Many perform extremely well in busy kitchens, but some slabs can absorb liquids if a spill sits long enough or the stone needs resealing.

For fresh oil, food, or drink marks, start with a pH-neutral stone cleaner or mild dish soap, then rinse and dry. Avoid using vinegar, lemon juice, bathroom descaler, or other aggressive household cleaners as a shortcut. Harsh products can affect sealers, finishes, silicone, and surrounding installation materials.

When a Poultice May Help

A lingering absorbed stain in natural stone may respond to a poultice. A poultice uses an absorbent material and an appropriate cleaning agent to help draw staining material from the pores of the stone.

The correct treatment depends on what caused the stain and the characteristics of the slab. An oil-based stain, for example, may require a different approach from an organic food or beverage stain. Because an incorrect treatment can alter the appearance of stone, test any approved method in a concealed area and consider professional advice for difficult stains or valuable natural stone.

Does the Countertop Need Resealing?

Do not judge granite or quartzite sealing by the calendar alone. On many natural stones, a simple water absorption test can provide useful information. Place a small amount of water on a clean, dry, inconspicuous section of the stone and observe whether the area begins to darken as moisture absorbs.

If water is being absorbed readily, it may be time to discuss resealing. Our guide to granite countertop sealing explains why sealing requirements vary from one stone to another.

Sealing helps slow absorption. It does not make natural stone completely stain-proof, and prompt spill cleanup is still important.

Marble Stains and Etching Need Different Solutions

Marble brings distinctive movement and natural variation to kitchens, bathroom vanities, fireplace surrounds, and bars. It also requires realistic maintenance expectations. The material can absorb liquids and is sensitive to acids, which means homeowners may encounter both staining and etching.

If a marble mark feels smooth but looks darker, it may be a stain. Start by cleaning it gently with a pH-neutral stone cleaner. For a persistent absorbed stain, an appropriately selected poultice may help, but avoid experimenting with acidic cleaners or strong chemicals.

If the spot appears lighter, duller, or less reflective than the surrounding polish, it is more likely to be etching. Scrubbing will not restore the shine because the finish itself has been affected.

Minor etching can sometimes be improved through professional stone restoration. More noticeable damage may require honing and repolishing to blend the affected area with the surrounding finish.

This is one reason marble is generally better suited to homeowners who are comfortable with the natural patina and maintenance that can develop over time.

Porcelain and Sintered Stone: Check the Finish First

Porcelain and sintered stone surfaces are dense and highly resistant to staining, making them practical for kitchens, outdoor BBQ counters, and other high-use areas. Most everyday marks can be removed with warm water, mild detergent, and a soft cloth.

Some textured or matte finishes can hold residue more visibly than smoother finishes. Grease around a cooktop, mineral deposits near a faucet, or residue within a textured surface may require a manufacturer-approved cleaner and a soft nylon brush.

Keep cleaning focused on the surface and rinse thoroughly so cleaner does not collect around seams, silicone, or undermount sink edges.

Even durable porcelain and sintered stone should not be treated as indestructible. Avoid impact on exposed edges and do not use abrasive tools that could affect the finish or leave metal residue behind.

What Not to Use on Countertops

The products stored under a kitchen sink are not automatically safe for countertops. Avoid vinegar or lemon juice on marble and other acid-sensitive natural stones. Strong cleaners should only be used when the surface manufacturer specifically approves them, and cleaning products should never be mixed.

Abrasive powders, aggressive scrub pads, and steel wool can leave scratches, dull patches, or metal transfer. Strong degreasers, oven cleaners, and drain cleaners can damage quartz resins, stone sealers, silicone, and other materials around the countertop.

Sharp scraping tools are also not a universal countertop-cleaning solution. A technique that may be permitted by one surface manufacturer could scratch or damage another material or finish.

If a product label does not clearly indicate that it is suitable for your countertop material, stick with mild soap and water until you can confirm an appropriate cleaner.

Preventing the Next Countertop Stain

Fast cleanup makes a bigger difference than most specialty cleaners. Wipe up oil, wine, coffee, tomato sauce, makeup, and cooking spills before they sit. Use coasters or trays under oils, soap dispensers, and frequently used bottles, particularly on natural stone.

Keep hot cookware on trivets and use cutting boards instead of cutting directly on the countertop. This is particularly important with engineered quartz, where excessive heat can damage the resin. You can learn more in our guide to quartz countertop heat resistance.

Avoid leaving wet cloths or standing liquids on natural stone. On a new countertop, ask your fabricator which cleaner and sealing schedule are appropriate for the exact material and finish.

Finish also matters. A honed versus polished countertop can show fingerprints, water marks, residue, and surface wear differently, even when the underlying material is the same.

When Should You Call a Countertop Professional?

Consider getting professional advice when a mark remains after appropriate gentle cleaning, when you cannot tell whether the problem is staining or etching, or when the surface has developed a dull patch, chip, crack, or unexplained discoloration.

It is also worth getting advice before applying an unfamiliar chemical or stain treatment to marble, quartzite, granite, or another valuable natural stone. Correcting a damaged finish can be considerably more involved than treating the original mark.

If you are dealing with a countertop stain, surface issue, or damage that normal cleaning has not resolved, contact Stone Valley Countertops. We can help determine whether the issue is related to cleaning, the material itself, or a surface that may require professional attention.

Frequently Asked Questions About Countertop Stains

Can countertop stains become permanent?

They can. Porous natural stones may absorb oils, pigments, and other liquids, while quartz can develop marks or surface damage from inappropriate cleaners. Treat spills promptly and use cleaning methods recommended for the specific countertop material.

Can I use vinegar to remove countertop stains?

Vinegar should not be treated as a universal countertop cleaner. It can etch marble and other acid-sensitive stone and may not be appropriate for other surfaces or installation materials. Use a cleaner approved for the countertop material instead.

How do I know if a marble mark is a stain or etching?

A darker mark may indicate absorbed staining, while a lighter, dull, or less reflective patch often indicates etching. Etching changes the stone’s finish, so ordinary stain removal will not restore the original polish.

Why does my granite countertop get darker when it is wet?

Temporary darkening can indicate that moisture is being absorbed into the stone. The amount of absorption varies by granite. If water penetrates readily, the countertop may need to be evaluated for resealing.

Why does my quartz countertop have grey or black marks?

Some grey or black marks are surface residue or metal transfer rather than true stains. Begin with a quartz-safe, nonabrasive cleaner recommended for the surface. Avoid aggressive scrubbing because it can create a dull area that is more difficult to correct than the original mark.

Does sealing prevent all stains on natural stone?

No. A suitable impregnating sealer can slow the absorption of liquids into porous natural stone, giving you more time to clean spills. It does not make granite, marble, or quartzite completely stain-proof.

Best Quartz Colors for Kitchens That Last

Best Quartz Colors for Kitchens That Last

A quartz sample that looks crisp white in a showroom can read cool grey beside your cabinets, while a dramatic veined slab can feel much busier once it wraps a large island. That is why choosing the best quartz colors for kitchens is less about following a trend and more about seeing how the surface works with the room you actually have.

Quartz gives homeowners a wide range of consistent colours and patterns, from quiet solids to marble-inspired movement. It is also nonporous, which makes everyday quartz countertop cleaning straightforward. The right colour, however, should account for cabinet tone, natural light, kitchen size, backsplash plans, and how much visual activity you want on the countertop.

Quick answer: The most versatile quartz colours for kitchens include soft white, warm white, light grey, greige, charcoal, and restrained marble-look designs. The best option depends on your cabinet undertones, lighting, room size, and tolerance for visible dust, spills, and pattern. Always compare larger samples horizontally in your own kitchen before approving a full slab.

Best Quartz Colours at a Glance

Quartz Colour Works Well With Practical Considerations
Soft white White, wood, black, navy, and grey cabinets Bright and flexible, but dark crumbs and spills may be more visible
Warm white or cream Oak, beige, greige, mushroom, and warm white cabinets Check the undertone carefully to avoid unexpected yellow or pink tones
Light grey White cabinets, medium wood, black fixtures, and simple tile Offers gentle contrast and is often forgiving between cleanings
Greige or taupe Warm neutral interiors, wood cabinetry, brass, and brushed nickel Choose a clear, light base in kitchens with limited natural light
Charcoal or black Light cabinets, pale oak, modern kitchens, and feature islands Dust, streaks, fingerprints, and water spots may be more noticeable
Marble-look quartz Simple cabinets, large islands, waterfall ends, and full-height backsplashes Vein direction and seam placement should be planned before fabrication

Best Quartz Colors for Kitchens by Style and Use

Soft white quartz for a clean, flexible look

Soft white remains one of the most practical quartz choices because it works with many cabinet finishes. Unlike a stark, blue-white slab, a warmer white with subtle cream or light grey undertones tends to sit comfortably beside painted white cabinetry, natural oak, black hardware, and stainless steel appliances.

A lightly patterned white quartz is especially useful when you want a bright kitchen without the maintenance concerns of natural marble. Fine grey or taupe veining adds depth while keeping crumbs, fingerprints, and water spots less obvious than they may be on a completely solid, polished white surface.

The trade-off is that white counters can show dark spills, coffee grounds, and colourful food residue more readily. They are easy to wipe down, but a busy family kitchen may benefit from a soft vein or speckle rather than a completely plain white.

Homeowners comparing materials should also consider how quartz performs against natural stone. Our quartz versus quartzite guide explains the differences in maintenance, heat resistance, consistency, and natural variation.

Warm white and cream quartz for warmer cabinetry

Warm whites, ivories, and gentle cream-based quartz colours suit kitchens with beige, greige, mushroom, or wood cabinets. These shades are also a strong choice when the existing floor tile or backsplash has warm undertones. A cool grey-white countertop against warm finishes can make the room feel slightly disconnected, even when each individual material is attractive.

Look closely at the base colour rather than relying on the slab name. Across a full quartz kitchen countertop, a faint undertone becomes much more noticeable than it is on a small sample. Viewing full slabs under lighting similar to the kitchen helps prevent a white that unexpectedly reads yellow, pink, or grey after installation.

Light grey quartz for balanced everyday living

Light grey quartz is a reliable middle ground. It provides more contrast than white but keeps the kitchen open and bright. It works particularly well with white cabinets, medium wood tones, matte black fixtures, and simple backsplash tile.

For homeowners who cook often, a pale to mid-tone grey can be forgiving between cleanings. It generally hides light dust and minor marks better than solid black or bright white. Keep the pattern controlled, though. If the cabinet doors, backsplash, and flooring already carry strong grain or pattern, a quiet grey surface gives the room somewhere to rest.

Greige and taupe quartz for a softer neutral palette

Greige, taupe, putty, and sandy beige quartz have become popular for a practical reason. They soften a kitchen without locking it into one specific design trend. These colours pair naturally with light wood, warm white cabinets, brushed nickel, brass, and earthy backsplash materials.

They can also be a smart choice for open-concept homes where the kitchen needs to relate to warmer living-area finishes. The key is choosing a quartz with enough clarity in the base colour. A muddier taupe can make a small kitchen look dim, especially if there is limited daylight. In those spaces, choose a lighter warm neutral with fine movement instead of a dark beige solid.

Charcoal and black quartz for deliberate contrast

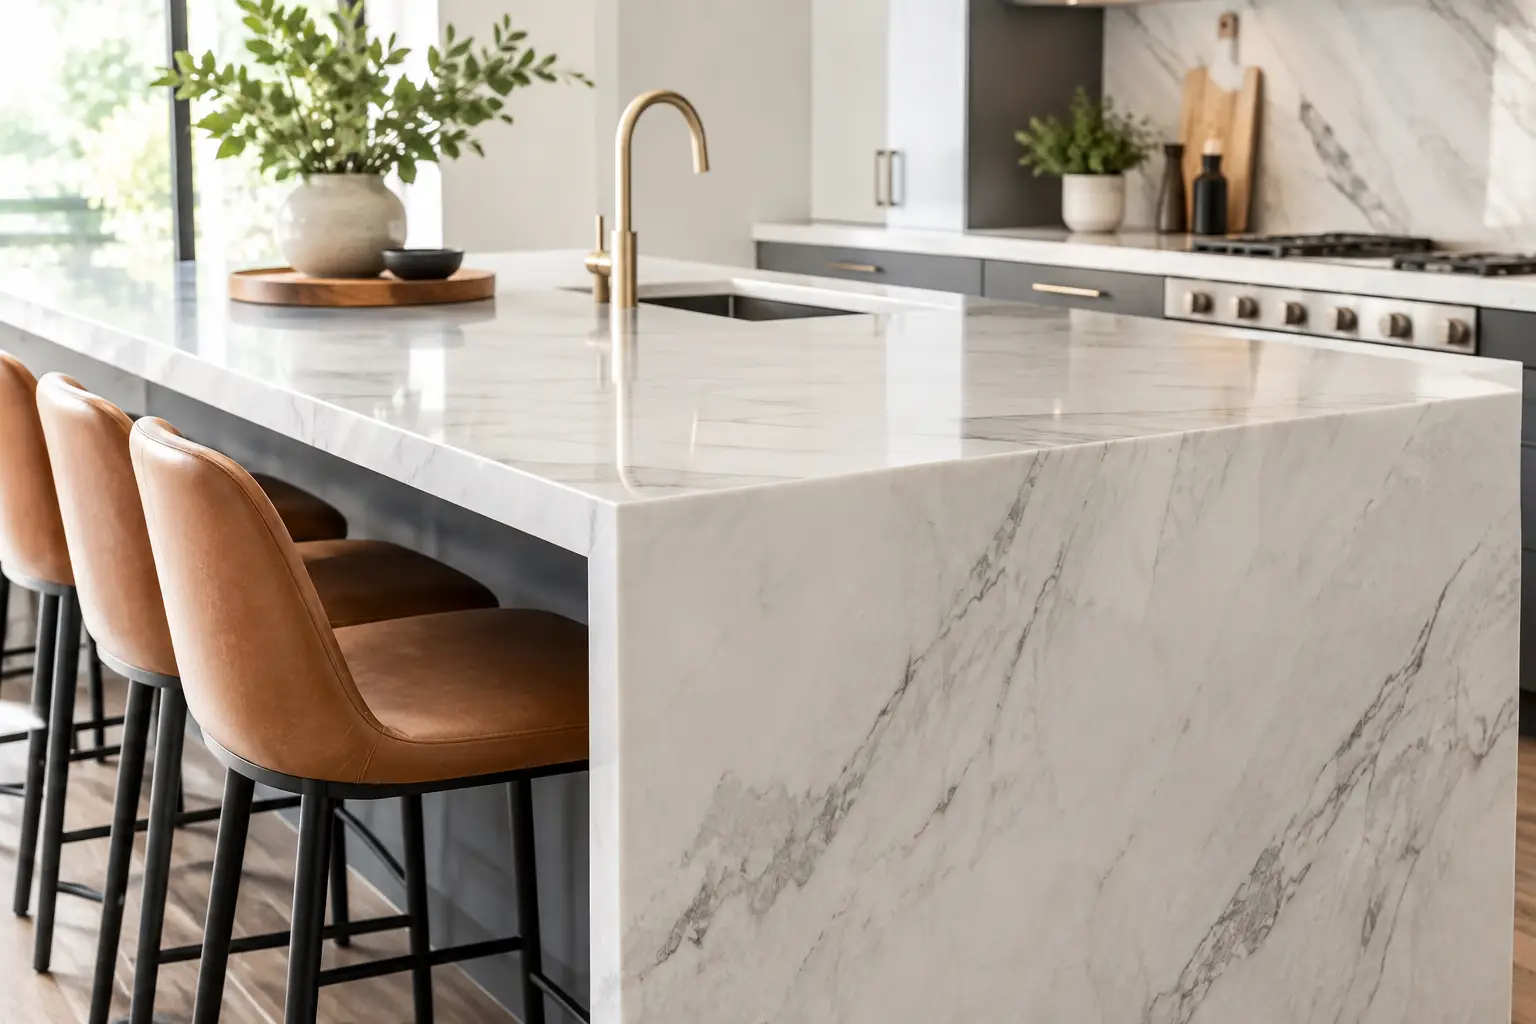
Dark quartz creates a strong focal point, especially on an island. Charcoal, deep graphite, and black surfaces can look excellent with light cabinets, pale oak, or a waterfall island where the veining continues down the sides.

Dark counters do come with a real maintenance consideration. Polished black and very dark solid colours can show dust, streaks, fingerprints, and water spots more quickly than mid-tone colours. This does not make them difficult to maintain, but they reward regular wiping with a clean microfibre cloth.

A charcoal quartz with subtle movement or a honed-looking finish often feels more forgiving than a glossy jet-black surface. Before choosing one, it is helpful to compare how matte and polished countertop finishes behave under your kitchen lighting.

Marble-look quartz for movement without a busy kitchen

Marble-look quartz is one of the most requested directions for kitchens because it brings character while remaining nonporous. The best option depends on the scale of your kitchen. Fine, delicate veining works well in smaller spaces and alongside detailed cabinetry. Larger, bolder veins make a stronger statement and are often better suited to broad islands or kitchens with simple cabinet fronts.

Pay attention to vein direction during the selection and fabrication process. On a waterfall island, many homeowners prefer the veining to flow from the top down the panel. This requires careful slab layout and can affect how efficiently the material is used.

The same planning matters when a backsplash is cut from the countertop material or when seams are required in a long run. A dramatic pattern should be reviewed across the entire slab, not just through a small sample or online photograph.

How to Match Quartz Colour to Cabinets and Light

The cabinet-countertop relationship usually matters more than any single trend. With white cabinets, you can choose nearly any quartz colour, but the result changes quickly. White-on-white feels bright and continuous, grey provides gentle definition, and black creates a more graphic contrast.

With dark cabinets, lighter quartz prevents the room from becoming too heavy. A white, warm white, or pale grey countertop can reflect available light and separate the cabinet colour from the wall finish.

Medium wood cabinets are highly flexible, although their undertone should guide the selection. Oak with golden warmth often suits creamy whites and greige, while cooler wood stains can work nicely with clean whites and grey-based quartz.

Lighting deserves equal attention. North-facing rooms often receive cooler daylight, which can make grey-veined quartz appear bluer. Warm under-cabinet lighting can shift the appearance of cream and beige materials.

Before finalizing your choice, place larger samples horizontally near the sink, cooktop, and island areas. Look at them during the day and again at night. Countertops are viewed flat, not upright like a cabinet door sample, so changing the sample position can reveal undertones that were not obvious in the showroom.

For a broader decision-making process, review our guide on how to choose kitchen countertops based on appearance, maintenance, durability, budget, and household use.

Consider the Details That Change the Finished Look

A countertop colour is only part of the finished result. Countertop thickness, edge profile, seams, cutouts, and surface finish all influence how the quartz presents in the room.

A standard polished edge keeps a light quartz clean and contemporary, while a mitered edge can create the appearance of a thicker, more substantial island. Mitered edges require precise fabrication because the pattern and corners must align cleanly.

The profile should also suit how the kitchen will be used. Simple eased and bevelled profiles are easy to maintain, while more detailed edges can add character to traditional cabinetry. See our comparison of the best countertop edge styles for more practical guidance.

If your kitchen includes a large island, consider whether the island should match the perimeter counters. Matching surfaces create a calm, cohesive look. Using a darker or more veined quartz on the island can add contrast, but it works best when the perimeter is quieter and the island has enough visual space to carry the pattern.

Seam placement and pattern direction

Seams are sometimes necessary on long counters, L-shaped kitchens, and oversized islands. An experienced fabricator plans seam placement around the slab pattern, cabinet layout, sink cutouts, appliance openings, and structural requirements.

A seam will not disappear completely, but thoughtful positioning can make it far less noticeable. Large veining may also make seams more visible if the pattern changes abruptly between pieces. This is another reason to select from a full slab rather than relying only on a small showroom swatch.

Our kitchen countertop seams guide explains when seams are necessary, where they may be placed, and what homeowners should realistically expect.

Overhangs, exposed edges, and support

For an overhang used for seating, colour and pattern should be considered along the exposed edge as well. Large veining may look different near a mitered edge than it does across the main surface of the countertop.

Support requirements depend on the overhang depth, material thickness, cabinet construction, and layout. These details should be reviewed before fabrication rather than after the cabinets are in place.

Should the Island and Perimeter Countertops Match?

There is no requirement that the island and perimeter countertops match. The better choice depends on how much contrast the kitchen already has.

Using the same quartz throughout creates a calm and continuous appearance. It can also simplify slab layout, seam planning, and backsplash selection. This approach works well in smaller kitchens or rooms with several competing finishes.

A contrasting island can work well when the surrounding kitchen is relatively simple. For example, a veined white island can be paired with quiet grey perimeter counters, or a charcoal island can be used with warm white countertops around the walls.

Before mixing colours, compare the undertones carefully. Two surfaces can look compatible individually but clash when one has a cool blue-grey base and the other has a yellow or pink undertone.

Choosing a Quartz Colour You Will Still Like Years From Now

The safest long-term quartz colours are not necessarily the plainest ones. A soft white, light grey, warm neutral, or restrained marble-look design can remain adaptable as wall paint, hardware, light fixtures, and stools change over time.

Very bold patterns are worthwhile when you genuinely enjoy them and the rest of the kitchen is kept simple enough to support them. Avoid choosing a dramatic quartz only because it photographs well or appears frequently in current design content.

At Stone Valley Countertops, the most useful material consultations start with the whole kitchen: cabinet samples, backsplash ideas, lighting, sink choice, appliance finishes, and island plan. This makes it easier to identify not only a colour that looks good on day one, but one that suits the way the kitchen will be used.

Bring home samples, view full slabs whenever possible, and give yourself permission to rule out a colour that looks beautiful but feels impractical for your household. The best countertop colour is the one that still looks right after breakfast, dinner preparation, and years of daily use.

Compare Quartz Colours for Your Kitchen

Cabinet samples, flooring, backsplash ideas, room lighting, and island dimensions can all change how a quartz colour looks. Stone Valley Countertops can help you compare suitable options and review the fabrication details before the material is cut.

Contact Stone Valley Countertops

Frequently Asked Questions

What is the most popular quartz colour for kitchens?

Soft white quartz with subtle grey, beige, or taupe veining remains one of the most commonly selected options. It works with a wide range of cabinet finishes and provides more visual interest than a completely solid white countertop.

Does white quartz make a kitchen look bigger?

White and light-coloured quartz can make a kitchen feel brighter and more open because they reflect more available light. The effect is especially noticeable in smaller kitchens, rooms with dark cabinets, and spaces with limited natural daylight.

What quartz colour is easiest to keep looking clean?

Light grey, greige, and softly patterned white quartz are often the most forgiving between cleanings. Completely solid black and bright white surfaces may show dust, crumbs, streaks, or water spots sooner.

Do dark quartz countertops show fingerprints?

Dark polished quartz can show fingerprints, dust, streaks, and dried water marks more readily than mid-tone surfaces. A charcoal design with gentle movement or a lower-sheen finish may be more forgiving.

Should quartz match the cabinets or the backsplash?

Quartz does not need to match either material exactly. It should coordinate with the undertones of both. In most kitchens, it is easier to choose the countertop and cabinets first, then select a backsplash that connects the two without adding too much competing pattern.

Should the kitchen island match the perimeter countertops?

Matching surfaces create a cohesive appearance, while a contrasting island can become a focal point. A contrast usually works best when one surface is quiet and the other carries the stronger colour or pattern.

Can quartz colours look different after installation?

Yes. Quartz can appear different depending on natural light, artificial lighting, cabinet colour, wall paint, and the size of the installed surface. Larger samples and full-slab viewing provide a more accurate impression than a small showroom sample alone.

Is marble-look quartz suitable for a busy kitchen?

Marble-look quartz is well suited to many busy kitchens because it is nonporous and does not require sealing. It should still be protected from excessive heat, harsh chemicals, and direct cutting, just like other engineered quartz surfaces.

Quartz Backsplash Pros and Cons for Your Kitchen

Quartz Backsplash Pros and Cons for Your Kitchen

A full-height quartz backsplash can make a kitchen look remarkably calm and intentional. The countertop pattern continues up the wall, grout lines disappear, and cleanup after cooking becomes much simpler. But before choosing one, it helps to understand the real quartz backsplash pros and cons, especially around cost, heat exposure, seams, and the details that affect the finished look.

Unlike a standard tile backsplash, quartz is fabricated as large slabs or carefully sized pieces. That makes material selection, templating, wall conditions, and installation planning more important. The result can be beautiful and practical, but it is not automatically the right choice for every kitchen.

Quick answer: A quartz backsplash is a strong choice for homeowners who want a low-maintenance surface with no grout lines and a coordinated countertop-to-wall design. Its main disadvantages are higher cost, possible seams, limited repair options, and the need to plan carefully around high-heat cooking appliances. It works best when the slab layout, outlet locations, wall conditions, and range clearances are reviewed before fabrication.

Full-height quartz backsplash with matching quartz kitchen countertops
A full-height quartz backsplash creates a coordinated surface with fewer joints and no grout lines to maintain.

What Is a Quartz Backsplash?

A quartz backsplash is made from engineered quartz, the same material commonly used for countertops. It contains natural quartz minerals combined with resins and pigments, creating a nonporous surface with consistent colour and pattern options.

It can be installed as a short 4-inch backsplash behind the counter, but most homeowners considering quartz choose a full-height application. This runs from the countertop to the bottom of the upper cabinets, range hood, or ceiling.

A full-height backsplash may use one continuous piece or multiple pieces, depending on slab size, layout, wall height, and the locations of windows, outlets, cabinets, and appliances.

Quartz Backsplash Pros and Cons at a Glance

Advantages Potential Drawbacks
No grout lines to scrub or maintain Usually costs more than ceramic or porcelain tile
Nonporous and resistant to everyday stains May require seams on long or tall walls
Creates a coordinated countertop and backsplash design Requires planning near high-output gas ranges
Available in consistent colours and veined patterns Outlet and switch cutouts can interrupt the pattern
Easy to wipe clean around sinks and prep areas Damage may be difficult to repair invisibly
Fewer visual interruptions than most tile installations Professional templating, fabrication, and installation are required

Quartz Backsplash Pros

Easy Everyday Cleaning

The practical benefit is hard to overlook. Quartz has no grout joints to scrub. Tomato sauce, cooking oil, coffee splashes, and everyday marks can usually be cleaned with a soft cloth, warm water, and mild soap.

Because quartz is nonporous, it does not require periodic sealing. This differs from many natural stone surfaces, including some of the materials discussed in our guide to whether granite countertops need sealing.

This makes quartz a comfortable option for busy kitchens, laundry rooms, bars, and bathroom vanity walls where homeowners want a clean surface without adding another maintenance task.

A Cohesive, Custom Look

Using the same quartz for the countertop and backsplash creates visual continuity. This is especially effective with veined designs, where the pattern can be planned to move naturally from the horizontal counter to the wall.

The look is not limited to dramatic veining. Soft white, warm beige, concrete-look grey, or finely speckled quartz can also make a kitchen feel less busy than patterned tile. In smaller kitchens, fewer horizontal breaks can help the room feel more open.

Fabrication details matter here. The best layout considers the slab pattern before cutting, rather than treating the backsplash as an afterthought. Planning should account for seams, outlet cutouts, corners, windows, range hoods, and visible pattern movement before fabrication begins.

Durable for Normal Kitchen Use

Quartz stands up well to everyday contact from utensils, dishes, and cleaning. It is generally more resistant to staining than natural marble and does not require periodic sealing.

For a backsplash, where the material sees less direct impact than a countertop, quartz offers more than enough durability for most households.

It is also a useful material choice near a sink. Water splashes do not soak into the material, and there are no grout lines that may discolour over time. A matching quartz ledge or low sill at a kitchen window can further simplify cleaning when the layout allows it.

Fewer Visual Interruptions

Tile requires grout joints, and even large-format tile usually has some visible lines. Quartz can cover a wide area with fewer interruptions. This is valuable behind a cooktop, around a window, or on a feature wall where the homeowner wants the material itself to be the focal point.

The number of seams depends on the slab dimensions and backsplash layout. A long wall, tall ceiling, or large range hood area may still require a seam. A skilled fabricator can place it thoughtfully, but promising a completely seamless backsplash without reviewing the measurements would be unrealistic.

No Ongoing Sealing Requirement

Quartz does not require the periodic sealing associated with many natural stone backsplashes. This does not mean it is maintenance-free, but routine care is usually straightforward.

Homeowners should still avoid harsh abrasive cleaners, strong solvents, and scouring pads that could affect the finish. Mild soap, water, and a soft cloth are usually enough for daily cleaning.

Quartz Backsplash Cons to Consider

It Costs More Than Many Tile Options

A quartz backsplash requires slab material, fabrication, careful handling, transportation, and professional installation. Cutouts for outlets, switches, windows, shelves, or a pot filler add labour and require precision.

These details make quartz more expensive than many ceramic or porcelain tile installations. The final price varies based on the selected quartz, the amount of material needed, wall height, access to the space, edge finishing, seam requirements, and the complexity of the cutouts.

A short quartz backsplash may be a reasonable upgrade, while a full-height installation across multiple walls can become a meaningful part of the kitchen budget.

For some projects, using quartz behind the range and a coordinating tile elsewhere creates a better balance of cost and visual impact. There is no rule that says every wall must use the same finish.

Heat Requires Planning Near Ranges

Quartz is heat resistant, but it is not heatproof. The resins within engineered quartz can be affected by concentrated or extreme heat. This matters most directly behind high-output gas ranges, especially where flames or hot cookware may come very close to the wall.

A quartz backsplash can work behind many cooking areas, but the range specifications, manufacturer clearance requirements, and surrounding design should be reviewed before the material is finalized.

In certain applications, porcelain, Dekton, or another sintered stone may be a better fit because these materials generally tolerate higher heat. Homeowners comparing these surfaces can also review our guide to quartz versus porcelain countertops.

The issue is not ordinary cooking splatter. It is prolonged, direct heat exposure in a concentrated location. This is one reason material decisions should happen early, before templates are taken and fabrication is scheduled.

Seams and Cutouts Are Still Visible

Quartz backsplashes have fewer joints than tile, not necessarily no joints at all. A seam may be needed where walls are long, ceilings are tall, slab dimensions are limited, or the pattern needs to be managed around a window or hood.

The seam is typically filled with a colour-matched adhesive, but it can still be visible at close range. Its appearance depends on the quartz pattern, lighting, seam location, fabrication quality, and how well the two sections align.

Outlet and switch cutouts also deserve attention. Their placement can interrupt a strong vein pattern, and their edges need accurate cutting and fitting. Discussing outlet locations, cover plates, and under-cabinet electrical options before fabrication can reduce unwanted visual distractions.

Repair Options Are Limited

Quartz is durable, but a sharp impact at an exposed edge can chip it. Small chips can often be repaired or made less noticeable, though an invisible repair cannot always be guaranteed.

A backsplash is less likely to take impact than a counter edge, but corners near open shelving, appliance garages, window returns, and exposed wall ends still need careful handling.

If damage occurs after installation, matching the exact slab pattern for a replacement piece can be difficult. This is particularly relevant with bold, directional veining or discontinued quartz designs.

Walls Must Be Suitable for Slab Installation

Quartz is heavier and less flexible than tile. The wall surface must be stable, properly prepared, and suitable for supporting the material.

Uneven walls can create fitting challenges, visible gaps, or stress points. Older homes may require additional preparation before templating or installation, especially around corners, windows, and areas where previous tile or drywall repairs have left the surface irregular.

Can You Use the Same Quartz Slab for the Countertop and Backsplash?

In many kitchens, yes. Using the same slab for both surfaces creates one of the cleanest and most coordinated looks available.

Whether the countertop and backsplash can come from the same slab depends on the kitchen dimensions, slab size, countertop layout, seam locations, sink and cooktop cutouts, and the amount of usable material available after defects or unsuitable areas are avoided.

During slab layout, the fabricator can review how the veining will move across the countertop and up the wall. In some kitchens, the pattern can be aligned closely. In others, the available slab dimensions or cut locations may make an exact vein match impractical.

Homeowners choosing a directional pattern should review the proposed slab layout before cutting. A small quartz sample will not show how large veins, colour changes, or pattern repeats will appear across an entire kitchen wall.

Installation Details That Influence the Result

A quartz backsplash is only as clean-looking as the planning behind it. Walls are not always perfectly flat, level, or square, particularly in older Ontario homes.

During templating, measurements are taken for wall variations, outlet locations, window openings, cabinets, range hoods, appliance clearances, and the final countertop position. The planning process is similar to the steps described in our guide to countertop fabrication in Ontario.

Countertop and Backsplash Installation Order

The countertop is typically installed first, followed by the backsplash. This allows the fabricator to confirm the final countertop position and create a close, consistent fit at the wall.

A small bead of colour-matched silicone at the countertop-to-backsplash joint helps accommodate normal movement and makes the transition easier to clean.

Backsplash Thickness

Many quartz backsplashes use the same thickness as the countertop, often 2 or 3 centimetres. Matching the thickness creates a substantial, consistent appearance, but it also increases projection from the wall.

In some layouts, a thinner slab or surface may be considered to reduce visual weight or simplify the fit around window trim, electrical boxes, faucets, shelving, and tight cabinet clearances.

The right thickness depends on the selected quartz, cabinet design, wall condition, available fabrication options, and how the backsplash needs to finish at exposed ends.

Outlet and Switch Planning

Electrical cutouts should be confirmed before fabrication. Moving outlets after the quartz has been cut may require additional work or may not be practical.

Homeowners who want a cleaner backsplash may consider under-cabinet outlet strips or carefully positioned receptacles, provided the electrical plan meets applicable building and electrical requirements.

Seam Placement

Seams are usually placed where they will be less noticeable and where the pieces can be installed safely. Corners, hood edges, cabinet breaks, and changes in wall direction may provide logical seam locations.

The best placement is not always the shortest seam. Pattern alignment, installation access, slab dimensions, and structural handling must also be considered.

Quartz Backsplash Versus Tile

Feature Quartz Backsplash Tile Backsplash
Cleaning Easy to wipe with few or no seams Grout requires additional cleaning
Installation cost Usually higher Often lower, depending on tile and labour
Design Large-format, coordinated slab appearance More colour, shape, pattern, and layout options
Heat performance Requires planning around concentrated heat Varies by tile material
Repairs Replacement pieces may be difficult to match Individual tiles may be easier to replace
Visual joints Few seams Multiple grout lines

Quartz is usually better suited to homeowners who prioritize easy cleaning, fewer joints, and a coordinated slab appearance. Tile may be the better choice when budget flexibility, high heat tolerance, decorative variety, or easier spot replacement are more important.

When Quartz Makes the Most Sense

Quartz is a strong backsplash option for homeowners who want low maintenance, a coordinated countertop-and-wall design, and fewer joints to clean.

It is especially well suited to kitchens with:

  • A simple wall layout with manageable seam locations
  • Standard outlet and switch positions
  • A quartz countertop that can continue onto the wall
  • A cooking setup without excessive direct heat against the backsplash
  • A preference for minimal grout and straightforward cleaning

It may be less suitable when the budget is tight, the backsplash has many small obstructions, the walls are highly uneven, or the cooking setup calls for the highest possible heat tolerance.

In those cases, porcelain, sintered stone, or tile may better match the project priorities.

Frequently Asked Questions

Is a Quartz Backsplash Worth the Cost?

A quartz backsplash can be worth the added cost when easy cleaning, minimal grout, and a coordinated countertop-to-wall appearance are important. The value is less clear when the wall has many cutouts or when a lower-cost tile would achieve the desired design.

Can Quartz Be Installed Behind a Gas Stove?

Quartz can be installed behind some gas ranges, but the appliance specifications, required clearances, burner output, and backsplash location should be reviewed first. Quartz should not be assumed to be suitable for every high-heat cooking setup.

Does a Quartz Backsplash Need Sealing?

No. Engineered quartz is nonporous and does not require periodic sealing.

How Thick Is a Quartz Backsplash?

Quartz backsplashes are often fabricated from 2-centimetre or 3-centimetre material. The best thickness depends on the selected slab, countertop thickness, outlet depth, window trim, cabinet clearances, and the desired appearance.

Can a Quartz Backsplash Be Installed Over Existing Tile?

Installing quartz directly over existing tile is not always recommended. The surface must be flat, stable, properly bonded, and able to support the added weight. Removing the existing finish often gives the installer better control over wall preparation and fit.

Will a Full-Height Quartz Backsplash Have Seams?

It may. Seam requirements depend on slab size, wall dimensions, pattern direction, access, windows, range hoods, and installation handling. Some smaller walls can be completed in one piece, while larger layouts may require carefully planned seams.

Can Quartz Backsplash Veins Match the Countertop?

Veining can often be coordinated, especially when the countertop and backsplash are cut from the same slab. Exact alignment is not always possible, so the slab layout should be reviewed before fabrication begins.

Final Thoughts on Quartz Backsplash Pros and Cons

A quartz backsplash offers easy cleaning, no grout maintenance, strong stain resistance, and a refined connection between the countertop and wall. Its main limitations are cost, heat sensitivity, visible seams, complex cutouts, and limited replacement options if damage occurs.

Before selecting a slab, look at a full-size section rather than relying only on a small sample. Consider the backsplash as part of the complete fabrication plan, including the countertop layout, range clearances, wall condition, outlets, windows, seams, and pattern direction.

The right backsplash is not simply the material that looks best in a showroom. It is the one that fits how the kitchen is used and allows the fabrication details to look intentional once installation is complete.

Planning a Quartz Countertop and Backsplash?

Stone Valley Countertops supplies, fabricates, and installs quartz countertops and full-height backsplashes for homeowners across Mississauga, Toronto, the GTA, Durham Region, Niagara Region, Hamilton, Burlington, Oakville, and surrounding Ontario communities.

Before fabrication, our team can review slab dimensions, backsplash height, seam locations, outlet cutouts, range clearances, wall conditions, and pattern direction. This helps identify potential issues before the quartz is cut.

Contact Stone Valley Countertops to discuss your kitchen measurements, material choice, and backsplash layout.

Quartzite vs Granite Durability for Busy Kitchens

Quartzite vs Granite Durability: Which Stone Holds Up Better?

Quartzite vs granite durability comparison in a modern kitchen

A countertop can look flawless in a slab showroom and still be the wrong fit for the way a kitchen is used. When homeowners compare quartzite vs granite durability, the real question is rarely which stone is stronger on paper. It is which surface will handle hot cookware, busy meal prep, spills, kids, pets, and years of daily cleaning without creating unnecessary maintenance concerns.

Both are natural stones with excellent long-term potential. Both can be fabricated into striking kitchen islands, bathroom vanities, bar tops, fireplace surrounds, and outdoor counters. The practical differences come down to the specific slab, how it is fabricated, where it is installed, and how much routine care you are comfortable providing.

Quartzite vs Granite Durability: At a Glance

Feature Quartzite Granite
Scratch resistance Excellent Excellent
Heat resistance Excellent Excellent
Stain resistance Very good with sealer Very good with sealer
Etching resistance Excellent (true quartzite) Excellent
Maintenance Periodic sealing Periodic sealing
Appearance Often resembles marble Wide variety of colours and patterns

Quartzite vs Granite Durability: The Short Answer

True quartzite is generally harder than granite and offers exceptional scratch resistance. Granite is also highly durable, heat resistant, and often a little more forgiving when it comes to day-to-day stain concerns and material variation. Neither material is maintenance-free, and neither should be treated as indestructible.

For a hardworking kitchen, either can be an excellent choice. Quartzite often appeals to homeowners who want pale, marble-like movement but need better resistance to scratching and etching than marble provides. Granite is a practical option for those who want a wide range of natural colours and patterns, reliable performance, and a surface that has proven itself in busy kitchens for decades.

The most accurate answer is slab-specific. Granite is a broad category with major variation in mineral makeup and porosity. Quartzite is also frequently mislabeled in the marketplace, so confirming that a slab is true quartzite rather than a softer stone is worthwhile before making a final decision.

Scratch Resistance and Everyday Wear

Quartzite usually has the advantage in scratch resistance. True quartzite is largely made of fused quartz crystals and typically ranks around 7 on the Mohs hardness scale. Granite commonly falls around 6 to 7, depending on the stone. In a normal home, both materials resist scratches far better than marble, laminate, wood, or many solid-surface counters.

That does not mean a knife should be used directly on either countertop. Cutting on stone dulls knives quickly, and dragging rough ceramic, metal cookware, or gritty items across any polished surface can leave marks or wear in the finish over time. What appears to be a scratch is sometimes metal transfer from a pan or utensil, which can often be removed without damaging the stone.

The finish matters, too. A polished surface makes colours and veining more vivid, but it can make smudges and surface marks easier to see under direct lighting. A honed finish has a softer look and may disguise minor wear better, although it can show fingerprints, oils, or darkened areas more readily on some light stones.

Heat Resistance Is Strong, Not Unlimited

Granite and quartzite handle heat well. A hot pan placed briefly on either surface is unlikely to cause the immediate burn damage associated with laminate or some engineered materials. That is one reason natural stone remains a sensible choice around cooktops, outdoor grills, and fireplace applications.

Still, using trivets is the better habit. Sudden, concentrated temperature changes can create thermal stress, especially near seams, sink cutouts, thin areas, or existing natural fissures. A slow cooker, cast-iron pan, or baking sheet is not usually a problem, but placing extremely hot cookware directly from a burner onto a cold countertop is an unnecessary risk.

Heat resistance also does not apply equally to every part of the installation. Adhesives at seams, caulk around a sink, and the cabinet support below the counter all benefit from reasonable care. The stone may tolerate heat, but the complete countertop assembly deserves protection.

Stains, Spills, and Sealing

Both quartzite and granite are porous natural materials. They need a quality penetrating sealer to slow the absorption of liquids. Sealer does not make stone waterproof or prevent every stain. It gives you more time to wipe up oil, wine, coffee, juice, sauces, and other spills before they can soak in.

How frequently either material needs resealing depends on the slab and the sealer used. Some dense granites and quartzites may go years between applications, while more absorbent slabs may need attention sooner. A simple water test can help: if a few drops of water darken the stone after several minutes, it may be time to evaluate the sealer.

In practical use, granite can be easier to live with when its colour and pattern naturally hide crumbs, water spots, and the occasional missed spill. Light quartzites can show dark oils or pigments more clearly, particularly around a cooktop or near a frequently used sink.

Avoid harsh chemicals, bleach left sitting on the surface, abrasive powders, and acidic cleaners. Warm water, a soft cloth, and a stone-safe cleaner are usually enough for routine care.

Etching: A Key Difference From Marble

Homeowners are often drawn to quartzite because it can resemble marble. True quartzite is much more resistant to acid etching than marble. Lemon juice, vinegar, and tomato-based foods are far less likely to leave dull etched spots.

Granite also has good resistance to etching, although individual stones vary. The important distinction is that a slab sold as quartzite should be verified carefully since some materials marketed under that name may behave more like marble.

Chips, Edges, and Fabrication Details

The edge of a countertop is more vulnerable than its flat surface. Quartzite and granite can both chip if a heavy pot strikes an exposed corner, especially around sink cutouts or thin overhangs.

A slightly softened edge profile can reduce the chance of noticeable edge damage compared with a very sharp square edge.

Fabrication has a major role in durability. Sink cutouts require careful handling because they create a narrow section of stone that carries stress. Large islands need proper support, particularly when there is seating overhang or a waterfall panel.

Thickness can influence the appearance of the countertop, but proper fabrication and installation have a much greater impact on long-term durability.

Which Stone Fits Your Kitchen Routine?

Choose quartzite when scratch resistance is a high priority and you prefer the lighter, layered movement often associated with marble.

Choose granite when you want a proven natural stone that offers excellent heat resistance, dependable durability, and a broad selection of colours and patterns.

Cost varies for both materials. Edge profiles, sink cutouts, waterfall ends, seam complexity, slab selection, installation access, and fabrication details all influence the final project price.

Before making your decision, view the full slab, discuss seam placement, and understand how the material will perform in your specific kitchen. Careful planning before fabrication has just as much influence on long-term satisfaction as the stone itself.

Frequently Asked Questions

Is quartzite stronger than granite?

True quartzite is generally harder and slightly more scratch resistant than granite, but both materials are exceptionally durable for residential kitchens.

Which requires more maintenance?

Both require periodic sealing and routine cleaning with stone-safe products. Maintenance depends more on the individual slab than the stone category.

Can I put hot pans on granite or quartzite?

Both materials resist heat very well, but using trivets is still recommended to reduce the risk of thermal shock and protect seams and adhesives.

Which is better for a busy family kitchen?

Either is an excellent choice. Granite often hides everyday crumbs and water spots better, while quartzite appeals to homeowners looking for a lighter, marble-inspired appearance with excellent durability.

If you’re comparing natural stone options for your home, visit one of our Ontario showrooms to view full slabs in person. Seeing the entire slab, discussing seam placement, and understanding how each material performs in everyday use will help you choose a countertop that looks beautiful and stands up to years of daily life.

Best Countertop Edge Styles for Every Kitchen

Best Countertop Edge Styles for Every Kitchen

A countertop edge is one of those details you notice most after the kitchen is finished. It affects how the stone feels under your hand, how easily crumbs wipe away, how thick the counter appears, and whether the overall design feels clean-lined or traditional. The best countertop edge styles are not necessarily the most decorative ones. They are the profiles that suit your material, layout, household, and the amount of visual detail already in the room.

For most Ontario homeowners, the decision comes down to a practical balance. A profile should look intentional without creating a cleaning nuisance, adding unnecessary fabrication cost, or leaving a vulnerable corner near a busy walkway. Here is how the most common options compare and where each one works best.

Popular countertop edge styles for quartz, granite, marble and quartzite kitchen countertops
Countertop edge profiles can change the appearance, comfort and maintenance needs of a finished surface.

Countertop Edge Styles at a Glance

The table below provides a quick comparison of popular countertop edge profiles. The final choice should also account for the countertop material, slab thickness, cabinet style, exposed corners and how the space will be used.

Edge Style Best For Maintenance Overall Look
Eased Modern kitchens, vanities and laundry rooms Very easy to clean Simple and understated
Pencil Family kitchens, islands and breakfast bars Very easy to clean Soft modern
Bevelled Transitional kitchens and architectural designs Easy to clean Crisp and defined
Half-Bullnose Traditional kitchens and seating areas Easy to maintain Soft and classic
Full Bullnose Bathrooms, bars and traditional interiors Easy to maintain Fully rounded
Ogee Formal kitchens, vanities and detailed cabinetry Requires more detailed wiping Decorative and traditional
Mitered Waterfall islands and thick contemporary counters Easy to clean when fabricated properly Bold and substantial

Best Countertop Edge Styles and What They Change

An edge profile is the shaped treatment applied to the exposed side of a countertop slab. It is cut and polished during fabrication after final measurements and material details have been confirmed. The right profile can make a standard 3 cm quartz countertop look substantial, soften the appearance of a bold-veined quartzite, or bring a more traditional finish to granite or marble.

Eased Edge: Clean and Easy to Live With

An eased edge has a small, softened radius along the top and bottom corners. It is not perfectly sharp, even though it can look square from a distance. This subtle rounding helps reduce the risk of chipping and makes the edge more comfortable during everyday use.

This is one of the most versatile choices for contemporary kitchens, laundry rooms, bathroom vanities and bar tops. It suits quartz especially well because it keeps the focus on the colour and pattern rather than the profile. It is also one of the easiest edges to wipe clean, with no deep grooves where dust or spills can collect.

An eased edge is usually a sensible place to start when comparing countertop estimates. It is straightforward to fabricate, works with nearly every stone material, and does not compete with cabinet hardware, backsplash tile or a statement island.

Pencil Edge: A Slightly Softer Modern Profile

A pencil edge has a more visible rounded top edge than an eased profile, while the lower edge remains relatively crisp. The result is clean but less angular. It is a good fit when you want a modern kitchen to feel a little more relaxed, or when children regularly use an island or breakfast bar.

Pencil edges work well on quartz, granite and quartzite. On materials with dramatic movement, such as marble-look quartz or natural quartzite, the gentle curve adds softness without interrupting the slab’s pattern. The difference may seem small on a sample, but it becomes more noticeable along a long island or peninsula.

Homeowners comparing natural stone can also review our quartzite countertops guide to learn how edge selection, sealing and fabrication affect long-term performance.

Bevelled Edge: Defined Lines Without Extra Ornament

A bevelled edge uses a flat angled cut along the top of the countertop. It catches light differently than a rounded profile, creating a crisp border that can give a simple slab more definition. Bevels vary in width, so a small bevel can remain understated while a wider bevel becomes a more obvious design feature.

This profile suits transitional kitchens, particularly where flat-panel or Shaker-style cabinetry is paired with simple hardware. It can also complement porcelain and sintered stone, which often have a refined, architectural appearance.

Because the angled face is polished, bevelled profiles require accurate fabrication to keep the line consistent around corners, sink cutouts and seams. More information about these production details is available in our guide to countertop fabrication in Ontario.

The trade-off is that the lower corners can be somewhat more exposed than they are on a fully rounded edge. In a narrow kitchen aisle or on an island with frequent traffic, a softer profile may be more forgiving.

Bullnose and Half-Bullnose: Soft, Traditional and Family-Friendly

A full bullnose is rounded from top to bottom, creating a smooth semicircular face. A half-bullnose rounds mainly over the top edge and drops more vertically beneath it. Both profiles soften the visual weight of stone and reduce the sharpness of exposed corners.

These edges pair naturally with traditional cabinetry, warmer granite patterns and classic marble vanities. They are also comfortable on raised seating areas where people may rest their arms against the counter. A full bullnose can make a countertop appear slightly thinner because the rounded face hides the slab’s straight edge, while a half-bullnose tends to preserve more visual thickness.

There is one practical consideration. A strongly rounded top edge can sometimes guide drips towards cabinet fronts instead of allowing them to fall straight down. This is rarely a major problem in a kitchen, but it can matter around a frequently used bathroom sink. A properly selected faucet and a short backsplash can help manage splashing in these areas.

Ogee Edge: Decorative, With More Fabrication Detail

An ogee profile combines an inward curve and an outward curve for a layered, traditional shape. It has more shadow lines than simpler edge options, giving granite, marble or quartz a more formal appearance. It is often selected for bathroom vanities, bars and kitchens with detailed cabinet doors rather than minimal contemporary designs.

The profile needs enough thickness to be seen properly. On a thin countertop, an ogee can look compressed, while a thicker edge treatment gives it better proportion. It also requires more fabrication time than an eased or pencil edge, so it generally adds to the project cost.

Ogee edges are not especially difficult to maintain, but their curves need more attention during cleaning. For a homeowner who prefers a quick wipe-down after meals, an eased or pencil profile is usually more practical. For a vanity or formal serving area, the added detail may be worthwhile.

Thickness and Mitered Edges Matter as Much as the Profile

The edge shape is only part of the visual decision. Countertop thickness changes how a profile looks and how substantial the finished surface feels. Many quartz and granite countertops are fabricated from 3 cm slabs, which provide a solid appearance and durable performance for standard kitchen applications.

Some materials are available in thinner slabs, especially porcelain and sintered stone. With these materials, a built-up or mitered edge can create the appearance of greater thickness while retaining the benefits of a thinner surface.

A mitered edge joins two pieces of stone at a 45-degree angle to create a thicker-looking front face. The seam is placed at the corner rather than across the visible surface, allowing a 3 cm slab to appear 6 cm or more thick. This treatment is often used for waterfall islands, contemporary vanities and bold statement counters.

A mitered edge is a fabrication detail, not a separate material. Its quality depends on precise cutting, colour matching, adhesive work, polishing and careful handling during installation. Veined materials require additional planning so the pattern continues naturally from the horizontal countertop surface onto the vertical edge.

A poorly planned miter can make an expensive slab look disjointed. A properly executed miter makes the added thickness feel intentional and helps the edge appear as though it was cut from one solid block.

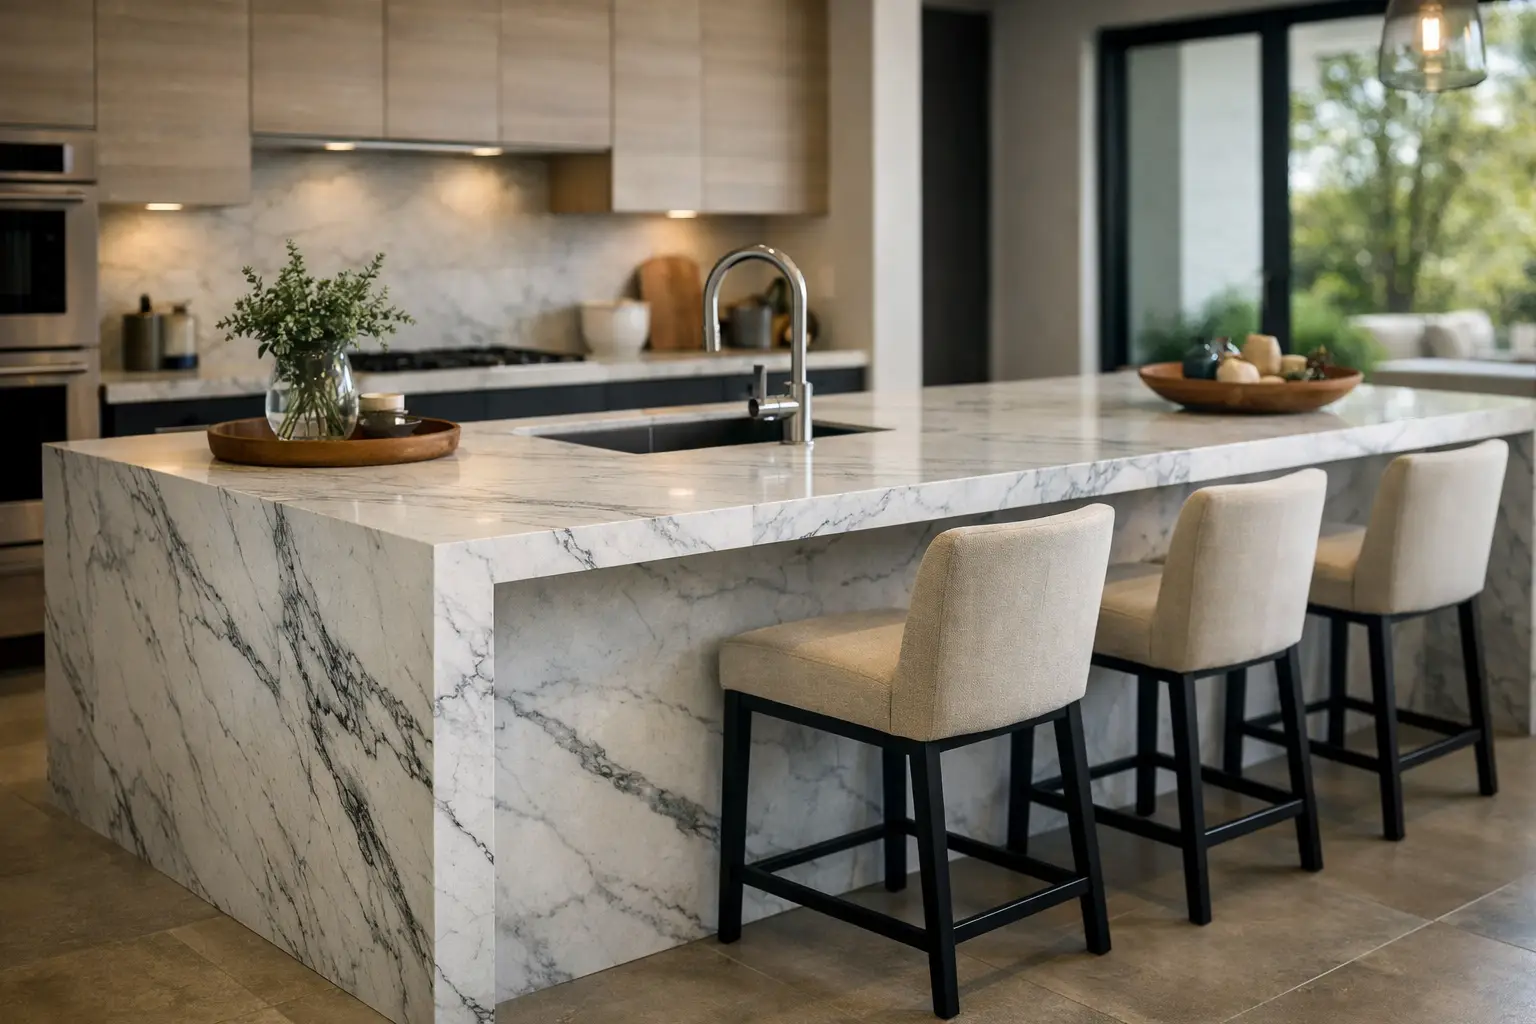
Waterfall panels deserve the same attention. A waterfall is the vertical continuation of the countertop down the side of an island or cabinet end. The edge where the horizontal and vertical pieces meet is often mitered, and the vein direction should be confirmed before fabrication. This is especially important with marble-look quartz, natural marble, quartzite and large-format porcelain.

Match the Edge to the Material and the Room

Quartz countertops are flexible because they can be fabricated in most standard profiles and do not require sealing. An eased, pencil, bevelled or mitered edge usually complements their clean, consistent appearance.

Granite also works well with nearly every profile, including more decorative ogee and bullnose options. Depending on the colour and movement of the slab, however, a highly decorative edge may make an already active pattern appear busier than expected.

Marble and quartzite deserve a little more caution around exposed corners. Both materials can look beautiful with eased, pencil or bullnose profiles, but a sharp square edge is generally more likely to show wear over time. Marble is naturally softer and can etch from acidic products, so while the edge profile will not eliminate that maintenance requirement, it can help reduce visible corner damage.

Porcelain and sintered stone are often selected for their thin, contemporary appearance and excellent resistance to heat and staining. Their edges can be finished simply or built up with miters, but fabrication requires specialised equipment because these materials behave differently than quartz or granite. A narrow, clean edge often complements these surfaces better than a heavily decorative profile.

Bathrooms and laundry rooms usually benefit from prioritising cleaning and practicality over decorative detail. A small eased edge works well with nearly every vanity style. For an entertaining space or large island, however, a thicker mitered edge can create more visual presence without introducing ornate curves.

Budget, Overhangs and Details That Affect the Final Result

Simple profiles generally cost less because they require fewer fabrication passes. More complex options, including ogee profiles, multi-step edges and thick mitered builds, require additional labour and material planning. The exact difference depends on the stone, the amount of exposed edge, the number of outside corners and whether the project includes a waterfall end or detailed backsplash returns.

The edge should also be considered alongside overhangs. A countertop seating overhang needs proper support based on the material, thickness and projection. A rounded edge may feel more comfortable along a breakfast bar, but the support requirements remain just as important as the profile itself.

Likewise, sink cutouts deserve careful planning. A polished stone edge around an undermount sink requires smooth transitions and accurate finishing, particularly in kitchens that see heavy daily use.

Edge profiles should also be considered alongside seam placement. Large islands, L-shaped kitchens and long countertop runs often require seams, and thoughtful planning helps make them less noticeable while preserving both strength and appearance. Learn more in our kitchen countertop seams guide.

Before fabrication begins, look at a full-size edge sample against your cabinet door, hardware and selected slab. This gives a much better impression than choosing from a small profile display. Lighting can make a bevel appear sharper, a bullnose softer and a mitered edge considerably thicker than expected.

At Stone Valley Countertops, these details are reviewed during material selection, templating and fabrication planning so the chosen edge works with the slab layout, seams, overhangs and installation conditions. The best edge profile is usually the one that looks natural in the room and remains easy to live with for years to come.

A countertop edge does not need to be elaborate to be effective. Start with how you use the space, then allow the material, slab thickness and cabinetry to guide the final decision. That approach usually creates a countertop that feels balanced rather than overdesigned.

Frequently Asked Questions

What is the most popular countertop edge style?

An eased edge is the most popular choice because it suits almost every kitchen style, is comfortable to use, easy to clean and helps minimise chipping at exposed corners.

Which countertop edge is easiest to clean?

Eased and pencil edges are generally the easiest to maintain because they have smooth transitions without decorative grooves where crumbs, dust or spills can collect.

Do decorative countertop edges cost more?

Yes. Ogee, double ogee, stacked profiles and thick mitered edges typically require additional fabrication time, making them more expensive than standard eased or pencil edges.

Are mitered edges stronger than standard edges?

No. A mitered edge is primarily a design feature used to create the appearance of a thicker countertop. Its durability depends on precise fabrication, proper adhesives and professional installation.

Which countertop edge is best for quartz?

Most quartz countertops pair well with eased, pencil, bevelled and mitered edges because these profiles complement the clean, consistent appearance of engineered stone while remaining practical for everyday use.

Planning a New Countertop?

Choosing the right edge profile is easier when you can compare full-size samples alongside your selected slab. If you’re planning a new kitchen, bathroom or laundry room, the team at Stone Valley Countertops can help you select an edge profile that complements your material, cabinetry and overall design while fitting your budget and lifestyle. Contact us to discuss your project or visit one of our Ontario showrooms.