Malik

Stone Fabrication Process Guide for Countertops
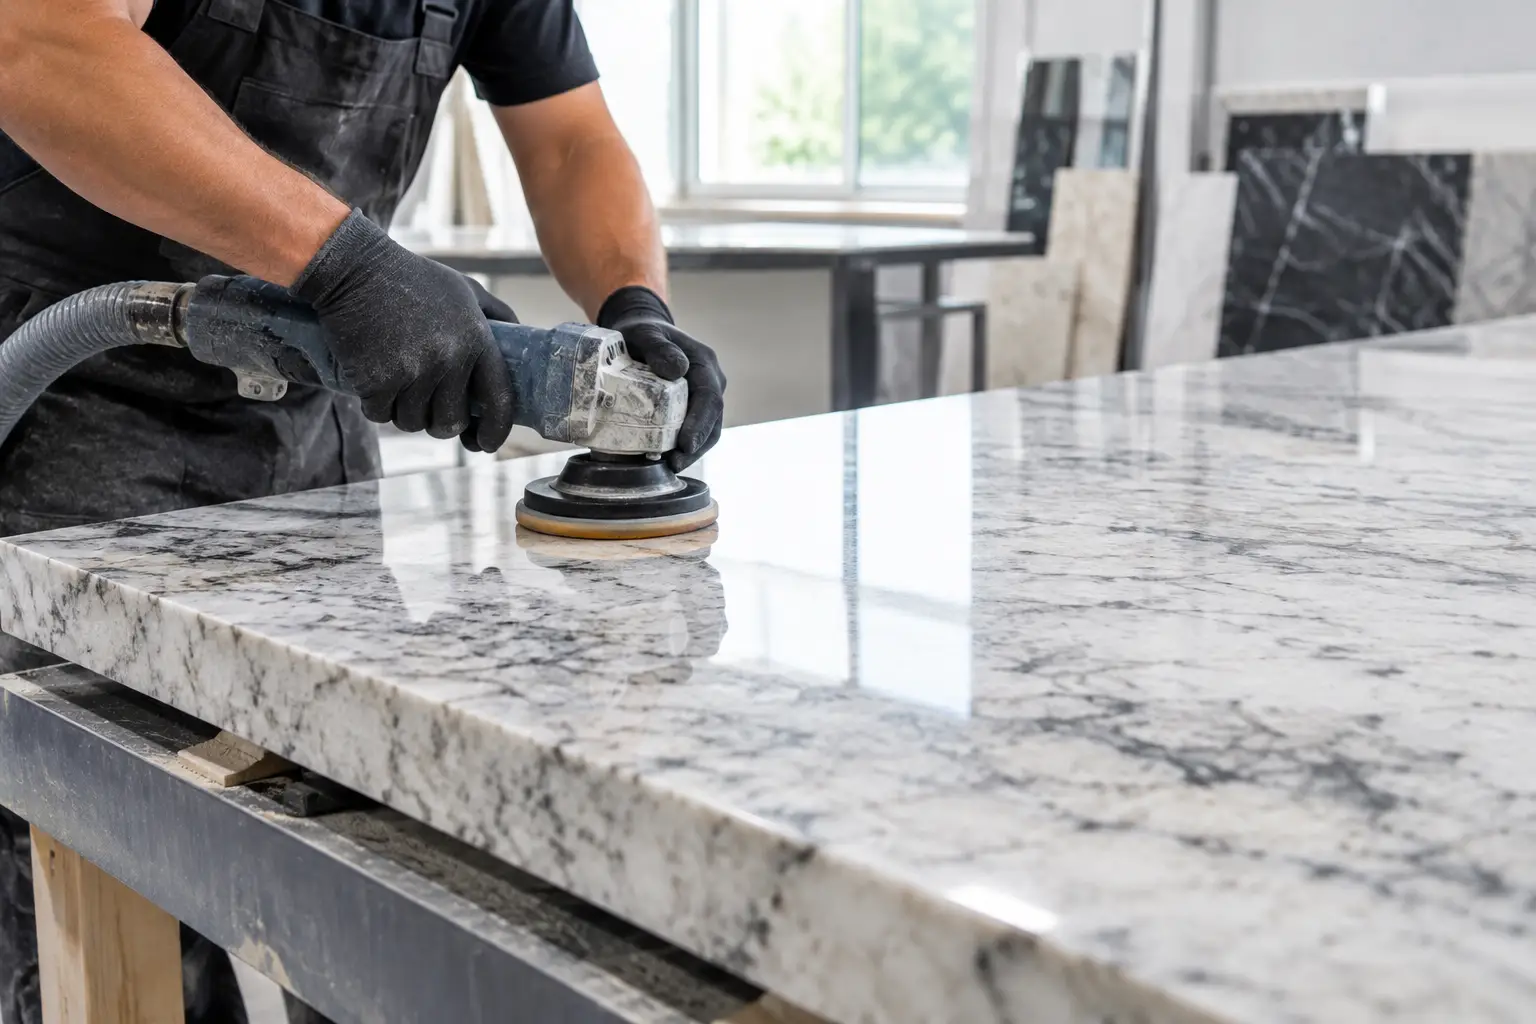
Stone Fabrication Process Guide for Countertops

A countertop may look like one solid, simple surface once it is installed, but its fit and finish are decided long before installation day. This stone fabrication process guide explains what happens between choosing a slab and using your new kitchen, bathroom, or bar countertop. It also clarifies where good planning matters most: seams, sink cutouts, overhangs, edge details, and the natural movement in the material.

Quick Answer: The countertop fabrication process typically moves from material selection and templating to slab layout, cutting, CNC machining, edge finishing, polishing, quality checks, and installation. Decisions about seams, sinks, overhangs, edges, appliances, and vein placement should be made before cutting begins because they directly affect the finished countertop.

The Process Starts Before the Slab Is Cut

Fabrication should begin with a conversation about how the surface will be used. A busy family kitchen may benefit from durable quartz or porcelain with an easy-to-clean finish, while a homeowner who appreciates natural variation may choose granite, marble, or quartzite. The right material depends on more than appearance. Heat exposure, staining risk, maintenance preferences, budget, and the size of the slabs available all affect the final plan.

At this stage, details that are easy to overlook should be decided early. These include countertop thickness, edge profile, backsplash height, undermount or farmhouse sink selection, cooktop location, and whether an island will have a waterfall end. A sink model, faucet, and any appliances that sit through the countertop should be selected before templating whenever possible. Their cutout specifications affect the fabrication drawing.

Natural stone needs additional planning because each slab has its own veining, mineral marks, and movement. Two slabs from the same collection can look noticeably different. Looking at the actual slabs allows the fabricator and homeowner to discuss which areas will be most visible and how veining can continue across a seam, mitered edge, or waterfall panel.

Templating: Turning Your Space Into a Fabrication Plan

After cabinets are installed, level, and securely fastened, the countertop is templated. This is the measurement stage where the installed space is captured precisely, including walls that are not perfectly straight, out-of-square corners, and any variation in cabinet depth.

Modern digital templating tools can create an accurate layout, but measurements are only one part of the job. The templater also confirms overhangs, support needs, seam locations, sink placement, wall conditions, and access for installation. For example, a long peninsula may need steel supports or corbels if its overhang exceeds what the selected stone and cabinet structure can safely carry.

A template is generally taken after the cabinets are in their final position. Measuring too early can create avoidable problems if cabinets move, a wall is adjusted, or an appliance opening changes. If a tile backsplash is planned, the countertop is usually fabricated to the finished wall condition or with the appropriate allowance discussed in advance.

Why Seams Are Planned, Not Hidden by Chance

Most large countertop projects require at least one seam. Even a spacious slab has limits, and the route into the home, stairways, turns, and the weight of the finished piece may make a single oversized section impractical.

A well-planned seam is placed where it is structurally sensible and visually less noticeable, often away from a sink cutout and major stress points. With natural stone, seam placement may also be guided by the veining. A fabricator can often align the pattern thoughtfully, but a seam will not disappear completely. Honest expectations matter, especially with heavily veined quartzite, marble, and marble-look quartz.

Slab Layout: Where Craftsmanship Meets Material Character

Once the template is complete, the fabrication team lays out the countertop pieces on the selected slab. This is sometimes called slab mapping. It determines where each countertop section, backsplash, cutout, and edge return will come from.

For quartz, the goal may be keeping a consistent pattern direction. For granite and quartzite, the team may work around a dramatic vein, a natural fissure, or a colour variation. These are normal features of natural stone, not fabrication defects, but they should be considered before cutting. A slab with bold movement can make a waterfall island look striking when the pattern is bookmatched or continued down the side, though that approach may require additional material and labour.

Material yield also affects cost. A simple rectangular vanity often uses a slab efficiently. A large L-shaped kitchen with a full-height backsplash, wide waterfall ends, or multiple cutouts creates more offcuts and may require extra slabs. Choosing a 2 cm or 3 cm countertop thickness can also change the look, weight, edge options, and overall project cost.

Cutting, Shaping, and Reinforcing the Stone

After the layout is approved, the slab is cut using equipment designed for stone fabrication. Water-cooled saws and CNC machinery make the primary cuts while helping control heat and dust. The exact tools vary by material: porcelain and sintered stone require different handling than quartz or granite because their density, thickness, and behaviour during cutting are different.

The raw cut pieces are then shaped for edges, sink openings, faucet holes, cooktops, and other details. A square eased edge is clean and practical for many kitchens, while a bullnose, ogee, or more detailed profile changes the visual weight of the countertop. Not every edge profile works equally well with every material or thickness, so the selection should suit both the design and the stone.

Sink cutouts deserve special attention. The area around an undermount sink is one of the countertop’s more vulnerable sections because it combines a large opening with frequent use. Fabricators round inside corners to reduce stress and finish the underside carefully where it will remain visible. Depending on the stone and sink configuration, reinforcement may be added near cutouts or seams.

Mitered edges are another detail that requires precision. They join two pieces at an angle to create the appearance of a thicker slab, commonly on waterfall islands and substantial-looking edges. A clean miter depends on accurate cutting, colour-matched adhesive, proper support, and careful polishing. It can create a refined result, but it adds fabrication time and is not always necessary for a durable, attractive countertop.

Polishing and Finishing the Details

A cut edge does not leave the shop looking like a finished countertop. Edges are shaped and polished through several stages until their sheen and feel match the slab surface as closely as possible. On honed materials, the finish is softer and less reflective, so the edge treatment must be adjusted accordingly.

This is also when small details receive attention: drain grooves near an undermount sink, softened corners on an island, outlet cutouts for a full-height backsplash, or a finished exposed end on a breakfast bar. These details may be subtle, but they influence how the countertop looks and functions every day.

Natural stone can have pits, fissures, or areas of variation that remain visible after fabrication. These characteristics are part of the material. Quartz, porcelain, and sintered stone usually offer a more uniform surface, though their printed or engineered patterns still need thoughtful alignment at seams and mitres.

Installation Day: Precision at the Finish Line

Before installation, the team confirms that the countertop sections can be moved safely into the home and placed without damaging walls, cabinets, or the material. Countertop pieces are heavy, particularly 3 cm granite, quartzite, and large waterfall panels. Clear access and a prepared work area help the day go smoothly.

At the cabinets, installers check fit against walls, level the surface as needed, secure the stone, and join seams with colour-matched adhesive. They make final adjustments to ensure the overhangs are even and the sink opening aligns correctly. Caulking is typically used where the countertop meets a wall or backsplash to allow for small movement and create a clean finished line.

Plumbing reconnection is normally completed afterward by the appropriate trade. Homeowners should also wait for the installer’s guidance before placing heavy items on a newly installed top or using the sink, especially if adhesives or supports need time to cure.

What Affects the Fabrication Timeline?

A typical countertop timeline includes material selection, cabinet readiness, templating, fabrication, and installation. The fabrication portion may move quickly once measurements are complete, but schedules can change if slabs are delayed, cabinets are not ready, appliance specifications are missing, or a project includes complex details such as full-height backsplash panels or multiple waterfalls.

Clear decisions early in the process help avoid delays. Confirm the sink, faucet, cooktop, edge profile, thickness, backsplash plan, and any overhang supports before the template appointment. If a design choice changes after the slab has been cut, it may require a new piece or an adjusted plan.

The most useful question to ask is not simply how quickly a countertop can be installed. Ask how the material will be laid out, where seams will fall, how cutouts will be reinforced, and what details are included in the finished edge work. Those answers give you a clearer picture of the care behind the surface you will use every day.

Frequently Asked Questions About Countertop Fabrication

What is stone countertop fabrication?

Stone countertop fabrication is the process of turning a full slab into finished countertop pieces that fit a specific space. It includes templating, slab layout, cutting, sink and appliance cutouts, edge shaping, polishing, reinforcement where required, quality checks, and preparation for installation.

Are countertops cut before or after measurements are taken?

Final countertop pieces should be cut from measurements or templates taken after the cabinets are installed in their final position. Cutting before the space is ready increases the risk of incorrect dimensions, overhangs, appliance openings, and wall fit.

How are sink holes cut into stone countertops?

The sink opening is programmed from the approved sink specifications and cut using fabrication equipment suited to the countertop material. The opening is then finished and polished as required. Sink type, reveal preference, faucet placement, and support requirements should be confirmed before fabrication.

Can countertop seams be completely invisible?

No. A carefully fabricated and installed seam can be discreet, but it should not be expected to disappear completely. Its visibility depends on the material, colour, pattern, vein movement, seam location, lighting, and adhesive match.

Why does slab layout matter before fabrication?

Slab layout determines where patterns, veins, colour variations, seams, cutouts, and finished edges appear in the completed project. It is especially important with natural stone and strongly veined materials where moving a countertop section on the slab can noticeably change the finished appearance.

How should homeowners prepare for countertop templating?

Cabinets should be installed, secured, and in their final position. Homeowners should also have final information available for sinks, faucets, cooktops, countertop thickness, edge profiles, overhangs, backsplash plans, and other items that affect fabrication.

Planning a Countertop Project in Ontario?

If you are selecting quartz, granite, marble, quartzite, porcelain, or another countertop surface, fabrication details are worth discussing before the slab is cut. Stone Valley Countertops supplies, fabricates, and installs custom countertops for homeowners throughout the GTA, Durham Region, Niagara Region, Hamilton and surrounding Ontario communities.

Contact Stone Valley Countertops to discuss your project, material selection, fabrication details, or installation requirements.
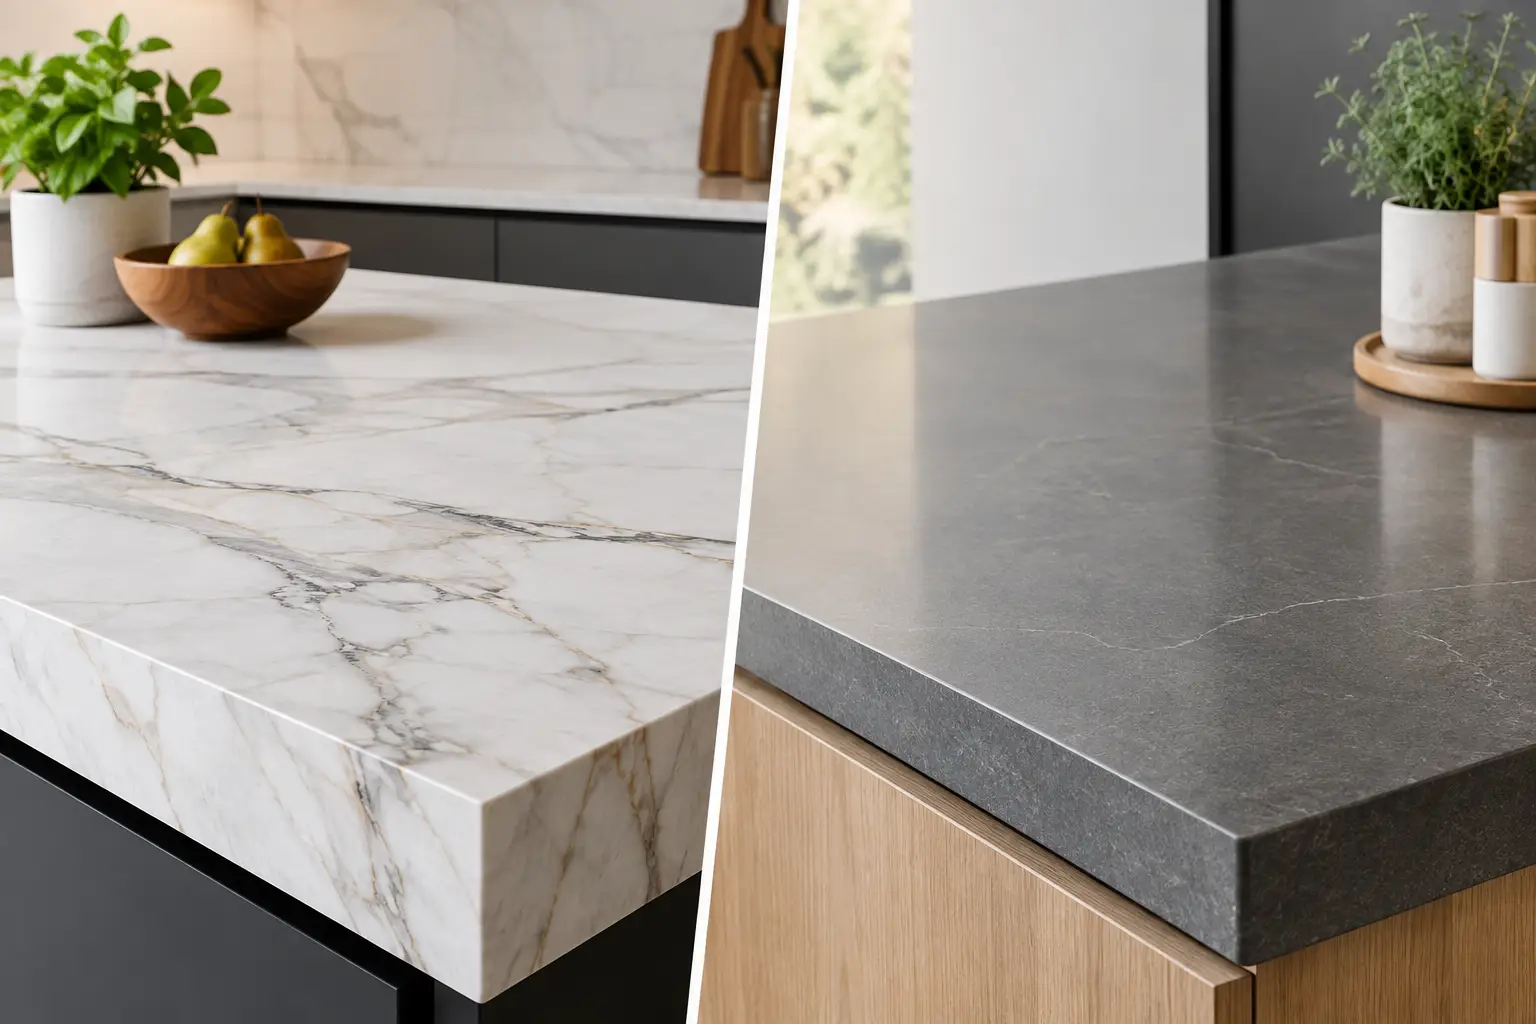
Sintered Stone vs Porcelain for Countertops

Sintered Stone vs Porcelain for Countertops

A hot pan beside the cooktop, red wine near the island, a heavy pot set down too quickly. These are the everyday moments that shape a countertop decision. When comparing sintered stone vs porcelain, both materials offer impressive resistance to heat, stains, and moisture. The more useful question is how each slab will perform after fabrication in your specific kitchen, bathroom, or outdoor area.

Both are practical choices for homeowners who want a low-maintenance surface with a modern look. But they are not interchangeable in every project. Slab size, thickness, edge details, cutouts, pattern selection, and the experience of the fabricator can all affect the finished result.

Quick Answer: Sintered Stone vs Porcelain

Both sintered stone and porcelain are dense, low-maintenance slab materials with strong resistance to heat, stains, moisture, and UV exposure. Porcelain is primarily made from refined clay and minerals fired at high temperatures, while sintered stone generally uses a blend of natural minerals compacted and heated during manufacturing. For countertops, the best choice often depends less on the category name and more on the specific slab, thickness, design, edge requirements, and fabrication details.

Sintered Stone vs Porcelain: The Basic Difference

Porcelain slabs are made from refined clay, feldspar, minerals, and pigments. They are pressed and fired at extremely high temperatures, creating a dense, nonporous surface. Large-format porcelain countertops and panels can be used for countertops, backsplashes, shower walls, fireplace surrounds, and outdoor kitchens.

Sintered stone is also made with natural minerals and produced under intense heat and pressure. The manufacturing process creates a dense slab designed for demanding surface applications. Depending on the brand and collection, the exact mineral composition and manufacturing process can vary.

In practice, the line between the two can be less clear than homeowners expect. Both are high-performance manufactured slab materials, and product terminology varies between manufacturers. Instead of relying only on the label, look at the actual slab, its thickness, approved applications, available finishes, warranty, and fabrication requirements.

Durability in a Working Kitchen

For everyday countertop use, porcelain and sintered stone are both highly resistant to staining. Their nonporous surfaces generally do not require sealing, which makes routine cleanup straightforward. A soft cloth, warm water, and a suitable mild cleaner are usually enough for daily care.

Heat resistance is another major advantage. Both materials generally tolerate heat very well. Even so, using a trivet is a sensible habit. Sudden temperature changes can place stress on countertop materials, particularly around cooktop openings, cutouts, joints, and unsupported areas.

Scratch resistance is also strong, but neither material should be treated as indestructible. Cutting directly on the countertop can dull knives, and hard or heavy objects can damage an exposed edge if they strike it with enough force.

This distinction is important. The broad surface of a slab may be extremely durable while a thin exposed edge, corner, sink opening, or cooktop cutout is more vulnerable to impact.

Porcelain and many sintered stone products also offer excellent UV stability, making suitable products practical for bright rooms and exterior applications. For an Ontario outdoor kitchen, however, the entire installation needs to be planned for the setting. Cabinet construction, support, drainage, product specifications, and exposure to Ontario freeze-thaw cycles all matter.

Sintered Stone vs Porcelain at a Glance

  • Stain resistance: Excellent for both when the specified product is intended for countertop use.
  • Heat resistance: Excellent for both, although trivets remain a good everyday habit.
  • Sealing: Generally not required for either material.
  • UV resistance: Strong for suitable products, making many options useful outdoors.
  • Scratch resistance: High, but neither surface should be considered scratch-proof.
  • Edge impact: Thin edges and exposed corners require more care than the centre of the slab.
  • Fabrication: Both require appropriate equipment, handling, cutting techniques, and installation planning.

The Fabrication Difference Matters More Than Most People Expect

These materials are hard and durable, but that does not mean they are simple to fabricate. Large slabs, thin profiles, and detailed cutouts require careful handling from templating through installation.

A porcelain or sintered stone countertop can be made with a thin profile, creating a clean contemporary look. Many homeowners also choose a mitered countertop edge to create the appearance of a thicker slab.

A mitered edge is formed by joining precisely cut pieces so the front of the countertop appears substantially thicker. It can work particularly well on islands and vanities, but accurate cutting and alignment become important when working with light colours or directional veining.

Sink and Cooktop Cutouts

Sink and cooktop openings deserve particular attention because cutting an opening removes material from the slab. The fabrication method, corner radius, appliance clearances, and support all need to follow the requirements of the specific product.

Undermount sinks also need appropriate support rather than relying on the countertop alone to carry the sink’s weight. This becomes increasingly important with large or heavy sinks.

Waterfall Panels and Vein Matching

Waterfall islands are possible with both materials, but the design should be discussed before fabrication begins. If the veining or pattern is directional, the slab layout determines how the pattern turns from the horizontal countertop onto the vertical panel.

A well-planned waterfall can make the pattern appear continuous. With heavily veined designs, slab layout should be reviewed before cutting rather than leaving the pattern alignment until installation.

Appearance: Printed Design vs Material Depth

The visual difference often comes down to the individual collection rather than simply choosing porcelain or sintered stone.

Porcelain is available in marble looks, concrete finishes, solid colours, metal-inspired designs, and natural stone patterns. Many slabs use surface decoration, so the face pattern may not continue through the body or along an exposed edge in the same way it does with natural stone.

Sintered stone is available in many of the same design directions, from quiet neutrals to dramatic veining. The appearance of the body, edge, and surface pattern varies significantly by manufacturer and collection, so it is worth examining the actual product rather than assuming all sintered slabs behave or look alike.

A sample is useful for comparing colour and texture, but it should not replace viewing the full slab whenever possible. A small sample cannot show where the veining will land on an island, whether pattern repetition will be noticeable, or how a large surface responds to natural and artificial light.

If you are comparing several slabs, our guide to how to compare countertop slabs covers the details worth checking before making a final selection.

What About Full-Height Backsplashes?

Either material can create a clean, low-grout backsplash that runs from the countertop to the upper cabinets or range hood.

Using the same design for the countertop and backsplash can reduce visual breaks, but slab backsplashes require accurate measurements and careful planning around outlets, switches, windows, cabinets, and range hoods.

Pattern placement matters too. A dramatic vein that looks excellent on an island may need to be positioned differently when it continues vertically up a backsplash.

Cost Depends on More Than the Slab Price

It is difficult to say that sintered stone is always more expensive than porcelain, or the reverse. Pricing changes based on the manufacturer, collection, slab size, thickness, finish, availability, and complexity of the project.

Fabrication also has a meaningful effect on the final cost. Straight runs with simpler edge details and a single sink opening are generally less involved than a kitchen with mitered edges, waterfall panels, full-height backsplash, multiple seams, drain grooves, or several appliance cutouts.

Large-format slabs can also require additional planning for transportation and access into the home. Stairs, elevators, narrow doorways, finished cabinetry, and the size of individual countertop pieces can affect how an installation needs to be approached.

When comparing countertop quotes, make sure each one reflects the same scope. One estimate may include a standard edge while another includes a mitered buildup. Seam locations, backsplash work, cutouts, installation, and material thickness may also differ.

Which Material Is Better for Your Project?

For most homeowners, there is no universal winner in the sintered stone vs porcelain comparison. Start with the application and the specific slab rather than choosing based only on the category name.

For a busy kitchen, both can be practical options when strong heat, stain, moisture, and UV resistance are priorities. For a bathroom vanity or shower wall, large-format panels can reduce grout lines and simplify everyday maintenance.

For a fireplace surround or outdoor counter, suitable porcelain and sintered stone products can offer useful heat and UV performance, but the manufacturer’s approved applications should always be confirmed. Not every thickness, finish, or collection is designed for every use.

Your design priorities should guide the final selection as well. If you want a particular marble look, compare full slabs and inspect the edge appearance. If you want a substantial-looking island, discuss whether a mitered edge makes sense. If your kitchen has long countertop runs, ask where seams will be located and how the pattern will align.

At Stone Valley Countertops, these details are considered before fabrication begins. Accurate templating, realistic seam planning, slab layout, and precise fabrication help ensure the material works around the sink, cooktop, backsplash, and island rather than simply looking good as a showroom sample.

The best choice is usually the specific slab that fits your daily use and project details. Bring your cabinet layout, appliance specifications, sink information, and design preferences when selecting material. Those details make it much easier to determine whether a particular porcelain or sintered stone product is suitable for the project.

Frequently Asked Questions

Is sintered stone the same as porcelain?

No. They are related high-performance manufactured surfaces, but their raw materials and manufacturing processes can differ. Product terminology also varies between manufacturers, so homeowners should compare the specifications of the individual slab rather than relying only on the category name.

Is sintered stone or porcelain better for kitchen countertops?

Both can perform very well in a kitchen. The better fit depends on the specific product, thickness, available slab sizes, desired edge treatment, pattern, cutouts, and fabrication requirements.

Do porcelain and sintered stone countertops need sealing?

These surfaces are generally nonporous and typically do not require the periodic sealing associated with materials such as granite or marble. Always follow the care instructions provided by the manufacturer of the specific product.

Can you put hot pans on porcelain or sintered stone?

Both materials offer strong heat resistance, but using trivets is still recommended. Protecting the surface from extreme or sudden temperature changes is a simple precaution, particularly near cutouts, edges, and joints.

Can porcelain or sintered stone be used outdoors in Ontario?

Many products are suitable for exterior applications because of their low water absorption and UV resistance. The specific product must be approved for exterior use, and the installation should account for proper support, drainage, weather exposure, and Ontario’s freeze-thaw conditions.

Can you have an undermount sink with porcelain or sintered stone?

Yes, depending on the slab and manufacturer’s fabrication requirements. The sink opening needs to be fabricated correctly, and the sink should have appropriate mechanical support rather than relying solely on adhesive or the countertop to carry its weight.

Does Quartz Scratch? What Homeowners Should Know

Does Quartz Scratch? What Homeowners Should Know

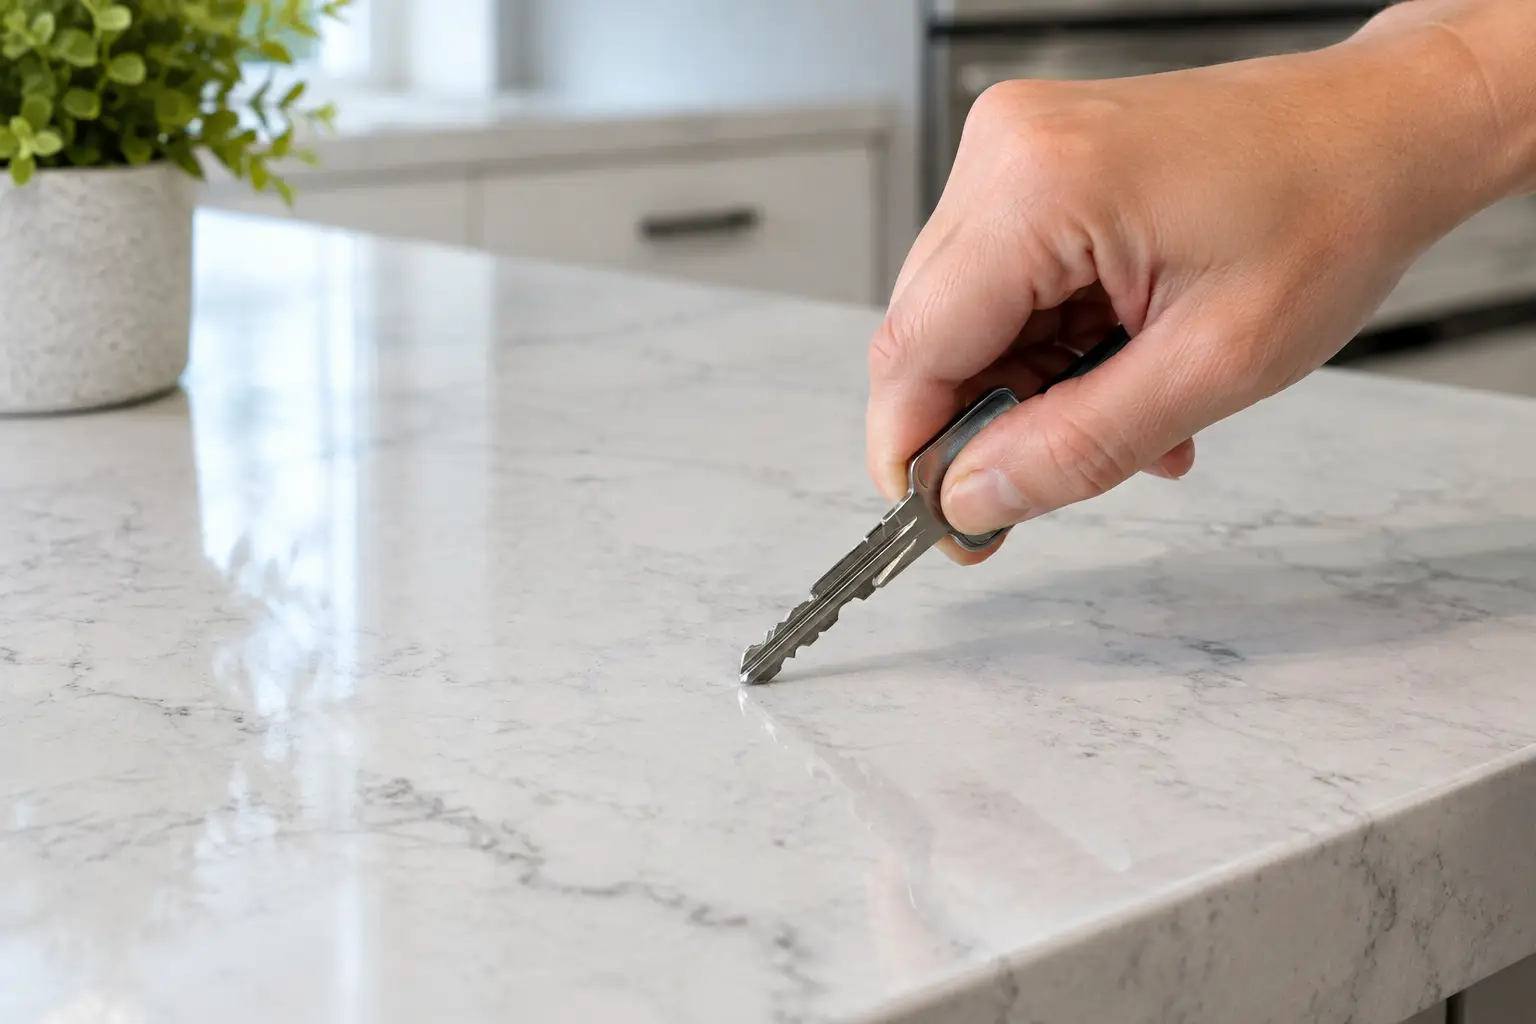
A new quartz countertop can look almost indestructible, especially once it is installed as a large, clean kitchen island or a continuous run along the wall. It is tough, practical, and far less delicate than marble. But does quartz scratch? Yes, it can. The better question is what causes those marks, how likely they are in everyday use, and what you can do to keep the surface looking good for years.

Quartz is one of the more scratch-resistant countertop materials available for busy kitchens, bathrooms, laundry rooms, and bar areas. Still, scratch-resistant does not mean scratch-proof. A little daily care goes a long way.

Quick Answer: Does Quartz Scratch?

Yes. Quartz countertops can scratch, but they are highly resistant to scratching during normal household use. Cutting directly on the surface, dragging gritty objects, using abrasive cleaning pads, or moving heavy items across the countertop can cause marks. Using cutting boards, soft cleaning materials, and protective pads helps keep quartz looking its best.

Does Quartz Scratch in Everyday Use?

Engineered quartz countertops are made primarily from quartz minerals combined with resins, pigments, and other components. Natural quartz is very hard, which helps give the finished countertop strong resistance to everyday wear.

In a typical kitchen, quartz stands up well to plates, cups, grocery bags, small appliances, and routine food preparation. You should not expect it to pick up scratches from ordinary use. It is also less prone to etching than marble, which can dull or mark when exposed to acidic foods and drinks.

However, sharp tools, abrasive debris, and harder materials can leave a visible mark. The resin portion of a quartz slab is not as hard as the quartz mineral itself. That means the finished surface can be damaged if it is treated like a cutting board or scrubbed with the wrong product.

A countertop may also show marks differently depending on its colour and finish. Dark, solid-colour quartz often makes fine scratches, fingerprints, and dried water spots easier to notice. A heavily veined or patterned design can be more forgiving because the movement in the slab helps disguise small signs of use.

What Actually Scratches Quartz Countertops?

The most common cause is cutting directly on the counter. Kitchen knives can score the surface, and they will also dull faster when used against quartz. A wood, plastic, or composite cutting board protects both the countertop and the knife.

Grit is another frequent issue. Sand, tiny stones, and debris can become trapped under a ceramic dish, appliance, or decorative tray. Dragging that item across the counter can create fine scratches. This can be especially relevant near patio doors, mudrooms, outdoor living areas, and kitchen islands that get a lot of traffic.

Some marks are not actually scratches. Metal cookware, utensils, and the bottoms of small appliances can leave grey or silver transfer marks on quartz. These marks may look alarming, but they can sometimes be residue sitting on the surface rather than damage to the quartz itself. A gentle cleaner suitable for quartz and a non-abrasive cloth may remove them.

Avoid harsh scouring pads, steel wool, pumice-based cleaners, and abrasive powders. They can dull the finish or create fine surface damage over time. The same applies to aggressively scrubbing a stubborn spot with a rough sponge.

Quartz Is Hard, but It Still Has Limits

Countertop durability is not just about hardness. It also involves heat resistance, impact resistance, stain resistance, fabrication quality, support, and how the surface is used.

Quartz performs very well against staining when spills are cleaned within a reasonable amount of time. Its nonporous surface does not normally require routine sealing, which is one reason many homeowners choose quartz countertops for busy kitchens and bathrooms.

Heat is where care is especially important. Hot pans taken directly from the stove or oven can cause discolouration, thermal damage, or damage to the resin binder. Our guide to quartz countertop heat resistance explains this in more detail. Always use a trivet or hot pad.

Impact can also be a concern at vulnerable areas. The middle of a properly supported quartz countertop is very strong, but edges, sink cutouts, cooktop cutouts, and unsupported overhangs are more susceptible to chips or cracks if struck hard. Precision templating, proper fabrication, correct support, and careful installation all help reduce those risks.

How Quartz Compares With Other Countertop Materials

If scratch resistance is high on your list, quartz is a strong option, but it is not automatically the right material for every kitchen.

Quartz vs. Granite

Granite countertops are also highly scratch-resistant and generally tolerate heat better than engineered quartz. Because granite is natural stone, every slab has its own variation in colour, pattern, and mineral structure. Depending on the specific stone, finish, and sealer used, granite may also require periodic resealing.

For homeowners who frequently cook with hot cookware, granite may be worth considering. You can learn more in our guide to granite countertop heat resistance.

Quartz vs. Quartzite

Quartzite is a natural stone that can offer excellent scratch and heat resistance. It also provides the natural movement many homeowners like in marble.

Quartzite should not be confused with quartz. Quartzite is quarried natural stone, while quartz countertops are manufactured using quartz minerals, binders, pigments, and other components. Quartzite also has different sealing and maintenance requirements depending on the stone.

Quartz vs. Marble

Marble is softer and more susceptible to scratching and etching than quartz. It develops a natural patina over time, which appeals to some homeowners, but it may not suit someone who wants a countertop to remain visually uniform with minimal maintenance.

Quartz vs. Porcelain and Sintered Stone

Porcelain countertops and many sintered stone surfaces offer excellent resistance to scratching, heat, and UV exposure. They can be useful for outdoor countertops, fireplace applications, and other projects where heat or sunlight exposure is an important consideration.

Their fabrication and installation require specialized handling because these materials behave differently during cutting, edge fabrication, transportation, and installation than engineered quartz.

How to Prevent Scratches on Quartz

The daily routine for quartz is simple. Use cutting boards for food preparation, trivets for hot cookware, and protective pads under heavy decorative items or appliances that may be moved. Wipe away sand or gritty debris before sliding anything across the counter.

For cleaning, use a soft cloth or non-abrasive sponge with warm water and mild soap. Drying the surface afterward can help reduce visible water spots, especially on darker colours or matte finishes. For stubborn residue, follow the care instructions provided by the quartz manufacturer.

Be careful with heavy cast-iron cookware, particularly around countertop edges. A dropped pan can chip many countertop materials. The same caution applies around an undermount sink cutout, where a large section of the countertop has been removed to accommodate the sink.

For a kitchen island, think about how it will be used before finalizing the material and finish. A polished white quartz with soft veining can be practical for a family kitchen. A dark matte quartz may create a very different look, but fingerprints, water marks, and signs of daily use can be more noticeable.

Can a Scratched Quartz Countertop Be Repaired?

Sometimes, but the appropriate repair depends on what you are actually seeing. A surface transfer mark or residue may simply need cleaning. A shallow scratch may be less noticeable in a patterned material, while deep scratches, chips, and cracks can be more complicated.

One challenge is that quartz has a factory-finished surface. Attempting to sand or polish one small area can change its sheen, leaving a dull or glossy patch that is more noticeable than the original mark.

For that reason, avoid experimenting with aggressive abrasive pads, sandpaper, or home polishing kits before having the damage assessed.

If damage is near an edge, seam, sink, or cooktop cutout, it is particularly important to determine whether you are dealing with a cosmetic mark, chip, crack, or another issue. The repair approach depends on the colour, pattern, finish, location, and extent of the damage.

Choosing Quartz for a Busy Home

Quartz is a sensible choice for homeowners who want a low-maintenance countertop with strong stain resistance and good everyday durability. It works particularly well in kitchens, bathroom vanities, laundry rooms, and bars where easy cleanup matters.

The material selection should also reflect your cooking habits and design priorities. If high heat is a major concern, granite, quartzite, porcelain, or sintered stone may deserve a closer look. If you want consistent colour, minimal routine maintenance, and strong resistance to everyday wear, quartz remains a practical option.

The details of fabrication matter just as much as the slab itself. Countertop edge profiles, seam placement, sink cutouts, countertop thickness, and properly supported overhangs all influence how the finished countertop performs.

Quartz does not need to be treated like a fragile surface. It simply benefits from sensible habits: cut on a board, set hot pans on a trivet, clean with non-abrasive products, and investigate unusual marks before trying an aggressive fix.

Frequently Asked Questions About Quartz Scratches

Does quartz scratch easily?

No. Quartz is highly scratch-resistant during normal household use, but it is not scratch-proof. Sharp objects, abrasive debris, and improper cleaning products can damage the surface.

Can you cut directly on quartz countertops?

You should not cut directly on quartz. A cutting board protects the countertop from potential marks and helps prevent your knives from becoming dull.

Can a knife scratch quartz?

A knife or other sharp object can potentially mark or damage a quartz surface, particularly with repeated or forceful contact. Using a cutting board is the safer approach.

Are marks on quartz always scratches?

No. Metal transfer, residue, dried spills, and other surface marks can sometimes look like scratches. Start with gentle cleaning using products suitable for quartz before assuming the surface is permanently damaged.

Can scratches be polished out of quartz?

Not always. Quartz has a factory-finished surface, and polishing a small area can alter its sheen. Significant scratches should be assessed before sanding or polishing is attempted.

Which countertop materials are most scratch-resistant?

Quartz, granite, quartzite, porcelain, and sintered stone can all provide strong scratch resistance, but each has different characteristics related to heat, staining, maintenance, fabrication, and repair. The best material depends on how the countertop will actually be used.

Considering quartz for your countertop project?

Stone Valley Countertops supplies, fabricates, and installs quartz and other countertop materials for homeowners across the GTA, Durham Region, Niagara Region, Hamilton, Orillia, and surrounding Ontario communities. Contact Stone Valley Countertops to discuss your project or visit one of our showroom locations to compare materials in person.

12 Stone Shower Wall Ideas That Feel Well Planned

12 Stone Shower Wall Ideas That Feel Well Planned

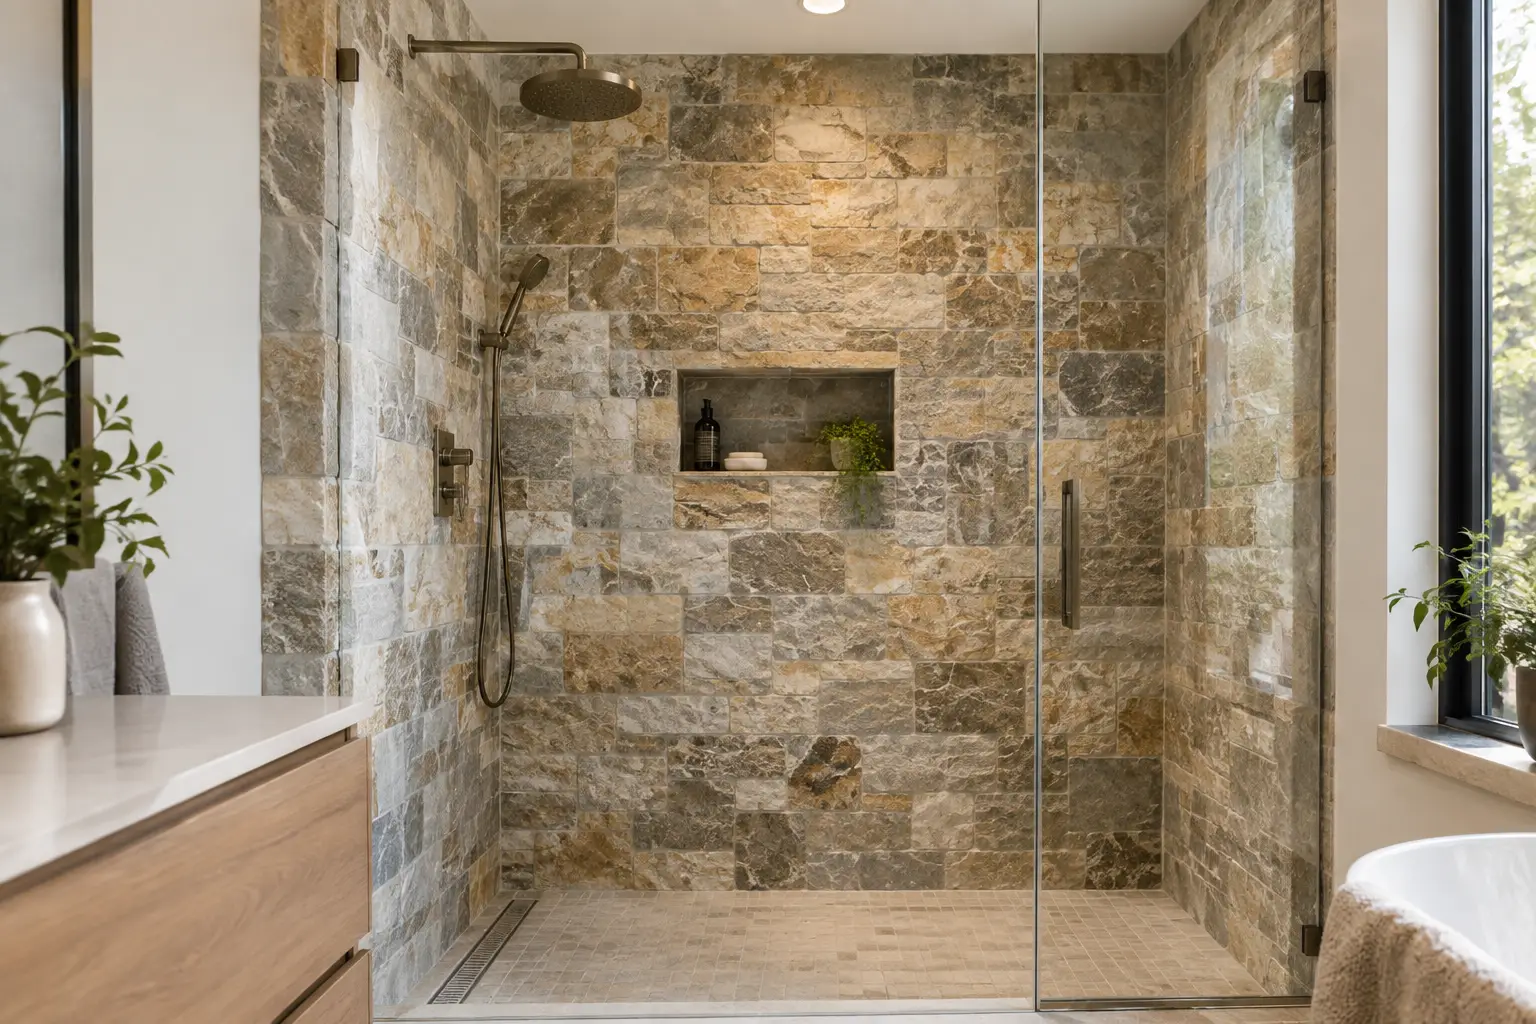
Stone shower wall ideas featuring large-format stone panels in a bathroom shower

A shower wall is one of the few surfaces you see up close every day. It needs to look intentional, but it also needs to handle water, shampoo residue, cleaning products, and years of daily use. The best stone shower wall ideas balance visual impact with practical choices about material, slab layout, seams, niches, and maintenance.

Large-format stone surfaces can make a compact bathroom feel calmer and more open because there are fewer grout lines breaking up the walls. That does not mean every shower needs a dramatic, heavily veined slab. Sometimes the most successful design is a quiet porcelain panel, a warm stone-look surface, or a subtle quartzite installed with careful vein matching.

Quick Answer: What works best for stone shower walls?

For low-maintenance shower walls, porcelain and sintered stone are practical options because they are nonporous and available in large formats with minimal grout lines. Natural stones such as quartzite, granite, and marble offer more variation and depth but require more attention to slab selection, sealing, cleaning, seam placement, and installation. The best choice depends on the look you want and the amount of maintenance you are comfortable with.

Start With the Material, Not Just the Colour

A material that looks right in a showroom may behave differently in a wet shower. Before choosing a pattern, consider how much maintenance you are comfortable with, how busy the bathroom will be, and whether you want natural stone or a more consistent manufactured surface.

Porcelain and sintered stone for easier care

Porcelain and sintered stone are practical choices for shower walls because they are dense, nonporous, and highly resistant to staining. They are also available in large formats, allowing for fewer grout joints. Many homeowners choose marble-look porcelain when they want soft veining without the maintenance requirements of natural marble.

These materials are especially useful when the shower will see frequent use or when the goal is a clean, low-maintenance finish. A honed or matte appearance can look more natural than a high polish, although the exact finish should be selected with cleaning habits and bathroom lighting in mind.

Quartzite and granite for natural variation

Quartzite offers the movement and depth many homeowners want from natural stone, often with better resistance to scratching and etching than marble. Granite can also work well, particularly in darker or more granular patterns.

Natural slabs are never perfectly uniform. That is part of their appeal, but it also makes slab selection important. View the actual slab whenever possible, especially if the shower walls will feature bold veining, distinct mineral deposits, or large areas of colour variation.

Marble for character, with realistic expectations

Marble remains popular in bathrooms because it has a softness and depth that manufactured materials can imitate but not fully duplicate. It can be used successfully on shower walls, but it requires an owner who is comfortable with routine care. Acidic products, harsh cleaners, and prolonged exposure to certain products can affect the finish over time.

Honed marble is often more forgiving visually than polished marble because changes to the finish may be less noticeable. Our guide to polished versus honed marble explains the differences in more detail. Sealing can help reduce absorption, but it does not prevent etching or make marble maintenance-free.

12 Stone Shower Wall Ideas for Different Bathrooms

The shower walls should support the rest of the bathroom rather than compete with it. Consider the vanity top, shower glass, fixtures, flooring, and surrounding tile as one composition. A slab that looks dramatic on its own can feel crowded once every finish is installed.

1. Bookmatched feature wall

Bookmatching places neighbouring slab sections as mirror images, allowing the veining to meet at the centre. It can create a strong feature on the back shower wall, particularly with marble, quartzite, or large-format porcelain with directional veining.

This look requires planning before fabrication. The fabricator needs to determine where the material will be cut, how the pattern will align, and whether a niche, bench, valve, or other opening will interrupt the movement.

2. Soft-vein full-height walls

For a lighter, more open bathroom, choose a slab with gentle movement and carry it from the shower base to the ceiling. Pale grey, warm white, sand, and muted taupe surfaces work well when the vanity and fixtures are also restrained.

Full-height panels reduce horizontal joints and can visually emphasize the height of the room. They also provide larger uninterrupted surfaces than conventional small-format tile.

3. Dark stone with warm metal fixtures

Charcoal granite, deep green quartzite, or dark porcelain can give a shower depth without relying on a busy pattern. Brushed brass, bronze, and other warm metal finishes can create contrast, while black fixtures produce a more graphic appearance.

Keep water conditions in mind. Dark polished surfaces can make mineral deposits and dried water spots more noticeable, particularly in areas with harder water.

4. One statement wall with quieter side walls

Not every shower needs matching stone on all three walls. A dramatic slab can be used on the rear wall with quieter porcelain or tile on the sides. This can reduce the amount of slab material required while still creating a clear focal point.

The key is coordination rather than exact matching. Pull a background colour from the feature slab for the surrounding walls and avoid introducing another pattern that competes with it.

5. Continuous shower wall and vanity backsplash

When the shower sits close to the bathroom vanity, repeating the same material can make the room feel more connected. The shower wall does not have to match the vanity countertop exactly. Using the material again on a backsplash or short accent wall may be enough to establish continuity.

This approach works particularly well with controlled veining. A very dramatic natural slab may be better reserved for one area, while a quieter surface can be repeated without overwhelming the room.

6. Vertical veining to emphasize height

A slab with directional veining can be oriented vertically to draw the eye upward. This can work especially well in showers with standard or lower ceiling heights because the pattern reinforces the height of the wall.

The orientation should be decided before cutting. Rotating a slab changes not only the direction of the veins but also which sections can be used around niches, corners, benches, and plumbing openings.

7. Horizontal movement for a wider appearance

Horizontal veining can visually stretch a narrow shower from side to side. It works particularly well with long, flowing patterns rather than highly fragmented movement.

Horizontal layouts can require additional planning if more than one panel is needed across a wall. The goal is to make the pattern transition feel deliberate instead of allowing a seam to interrupt the strongest part of the design.

8. A stone-lined shower niche

A niche can become part of the slab design instead of looking like a separate insert. The back, sides, sill, and top can be fabricated from the same material as the wall or from a coordinated piece.

For strongly veined material, decide whether continuing the pattern through the niche is worth the additional fabrication planning. Sometimes a quieter niche produces a cleaner result.

9. Matching shower bench and walls

A shower bench introduces another horizontal surface, making material selection more important. Using the same slab on the bench and walls can create continuity, while a contrasting bench can visually define the seating area.

The bench surface must be fabricated and installed with drainage in mind. Water should not be allowed to collect against the wall or sit on the stone.

10. Wrap the pattern through the corners

With directional natural stone or printed porcelain, planning adjoining panels from related areas of the slab can help the movement continue through inside corners.

This is one of the details that should be discussed before fabrication. Once panels are cut independently, recreating a convincing vein transition may no longer be possible.

11. Quiet stone with a dramatic vanity

The shower does not always need to be the main feature. If the bathroom already has a heavily veined vanity countertop or backsplash, quieter shower panels can give the room visual balance.

Look for a shower surface that picks up one of the background tones in the vanity material. This connects the two areas without making them compete.

12. Minimal-vein panels for a small shower

In a compact bathroom, a heavily patterned surface can sometimes make the enclosure feel busier. Large panels with subtle movement and fewer visible joints can create a calmer backdrop.

This approach is particularly effective with clear shower glass because the uninterrupted wall surface remains visible from the rest of the bathroom.

Details That Make a Slab Shower Look Finished

The difference between an average shower wall and a well-executed one is often found in the details. Material selection matters, but so do cut placement, seam location, edges, and the way the slab meets glass, fixtures, niches, and the shower base.

Plan seams around the layout

Large slabs reduce seams, but they do not eliminate them in every shower. Slab dimensions, ceiling height, wall width, access into the home, panel weight, and the material’s handling requirements can all affect the final layout.

A seam should be considered before cutting begins. With veined material, the location can affect whether the finished pattern looks continuous or noticeably interrupted.

Treat niches as part of the design

A recessed niche provides useful storage but also creates several visible cuts in the wall. It can be lined in the same material for continuity or finished with a complementary surface for contrast.

Niche shelves and sills should have appropriate drainage so water does not sit against the wall. Small details like these have a significant effect on daily use and long-term maintenance.

Choose edges and transitions carefully

Most slab shower walls suit clean, simple edges. Exposed edges at an entry, bench, curb, or niche should be planned according to the material and installation method rather than treated as an afterthought.

Transitions where panels meet the shower base, tub deck, ceiling, adjoining walls, glass, and plumbing fixtures also need careful planning. Accurate measurements and fabrication help avoid awkward gaps and poorly positioned cutouts.

Do Stone Shower Walls Need Waterproofing?

Yes. Stone, porcelain, or sintered panels are the finished surface of the shower, not a substitute for the waterproofing system behind them. The shower assembly still needs an appropriate substrate, waterproofing method, properly treated penetrations, and correctly detailed transitions.

This distinction is important with large-format panels because there may be very few grout joints visible after installation. A nearly seamless appearance does not mean water management behind the finished surface can be ignored.

Maintenance Habits That Protect the Finish

Even low-maintenance shower materials benefit from regular care. Use cleaners appropriate for the specific surface and avoid abrasive or acidic products unless the material manufacturer permits them.

Natural stone may also require periodic sealing depending on the material, finish, sealer, and amount of use. Sealing can reduce absorption, but it does not make natural stone stain-proof or prevent marble from etching.

Good bathroom ventilation also matters. It helps moisture dissipate and can reduce the buildup of soap residue on both shower walls and glass. A quick squeegee after use can make maintenance easier, particularly on polished or darker surfaces.

Make the Slab Layout Part of the Selection Process

A shower wall should not be chosen from a small sample alone when the final installation will use large panels. Ask how the material will be cut, where seams may fall, whether the pattern can continue through corners, and how niches and plumbing openings will affect the layout.

For natural stone, viewing the actual slab is particularly useful. Our guide on how to compare stone slabs explains what to look for when assessing colour, movement, variation, and usable areas before fabrication.

At Stone Valley Countertops, shower wall planning starts with the actual space and selected material. Measurements, panel sizes, access, seams, vein direction, niches, benches, and cutouts should all be considered before fabrication begins.

If you are planning a slab shower wall in Ontario, you can contact Stone Valley Countertops to discuss the material and fabrication requirements for your project.

Frequently Asked Questions About Stone Shower Walls

What is the best stone for shower walls?

There is no single best material for every shower. Quartzite and granite can provide natural variation and durability, while marble offers a distinctive appearance with greater maintenance requirements. Porcelain and sintered stone are useful alternatives when low absorption and easier maintenance are priorities.

Can you use large stone slabs on shower walls?

Yes. Large-format natural stone, porcelain, and sintered panels can be used for shower walls when the substrate, waterproofing, fabrication, handling, and installation are appropriate for the material. Panel size also needs to account for access into the bathroom and the ability to safely position the material.

Are slab shower walls easier to clean than tile?

They can be. Large-format panels usually have fewer grout joints than small tile, which reduces the number of grout lines that need cleaning. The surface itself still requires cleaning appropriate to the specific material and finish.

Does natural stone need to be sealed in a shower?

Many natural stones benefit from an appropriate penetrating sealer, but requirements vary by stone and finish. Sealing can reduce absorption and staining risk, but it does not make the stone waterproof or eliminate the need for a proper shower waterproofing system.

Can marble be used for shower walls?

Yes. Marble can be used on shower walls, but homeowners should understand that it is sensitive to acidic products and may develop changes in appearance over time. A pH-neutral cleaning routine and appropriate maintenance are important.

How many seams will a slab shower have?

The number of seams depends on the dimensions of the shower, slab or panel size, material, access conditions, pattern direction, and installation requirements. Seam locations should be planned before fabrication so they work with the overall layout rather than interrupting important veining.

How to Match Countertop Veining in Your Kitchen

How to Match Countertop Veining in Your Kitchen

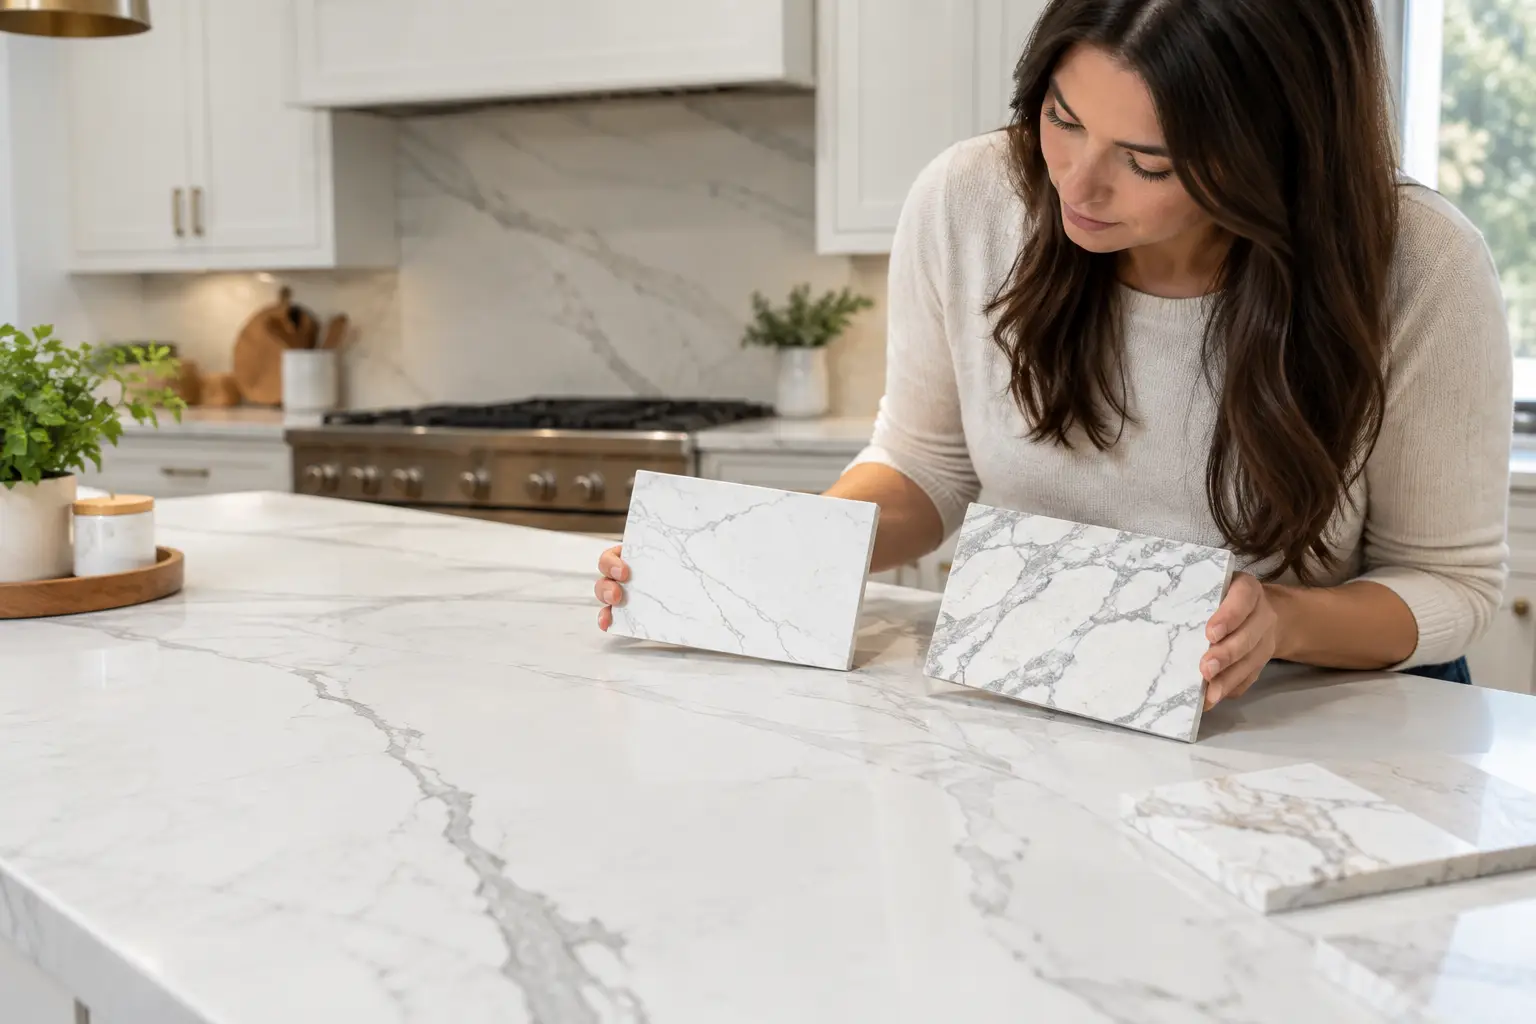
Kitchen with veined countertop showing how to match countertop veining with cabinets and surrounding finishes

A dramatic vein can make a countertop the defining feature of a kitchen, but it can also feel disconnected if every surrounding finish competes for attention. Knowing how to match countertop veining comes down to more than choosing a white slab with grey lines. You need to consider the movement in the material, cabinet colour, undertones, seam locations, and how the pattern will continue across an island, backsplash, or waterfall edge.

The goal is not to make every element match perfectly. It is to create a kitchen where the countertop looks intentional from every angle, including the views you see most often when cooking, sitting at the island, or walking into the room.

Quick Answer: How Do You Match Countertop Veining?

Start by identifying the dominant and secondary colours in the countertop veins, then compare those undertones with your cabinets, flooring, backsplash, and hardware. For strongly veined slabs, keep surrounding finishes quieter and review the full slab before fabrication. Vein direction, seams, sink cutouts, waterfall panels, and backsplash placement should also be planned before the stone is cut.

Start With the Strength of the Veining

Countertop veining ranges from subtle, soft movement to bold, high-contrast lines. Before selecting cabinet colours, hardware, or a backsplash, decide how much visual attention you want the surface to receive.

A quiet quartz with fine grey veining can work comfortably with painted cabinets, textured tile, and warmer wood accents. A heavily veined marble-look quartz, quartzite, marble, or porcelain usually needs more visual space around it. When the countertop has large sweeping veins, simpler cabinets and a restrained backsplash often produce a cleaner result.

Look at both the colour and the pattern. Grey veining can lean cool blue, charcoal, taupe, or warm brown. Gold or rust veining often works naturally with warm whites, wood tones, brass, and softer black accents. A slab can look mostly white under showroom lighting but reveal beige, green, grey, or blue undertones once it is placed beside your cabinet sample.

This is especially important with natural stone. Granite, marble, and quartzite vary from slab to slab, so a small sample may not show the full range of movement. Whenever possible, make final design decisions from the actual slab selected for your project rather than from a small chip.

How to Match Countertop Veining With Cabinets

Cabinets form the largest block of colour beneath the counter, so they have a major influence on how countertop veining reads. A useful starting point is to pull one of the secondary tones from the slab rather than trying to match its brightest background colour exactly.

For example, a countertop with warm grey and light taupe veins can look balanced with mushroom, greige, natural oak, or warm-white cabinets. A surface with crisp charcoal or blue-grey movement can work with clean white, light grey, navy, or black cabinetry. The exact combination depends on how much contrast you want.

Matching Veining With White Cabinets

White cabinetry gives you considerable flexibility because the countertop can either blend quietly or become the focal point. If you choose a bold slab against white cabinets, consider keeping the backsplash and other large surfaces more restrained so the kitchen does not have several competing patterns.

Be careful with different whites. A creamy slab beside a very cool cabinet white can make the countertop appear yellow, while a cool white slab beside warm cabinetry can suddenly look blue or grey.

Matching Veining With Wood Cabinets

Wood cabinets deserve a closer look. Warm oak, walnut, and maple can clash with a countertop that has distinctly cool grey veining, but they can work beautifully when the slab contains warmth in its background or secondary veins.

Place a cabinet door sample directly on the slab and view the combination in daylight as well as under the lighting planned for the kitchen. Undertones are often much easier to see this way than on a computer screen or from separate samples.

Practical tip: Take your cabinet door, flooring sample, backsplash sample, and hardware finish with you when viewing slabs. Looking at the materials together is much more useful than trying to remember a colour from home.

Keep the Backsplash From Competing

A backsplash should support the countertop rather than turn the wall into a second focal point. This is where many otherwise good material selections become too busy.

If your counter has pronounced movement, a full-height slab backsplash can be one of the most cohesive choices. Using the same material allows the pattern to continue vertically and reduces the visual interruption created by grout lines.

The layout matters. A fabricator can plan whether veins align across the countertop and backsplash, continue in a directional flow, or are positioned to create a bookmatched effect. Bookmatching mirrors adjoining pieces so the veining opens outward from a joint. It can be particularly effective behind a cooktop or on a feature wall, but it requires careful slab planning and can affect material yield.

If you prefer tile, consider a quieter option when the countertop has strong movement. A simple white, cream, or lightly textured tile usually lets the countertop remain the feature. Conversely, a countertop with minimal veining can handle more backsplash texture or pattern.

Plan Vein Direction Before Fabrication

Veins are not just decorative. Their direction changes how long, wide, and connected a countertop appears.

On a long perimeter run, movement following the length of the counter can emphasize the kitchen’s horizontal lines. On an island, veins can run lengthwise to make the island feel more expansive or across the width to direct attention toward seating or an adjacent range wall.

Neither direction is automatically correct. The better choice depends on the room’s sightlines, the slab’s pattern, available material, cutouts, and the areas of the countertop that will be most visible.

This conversation should happen during slab layout, before fabrication begins. At this stage, the countertop pieces are mapped onto the slab while accounting for sink cutouts, cooktop openings, overhangs, edges, seams, and usable slab area.

A large vein may be centred on an island, moved away from a sink cutout, or carried toward a waterfall panel. Planning these details before cutting provides much more control over the finished appearance.

Match Veining Across a Waterfall Island

A waterfall island deserves particular attention because the countertop turns vertically from the island top toward the floor. With directional materials, the way those two pieces meet becomes one of the most noticeable details in the kitchen.

The stone can sometimes be laid out so a prominent vein appears to continue from the horizontal countertop into the vertical waterfall panel. Whether this is possible depends on slab dimensions, island size, pattern direction, the number of waterfall ends, and available material.

Continuous vein matching can also require additional slab material because the fabricator may need to position pieces for appearance rather than maximum material yield. That is why vein matching should be discussed before the slab is cut rather than during installation.

If you are considering this detail, our guide to waterfall island project details explains how mitred corners, seams, supports, and slab layout affect the finished result.

Seams Should Respect the Pattern and the Kitchen

Most large kitchens require seams, particularly with long runs, L-shaped layouts, oversized islands, or projects where slab dimensions limit the size of individual pieces.

The goal should not be to promise an invisible seam. A well-made seam is narrow, carefully positioned, colour-matched where practical, and less noticeable when it does not unnecessarily interrupt the strongest part of the pattern.

When matching veining, ask where seams are likely to fall and how adjoining pieces will be oriented. With a linear vein pattern, the fabricator may be able to continue some of the movement across the seam. With busier natural stone, the seam may blend into the existing variation.

Practical requirements still come first. Seams may be required near corners, because of slab dimensions, or because a piece must be transported and safely carried into the home. A good slab layout balances visual flow with the realities of fabrication and installation.

For more detail, see our guide to kitchen countertop seams.

Choose Edge Details That Let the Veining Work

An eased edge is an understated option that works with almost any veined surface. It keeps attention on the slab itself and suits both subtle and strongly patterned materials.

A mitred edge can create the appearance of a thicker countertop, which can work particularly well on large islands and waterfall designs. The mitre also introduces another pattern transition, so strongly veined materials should be laid out with that corner in mind.

Thicker-looking edges can make dramatic stone feel more substantial, while a standard profile often suits a cleaner, quieter kitchen. Strong veining generally benefits from enough uninterrupted surface area to read as a complete pattern rather than a collection of small fragments.

Consider the Material, Not Just the Veining

Many homeowners choose a veined surface because they like the appearance of marble but want different maintenance characteristics. The material itself should still suit the way the kitchen will be used.

Quartz

Quartz countertops offer a broad selection of veined patterns and do not require sealing. Because the pattern is manufactured, homeowners should review the full slab or slab image where possible, especially with large-scale designs where pattern repeats and transitions can affect seams and waterfall panels.

Quartzite

Quartzite provides natural movement and variation that can be difficult to reproduce in manufactured materials. Each slab is different, making actual slab selection particularly important. Depending on the stone, periodic sealing may also be required.

Marble

Marble offers distinctive natural veining, but its appearance comes with different maintenance expectations. Acidic foods and cleaners can etch marble, so homeowners should understand how the surface will change with use before selecting it for an active kitchen.

Porcelain and Sintered Stone

Porcelain and sintered stone can provide dramatic printed veining, large-format surfaces, and clean contemporary profiles. These materials are particularly useful for countertops, full-height backsplashes, and waterfall applications, but fabrication and pattern placement need to be carefully coordinated.

View the Whole Slab Layout Before You Commit

Before final approval, review the cabinet samples, backsplash, flooring adjacent to the kitchen, and selected countertop material together.

Then consider the kitchen from its main sightlines. Look at the island from the entry, the range wall, the sink area, and any transition between the countertop and waterfall panels.

For natural stone and strongly patterned engineered surfaces, ask to review the proposed slab layout when appropriate so you understand where important veins, seams, cutouts, and waterfall transitions are likely to land.

If you are selecting natural stone, our guide on how to compare stone slabs explains why colour variation, movement, usable slab area, and layout possibilities should be considered before fabrication.

At Stone Valley Countertops, this planning stage is where precise templating and fabrication make a visible difference. The slab’s character has to work with the practical requirements of the kitchen, including cutouts, seams, cabinet dimensions, overhangs, access, and installation.

Give the slab room to be itself. When countertop veining, cabinet colour, backsplash, sightlines, and fabrication layout are considered together, the finished surface feels coordinated without looking overly matched.

Frequently Asked Questions About Countertop Veining

Should countertop veins match the cabinet colour?

Not exactly. It is usually better to coordinate the undertones than to search for an exact colour match. A secondary grey, beige, taupe, brown, or gold tone in the countertop can help connect the slab with the cabinetry without making the kitchen look overly coordinated.

Should countertop veins run lengthwise on an island?

They often do because lengthwise movement can emphasize the size of an island, but it is not a rule. The best direction depends on the slab pattern, island dimensions, sink or cooktop placement, waterfall panels, and the main sightlines through the kitchen.

Can countertop veins be matched across a seam?

Sometimes. A fabricator may be able to position adjoining pieces so the movement flows naturally across a seam, but an exact match is not always possible. Natural stone does not repeat, while engineered surfaces may have pattern limitations or repeats that affect the layout.

Can countertop veining continue down a waterfall edge?

Often, yes. The horizontal countertop and vertical waterfall panel can sometimes be positioned so the pattern appears to continue around the mitred corner. The result depends on slab dimensions, vein direction, island size, and available material, so it should be planned before fabrication.

Should a backsplash match countertop veining?

It does not need to match every vein. With a strongly veined countertop, a quieter backsplash usually creates better balance. Another option is a full-height backsplash made from the same countertop material, where the slab layout can be planned as part of the overall pattern.

Should I choose a countertop from a small sample?

For a relatively uniform engineered surface, a sample can provide useful colour information. For granite, marble, quartzite, and strongly patterned manufactured slabs, viewing the actual slab or a full-slab image is much more useful because a small sample cannot show the complete movement and variation.